Do You Live in Dr. Pepper’s Fansville?

A rare entire article repost:

Dr Pepper Releases Bourbon-Flavored Soda (That Doesn’t Contain Any Alcohol)

The boozy flavor is meant to invoke tailgating cocktails.

By Mike Pomranz 

Published on October 17, 2022

Drinking trends constantly ebb and flow but in recent years we’ve seen an interesting confluence of soft and hard drinks. A movement towards mindful drinking has fueled a surge in things like non-alcoholic beers and spirits. But at the same time, plenty of brands are also licensing their names for boozy iterations for the first time, from Hard Mtn Dew to Lipton Hard Iced Tea.

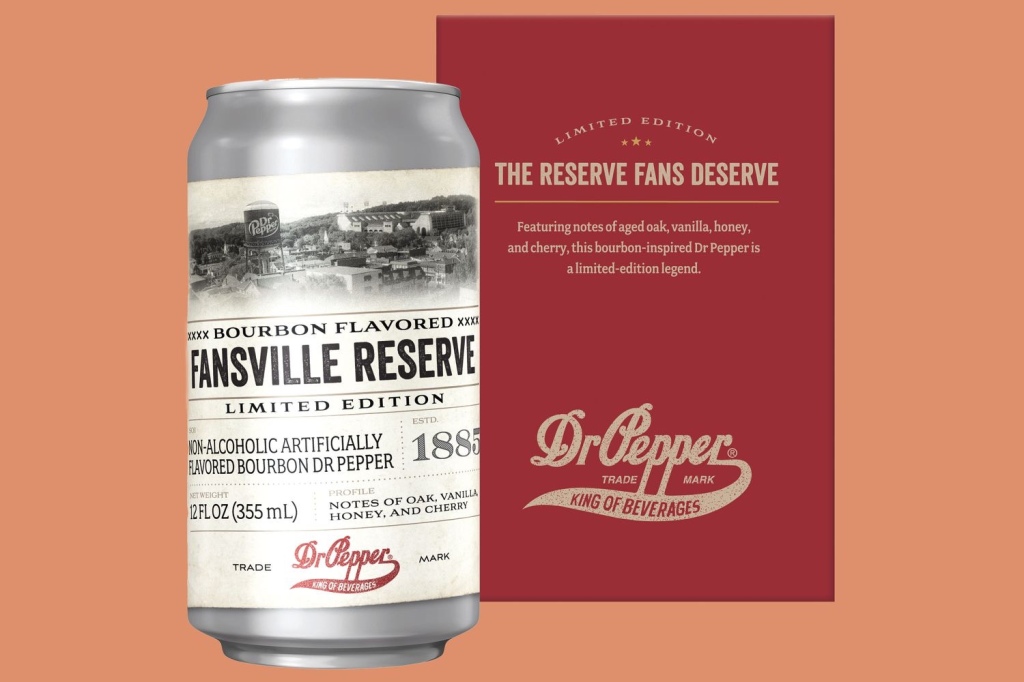
So no, Dr Pepper is not going the Hard Dr Pepper route. (At least not yet.) But the classic soda brand is tipping its hat to both current trends — a growing love of mocktails and an influx of soda/spirit crossovers — by releasing a new limited-edition non-alcoholic beverage, Dr Pepper Bourbon Flavored Fansville Reserve.

Billed as being “inspired by the tailgate,” this new artificially bourbon-flavored Dr Pepper is intended to evoke “sweet, savory, and woody notes with subtle hints of cherry, vanilla, chocolate and caramel depending on the sipper that are sure to delight the palate.” Adding to the fun, each 12-ounce can comes in a classy burgundy-colored box which hammers home the bourbon connection.

What the can doesn’t contain is a single drop of alcohol; however, Dr Pepper does acknowledge that fans of the brand have taken to “crafting their favorite at-home cocktails with Dr Pepper,” insinuating that the new drink might work well as a mixer. Also worth noting is that, much like regular Dr Pepper, this bourbon-inspired beverage does contain caffeine.

Dr Pepper Bourbon Flavored Fansville Reserve is being released exclusively via a sweepstakes for Pepper Perks members. And the brand says it’s not too late to enroll in the program. From there, once you’re logged in, all you have to do is to partake in “an exciting game of scratch-to-win on the Dr Pepper website where deserving fans have a chance to win various exciting prizes, including one can of the new Dr Pepper Bourbon Flavored Fansville Reserve.”

But don’t dawdle. The drink is being released today and the sweepstakes will only be doling cans out while supplies last — though the contest officially runs until November 17.

Are you on Facebook? You might be interested in the things I may not devote an entire blog post to: food news, recipes, food facts, nutritional information, photos and other things that make my mouth water. If so, visit my This Girl Loves To Eat community at: https://www.facebook.com/ThisGirlLovesHerFood

Advertisement

Easy Antipasto Bites

Gatherings are easier with quick, #MakeAhead, appetizers. #AntipastoBites can be made the day before and kept, in a sealed container, in the refrigerator until you’re ready to serve. The flavors are better when closer to room temperature, so, get them out 15-30 minutes before serving.

  • 1/2 c. Extra-virgin olive oil, plus 3 Tablespoons, divided
  • 9 oz. Fresh cheese tortellini
  • Kosher salt
  • Freshly ground black pepper
  • 2 tbsp. Balsamic vinegar
  • 8 oz. Mozzarella balls (in deli case near specialty cheeses)
  • 1/2 tsp. Italian seasoning
  • 1/4 tsp. Red pepper flakes
  • 4 oz. Sliced salami (or Prosciutto, Pepperoni, Sopressata, etc.)
  • 1/4 lb. Roasted red peppers, chopped into bite-sized pieces
  • 1 Bunch fresh basil
  • 14 oz. Artichoke hearts (drain & chop into bite-sized pieces)
  • 1/4 lb. Green olives (Can substitute black if you prefer)
  1. In a large pot of boiling water, add 1 tablespoon oil. Cook tortellini according to package directions until al dente. Drain and transfer to large bowl.
  2. Season cooked tortellini with salt and pepper. Add balsamic vinegar and 2 TBLS olive oil and mix to combine. Set aside.
  3. Marinate mozzarella: In a small bowl, add mozzarella balls, Italian seasoning, red pepper flakes, and remaining 1/4 cup olive oil. Mix to combine and set aside.
  4. Assemble skewers by layering one piece each mozzarella, salami, roasted red pepper, tortellini, basil, artichoke heart, and green olives.

Are you on Facebook? You might be interested in the things I may not devote an entire blog post to: food news, recipes, food facts, nutritional information, photos and other things that make my mouth water. If so, visit my This Girl Loves To Eat community at: https://www.facebook.com/ThisGirlLovesHerFood

Sweet Noodle Kugel

NoodleKugel2

When my father-in-law found out I enjoyed cooking, one of the first things he gave me was his Mother’s Jewish Cookbook.  He then opened it to much used page that had a recipe for a traditional #SweetLokshenKugel.  I was behind the 8 ball for a couple of  reasons on this one: I am not Jewish, so many of the words used in the, 70 + year old cookbook were, quite literally, foreign to me and, without the benefit of a picture accompanying the recipe, I was clueless as to what the recipe was actually for.  Dad did clue me in that it was for a noodle kugel that his Mother used to make, but beyond that he was pretty much useless. 😉  Once I #googled some of the words for the kosher ingredients and, what turned out to to be brand names, I was able to modernize the recipe and create something that he loved and requested for many years.

Sweet Noodle Kugel

  • 16 oz Wide egg noodles
  • 1 Cup Sugar (I now substitute 1/2 Cup Truvia)
  • 1 Stick Butter, melted
  • 1 Large Egg
  • 1 Medium Granny Smith Apple, grated
  • 8 oz Golden Raisins
  • 1 – 20 oz Can Crushed Pineapple (mine came in heavy syrup)
  • 1-2 tsp Ground Cinnamon
  • 1/4 tsp Ground Nutmeg
  • 1 tsp Vanilla

Preheat the oven to 350° F.  Grease a 13 x 9 inch baking dish with butter and set aside.

Boil the noodles for 10 minutes.  Drain and put into a large mixing bowl or return to the pan you cooked them in.  Add the butter to the noodles and toss to combine.

Combine the Sugar (or Truvia), Egg, Grated Apple, Crushed Pineapple (undrained), Raisins, Vanilla, Ground Nutmeg and Cinnamon, stirring well.

Add the combined ingredients to the noodles and toss until well distributed throughout.

Pour the noodle mixture into the prepared baking pan and bake for 45 minutes to an hour, just until tips of the noodles on top begin to brown.  Cool and cut into 16 – 20 equal pieces.  Can be served warm or room temperature.

Nutrition Information (for 16 servings using Truvia)

  • 205  Calories
  • 6.5 g  Fat
  • 26.62 g  Carbohydrates
  • 4.75 g  Protein

If you’re interested in the things I may not devote an entire blog post to, like:  health articles, my favorite recipes, fun drinks, food facts, nutritional information, restaurant reviews, gadget reviews, photos and other things that make my mouth water, I have a community page on Facebook:  https://www.facebook.com/ThisGirlLovesHerFood

Chicken Bacon Ranch Meatballs

chickbaconranchmb2

Ground chicken breast is one of my favorite ways to build a base for a #Keto meal!  It’s so versatile, mixes well with most of my favorite ingredients, and is easy to meal prep for the week ahead, that it’s become my go-to for creating new #KetoRecipes.  This recipe for #ChickenBaconRanchMeatballs is fun because you can eat them all alone or pop them on a skewer between a piece of lettuce and 1/2 a plum or cherry tomato and drizzle with some ranch dressing for a fun lunch, light dinner, or appetizer.  #ThisGirlLovesToEat

Chicken Bacon Ranch Meatballs

  • 2 Pounds Ground Chicken Breast
  • 4 Pieces Thick Cut Bacon
  • 3 Pieces Thick Cut Peppered Bacon
  • 1 Large Egg
  • 2 Cups Fresh Baby Spinach
  • 4 TBLS Ranch Dressing
  • 1/2 Cup Panko
  • Olive Oil Spray
  • Lettuce or Arugula (if desired)
  • Cherry or Plum Tomatoes (if desired)
  • More Ranch for drizzling

Spray 2 mini muffin pans (24 holes) lightly with olive oil spray or prepare 2 cookies sheets by lining with foil and spraying the foil lightly with the olive oil spray, then set aside.  Preheat oven to 350° F.

Cut the bacon into 1/4″ to 1/2″ chunks and cook in a skillet over medium heat until browned.  Remove bacon to paper towels to cool.  Remove the bacon grease from the pan and quickly wilt the spinach in the same pan.  Put the cooled bacon and spinach into your chopper or vitamix mini cup and pulse until bacon is chopped into small bits & spinach is roughly chopped.

Using your hands (I wear disposable gloves), combine the ground chicken breast, bacon, spinach, egg, 4 TBLS of Ranch Dressing, and Panko in a medium bowl until well mixed.  Form the mixture into about 40 2″ balls and pot into either the mini muffin pan or space out on the baking sheets.  Lightly spray the tops of the meatballs with the olive oil spray.

Bake in 350° F oven for 18 – 22 minutes, or until the meatballs register 165° F on your meat thermometer.

Remove the balls from the pans and lay on a paper towel lined plate to soak up any excess olive oil spray.  Serve with ranch dressing on a bed of lettuce and plum or red tomatoes or thread lettuce, meatball and tomato on a small skewer then drizzle with ranch dressing.  #ThisGirlLovesToEat

Buttery Crackle Chicken Thighs

Today I found this great recipe for Buttery Crackle Chicken Thighs on #SweetCsDesigns.
Buttery Crackle Chicken Thighs are the most delicious, juicy, and super crunchy chicken thighs you’ll ever make!  #ThisGirlLovesToEat 

Buttery Crackle Chicken Thighs

  • 1.5 lbs chicken, medium-large bone-in chicken thighs, skin on
  • 2 tbsp butter, ghee/clarified
  • salt and pepper, to taste
  1. Lay chicken thighs out on a cutting board, and using sharp kitchen scissors, cut out bone from thigh.
  2. Remove bones (save them for chicken stock if you make your own!)
  3. Pound chicken flat and make sure they are very dry, pat with paper towel if needed.
  4. Generously salt and pepper meat side of chicken (don’t salt fat side, as it can easily burn).
  5. Heat a cast iron (or heavy) pan on high heat, so it is scorching hot (but not smoking).
  6. Reduce heat to medium-high.
  7. Add ghee/butter to pan, and let melt.
  8. Add chicken to pan, starting with the fat side down.
  9. Let fat crisp and chicken brown, about 7 minutes.
  10. Flip chicken and cook until 165 degrees internal temp – about 6 minutes.
  11. Let rest 2-5 minutes and pat off any excess butter softly with a paper towel.
  12. If desired, cut chicken into strips.

NUTRITION INFORMATION

Amount Per Serving

Calories277 Fat7g Cholesterol95mg Sodium113mg Protein21g

Spinach Stuffed Chicken

thighsWhen I’m prepping for meals there is nothing that brings me more inspiration than chicken thighs.  There are so many ways to dress them up and keep them from being boring and they don’t take forever to cook!  #ThisGirlLovesToEat

Spinach Stuffed Chicken Thighs

  • 6 Bone-in, Skin-on Chicken Thighs (about 8 oz each)
  • 3 Cups Fresh Baby Spinach
  • 1 TBLS Olive Oil
  • 2 tsp Dried Basil
  • 1 tsp Onion Powder
  • 1 tsp Garlic Powder
  • 1 tsp Freshly Ground Sea Salt
  • 1/2 tsp Freshly Ground Black Pepper
  • Olive Oil Cooking Spray

Preheat oven to 375° F and spray the bottom of a 13 x 9 Pyrex Baking Dish with Olive Oil Spray.  Mix together your spices in a small bowl.

Toss Spinach with 1 TBLS Olive Oil and 2 tsp of your dried spice mix in a medium bowl.

Sprinkle each thigh with some of the spice mix and massage into both top and bottom.  Leave about 1 tsp of spice mix to sprinkle over tops at the end.

Gently lift the skin away from the meat and make a pocket for the spinach leaves.  Stuff each thigh with the spinach leaves until equally distributed.

Place the thighs in the baking dish and spray tops lightly with olive oil spray.  Sprinkle remaining tsp spice mix over thighs and put into preheated oven.  Bake for 30 minutes.

After 30 minutes divide the Parmesan cheese evenly between the breasts and put back into the oven until cheese is melted and begins to brown, about 15 minutes more.

Nutrition Information (Serving Size 1 Thigh)

  • 306 Calories
  • 22 g Fat
  • 1 g Carbs
  • 24 g Protein

Buttermilk Air Fried Chicken

plated2

Yesterday was #NationalFriedChickenDay so, because I adore southern fried chicken, I tried to make it #KetoFriendly without losing texture or taste.  #ThisGirlLovesToEat

Buttermilk Air Fried Chicken

  • 1 pkg (4 – 5 lbs) 5 Chicken Leg & Thigh Quarters (or your favorite cut)
  • 3 tsp Lawry’s Seasoned Pepper
  • 3 tsp Salt
  • 3 tsp Paprika
  • 1 tsp Poultry Seasoning
  • 1 tsp Oregano
  • 1 tsp Thyme
  • 1 tsp Cayenne Pepper
  • 1 tsp Onion Powder
  • 1 tsp Garlic Powder
  • 4 Cups Buttermilk

Combine all of your spices in a bowl and stir until well mixed.

Place your chicken into a bowl large enough to hold your chicken pieces, with room for the liquid.  Wearing disposable gloves, rub each piece of chicken generously with the spice mixture.  Moving the pieces around in the bowl as you go, pour your buttermilk over and around the chicken.  Make sure you are moving the pieces around so the spices that come off the chicken mix into the buttermilk.  Once all pieces are covered, and remain submerged, in the buttermilk, cover the bowl and put it in the refrigerator to marinate for at least 2 but preferably 6 hours or more.  Ideally, if you can, marinate it overnight or all day while you are at work.

When you are ready to fry your chicken stir together your dredging mixture with a fork in a shallow baking pan.  TIP: I like to put my dredge mixture together at least an hour ahead of frying, if I have the time, so that my spices have extra time for their flavors to absorb into the flours.

  • 2 Cups Bob’s Red Mill Paleo Baking Flour
  • 1 Cup Superfine Almond Flour
  • 1 TBLS Baking Powder
  • 1 tsp Salt
  • 1 tsp Paprika
  • 1/2 tsp Garlic Powder
  • 1/2 tsp Onion Powder

When you’re ready to cook follow these steps for juicy fried chicken without the grease, extra fat and mess that you get when you fry in peanut or vegetable oil.

  1.  Lightly spray the basket of our air fryer with olive oil spray to keep your skin from sticking
  2. Take one piece of chicken out of the buttermilk marinade and hold it over the bowl until it stops dripping (you don’t want to drop a sopping wet quarter into the dredge mixture)
  3. Lay your chicken quarter in the pan of dredge mixture and spoon the mixture over the chicken.  Lift the chicken up by the drumstick end and lightly shake to release any extra mixture.  You want a thin coating so it crisps up perfectly and isn’t soggy between the coating and the chicken.
  4. Lay your chicken quarter in the basket of your air fryer skin side up.  Repeat with as many pieces of chicken as will fit in your basket but don’t crowd the pieces.  You want the air to flow around the pieces so they all cook evenly.  My quarters were large, so I cooked 3 at a time.
  5. Set your air fryer to 375° F and set your timer according to what pieces you are cooking (except where noted, all assume your chicken has bones/skin):  Leg Quarters 25 – 30 Minutes – Cook to 165° F to 180° F in the thickest part of the thigh.  Time will be solely based on the size/thickness of your pieces.  Cooking to a higher temp breaks down the fibers of the tougher thigh meat and gives you a more tender result.  Breasts: 22 to 25 Minutes – Cook to 165° F in the thickest part of the breast.  Boneless Chicken Tenders:  12-16 Minutes – Cook to 165° F in the thickest part.
  6. Using tongs, turn your chicken pieces over 15 minutes into cooking so that your chicken gets evenly browned.  Turn tenders over 1/2 way through your cooking time.
  7. When your chicken has reached the desired temperature, remove from the air fryer, set on a cooling rack (or your plate if your serving right away) and repeat the steps with your remaining chicken.

Nutrition Information & Comparison to Traditionally Fried Chicken (1 Leg/Thigh Quarter)

  • Air Fried:  290 Calories     Deep Fried: 1262 Calories (972 Less)
  • Air Fried:  5 g Fat     Deep Fried:  85 g Fat (80 g Less)
  • Air Fried:  7 g Carbs     Deep Fried: 56 g Carbs (49 g Less)
  • Air Fried:  23 g Protein     Deep Fried: 66 g Protein (43 g Less)

What you give up in apples to apples crispiness, you more than make up in the health benefits of converting this to a Keto Air Fried recipe!

Angel Food Cupcakes with Cream Cheese Frosting

afccwccf2

Admittedly I prefer cooking meals to baking any day!  My desserts are never pretty. 😐  Regardless, I bit the bullet today and prepared to make something to take to a 4th of July BBQ tomorrow.  I thought about cookies, but wasn’t in the mood for something so labor intensive, then came upon a long forgotten boxed angel food cake mix in my cupboard.  The “best by” date had admittedly passed, but since the only added ingredient was water, I decided to give it a shot… #ThisGirlLovesToEat

Angel Food Cupcakes

  • 1 Box Betty Crocker Angel Food Cake Mix
  • 1+1/4 Cups Water

Add water to cake mix in metal or glass bowl and mix on low 30 seconds then medium for 1 minute.  Divide batter between 24 paper lined cupcake pan holes and put pans into a preheated 375° F oven.  Bake for 18 minutes, or until tops are browned and not sticky to the touch.  Remove from oven when done baking and cool on wire racks until ready to frost.

Cream Cheese Frosting

  • 12 Ounces Cream Cheese
  • 12 TBLS (3/4 Cup) Room Temperature Butter
  • 1+1/2 tsp Vanilla
  • 4+1/2 Cups Confectioner’s (Powdered) Sugar

Put butter, vanilla, and cream cheese in the bowl of your stand mixer and beat on medium speed until well combined.  Reduce speed to low and slowly add the powdered sugar until all is incorporated then turn speed to medium and whip until frosting is light and fluffy.

Frost each of the cupcakes & enjoy!  Keep in refrigerator.

Nutrition Information (24 Servings)

  • 236 Calories:  70 Calories (Cupcake)     166 Calories (Frosting)
  • 8.28 g Fat (All from the Frosting)
  • 38 g Carbs:  16 g Carbs (Cupcake)     22 g Carbs (Frosting)
  • 2 g Protein:  1.5 g Protein (Cupcake)     .65 g Protein (Frosting)

Keto Flatbread & Lemon Tahini Sauce

My next post is going to be for Chicken Shawarma, but I was really sad that, in order to really enjoy it I’d need to cheat with a high carb Pita and Tahini sauce.

After doing some research and taking a couple of tries in the kitchen though, I discovered that making an acceptable Keto flatbread to host the deliciousness of the flavorful chicken dish, kebabs, or any other Middle Eastern delicacy isn’t that hard at all!

flatbread

Keto Flatbread

  • 2 Large Eggs
  • 2 tsp Baking Powder
  • 1/2 tsp Kosher Salt
  • 2 Cups (6 oz) Shredded Full Fat Mozzarella Cheese
  • 1+1/2 Cups Finely Ground Almond Flour
  • 1/2 tsp Dried Thyme

Preheat the oven to 400° F.

In a large bowl, beat the eggs until they are light and frothy then add the salt and baking powder in, making sure to mix well.  Mix the mozzarella in with a spatula.  Add in the almond flour and mix everything well.

Wearing rubber prep gloves, put some oil on your hands and continue mixing with your hands, then separate the dough in 5 equal balls.   Flatten each section of dough into a disc and spread them out on a piece of parchment paper.  Place another piece of parchment paper on top of the flattened discs.

Use a rolling pin to flatten each disc further until they are about 5-6 inches in diameter.

Transfer the dough and bottom piece of parchment to a sheet tray, sprinkle with dried thyme, and bake for 13-15 minutes, or until golden brown.  When the flat breads have finished cooking, remove from the oven and set on a wire rack to cool.

TIP:  Flatbread will keep 3-4 days in the refrigerator in a zip bag, or can be frozen for 3 months.

lemontahini

Lemon Tahini Sauce

  • 1/3 Cup Sesame Tahini – I use Kevala Organic Sesame Tahini
  • 2 Cloves Garlic Crushed (2 tsp jarred crushed garlic)
  • Juice of 1 Medium Lemon
  • 1/4 tsp Freshly Ground Sea Salt
  • Ice Water
  • 1 tsp Freshly Chopped Parsley

Put garlic in a small bowl and cover with the juice of 1 lemon.

Let sit for 5-15 minutes until the raw flavor of the garlic goes away.  Add the tahini to a blender or small food processor, or use a handheld immersion bender in a tall and narrow jar.

Add the garlic/lemon juice blend, the parsley, and the salt, and blend for a few seconds.  Add some ice water(about 2-4 tablespoons) while blending and keep going until the texture is smooth and creamy.  If you need to add more water, do so. If the tahini gets too loose, add more tahini.  Check the seasoning and put in the refrigerator in a sealed container until needed.

The tahini sauce will last for 5 days in the refrigerator but can’t be frozen.

Use the flatbread as your base to build your kebab or Schwarma plate and dress with the tahini sauce.  #ThisGirlLovesToEat

Low Carb & Gluten Free Brownies

avocadobrownies
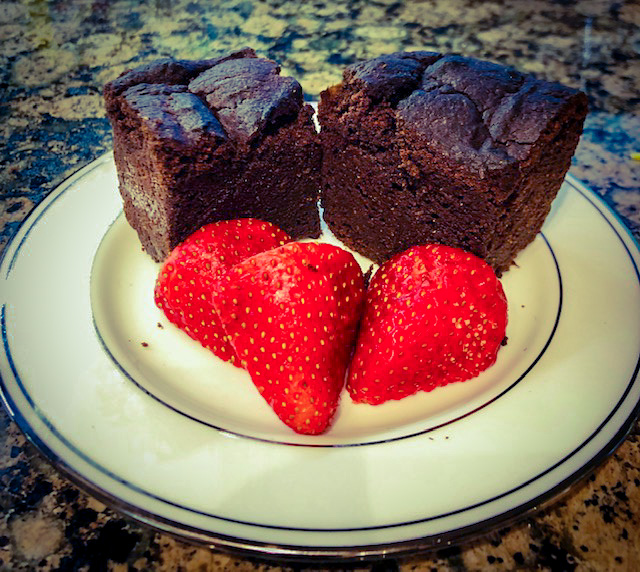
Although I’m not a daily dessert eater, I do have a wicked love of anything chocolate.  These #KetoFriendly brownies satisfy that love without ruining my diet goals.  #ThisGirlLovesToEat

Keto Avocado Brownies

  • 2 Ripe Avocados
  • 4 Large Eggs
  • 6 TBLS Unsweetened Creamy Peanut Butter
  • 1/2 Cup Bob’s Red Mill Paleo Baking Mix
  • 2 tsp Baking soda
  • 2/3 cup Cocoa powder, unsweetened
  • 2/3 cup Xylitol (Sugar Substitute)
  • 1/2 tsp Kosher salt
  • 2 tsp Vanilla extract, pure
  • 1/2 Cup Butter
  1. Preheat oven to 350° and line a 8”-x-8” square pan with parchment paper. In a blender or food processor, combine all ingredients and blend until smooth.
  2. Transfer batter to prepared baking pan and smooth top with a spatula.
  3. Bake until brownies are soft but not at all wet to the touch, 40 – 45 minutes. Let cool 25 to 30 minutes before slicing and serving.