Gatherings are easier with quick, #MakeAhead, appetizers. #AntipastoBites can be made the day before and kept, in a sealed container, in the refrigerator until you’re ready to serve. The flavors are better when closer to room temperature, so, get them out 15-30 minutes before serving.
1/2 c. Extra-virgin olive oil, plus 3 Tablespoons, divided
9 oz. Fresh cheese tortellini
Kosher salt
Freshly ground black pepper
2 tbsp. Balsamic vinegar
8 oz. Mozzarella balls (in deli case near specialty cheeses)
1/2 tsp. Italian seasoning
1/4 tsp. Red pepper flakes
4 oz. Sliced salami (or Prosciutto, Pepperoni, Sopressata, etc.)
1/4 lb. Roasted red peppers, chopped into bite-sized pieces
1 Bunch fresh basil
14 oz. Artichoke hearts (drain & chop into bite-sized pieces)
1/4 lb. Green olives (Can substitute black if you prefer)
In a large pot of boiling water, add 1 tablespoon oil. Cook tortellini according to package directions until al dente. Drain and transfer to large bowl.
Season cooked tortellini with salt and pepper. Add balsamic vinegar and 2 TBLS olive oil and mix to combine. Set aside.
Marinate mozzarella: In a small bowl, add mozzarella balls, Italian seasoning, red pepper flakes, and remaining 1/4 cup olive oil. Mix to combine and set aside.
Assemble skewers by layering one piece each mozzarella, salami, roasted red pepper, tortellini, basil, artichoke heart, and green olives.
Are you on Facebook? You might be interested in the things I may not devote an entire blog post to: food news, recipes, food facts, nutritional information, photos and other things that make my mouth water. If so, visit my This Girl Loves To Eat community at: https://www.facebook.com/ThisGirlLovesHerFood
Realizing that #leftoverwine is an oxymoron, the occasion did present when a high quality bottle was opened at the end of a multi-bottle evening and not finished, then said bottle was put into the wine cellar and forgotten for a week past it’s drinking window. Shit!
Time to make some red wine vinegar! I left the bottle, corked, in the dark, cool cellar for an additional month then set to starting my kitchen #chemistryexperiment.
Vintage Red Wine Vinegar
Up to 750 ml leftover Red Wine of any variety – in this case, I used: 3/4 bottle Eighty Four Wines 2013 Malbec out of Napa, CA + about 1/4 bottle Bodega Y Vinedos Catena 2019 Malbec out of Argentina
1/2 cup (118 ml) Raw, Unfiltered, Unpasteurized Vinegar, or a Vinegar Mother – I used Bragg Organic Raw-Unfiltered Apple Cider Vinegar With the Mother
Pour the wine into a dry, sanitized, wide-mouthed, sealable (canning) jar that holds at least a quart. If the wine contains sulfites (it will say so on the back of the bottle), stir in the hydrogen peroxide and let the wine sit for about a minute to neutralize them. Stir in the water with a wooden spoon.
Stir in the raw vinegar well to oxygenate the wine.
Cover the jar with either tightly-woven, quadrupled cheesecloth or a piece of muslin, even a thick paper towel, securing with rubber band/string/a screw on metal canning band, or, like I used, 😉 a zip tie to keep fruit flies out. You can cover it with a paper coffee filter for extra protection from fruit flies if desired. The jar needs to breathe (vent its Carbon dioxide) so do not, under any circumstances, put the metal inner jar canning lid or glass clamped vacuum lid on to seal.
Place your jar on the counter, out of direct light, or in a cupboard, where the temperature stays between 65° and 75°F. The longer you leave it alone to fully develop it’s acidity, especially if you have blended more than one type of wine, the better. Ideally, leave it alone a minimum of one month before checking your acidity level. Your ph should be 4.0 or below.
Bottle half of the vinegar, in a pressure resistant bottle, leaving headspace and replace with the same amount of wine for another batch. Or, you can bottle it all, storing the mother (1/2 C) for another batch or to share with a friend to make her own.
Amazon carries many suitable bottles for storing vinegar
The vinegar can be used immediately (stored in the refrigerator if you like the flavor as it is) or aged longer in your cupboard or on the cool counter top to allow it to mellow further and the flavors to develop more fully.
Troubleshooting: Most fermenting problems with vinegar come from trying to ferment in temperatures that are too warm for the fermentation process. Try to keep your jars in a room that’s between 55 and 75°F.
Surface growth: If you see anything “scummy” starting to grow on your vinegar while it’s fermenting, scoop off the surface growth. If it smells fine, it is fine.
Over-Fermenting: If your vinegar develops an awful smell (like rotting garbage), toss it out. If it smells a little funky (like vinegar), it’s probably fine.
Mold Growth: If you’re having problems with mold growing on the vinegar (not simply white scum on the top), toss out the vinegar. Next time, make sure your vinegar is fermenting in a room that’s not above 75 degrees, and is in a place with good airflow.
Are you onFacebook? You might be interested in the things I may not devote an entire blog post to: food news, recipes, food facts, nutritional information, photos and other things that make my mouth water. If so, visit my This Girl Loves To Eat community at: https://www.facebook.com/ThisGirlLovesHerFood
I love my air fryer and have, so far, only experimented once with cooking seafood in it. I did Salmon in it, which turned out so yummy! Tonight I was behind the 8-Ball, having forgotten to get something out for dinner, so seafood attempt number two, with frozen fillets no less, is commencing as we speak!
Creole Spiced Mahi-Mahi with Lime Sauce
2 – 6 Ounce Frozen Wild Caught Mahi-Mahi Fillets (I got mine from Whole Foods)
Zatarain’s Creole Seasoning
4 TBLS Butter (room temperature)
Juice and Zest of 1 Lime
Olive Oil Cooking Spray
Lightly spray the inner basket of your air fryer with olive oil spray.
Liberally sprinkle both sides of your mahi-mahi with the Creole seasoning and lay in the air fryer basket. Lightly spray the top of the fillets and close the tray.
Cook at 380° F for 10 minutes then turn the fillets over and cook another 8 to 10 minutes, or until fish flakes and inner temperature registers 145° F.
While the fish is cooking, stir the lime juice and zest into the butter and set aside.
When the timer goes off, remove mahi-mahi from the air fryer immediately, cut each fillet in half, and spoon 1/4 of the lime butter over each serving. Serve with a green salad and a steamed vegetable for a quick & healthy weeknight meal. #ThisGirlLovesToEat
Nutrition Information: (4 – 3 oz servings with 1 TBLS Lime Butter Sauce)
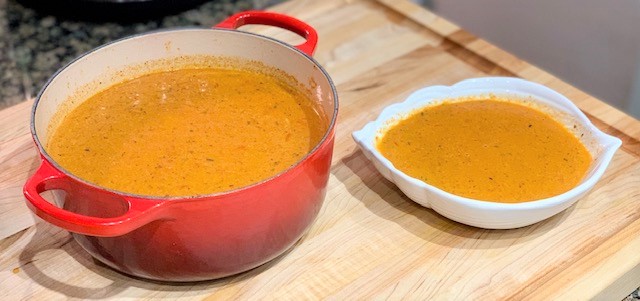
I bought some organic tomatoes on the vine and a pint of grape tomatoes that I hadn’t finished but didn’t want to go to waste. Tomato soup is my favorite, but the canned variety is SO full of carbs…enter the #InstantPot and, 20 minutes later, viola #LowCarbTomatoBisque!
Spicy Tomato Bisque
2 TBLS Olive Oil
1/2 Cup Chopped Onion (1 Small to Medium Onion)
3 Ribs Celery, Chopped (About 3/4 Cup)
2 Medium Carrots, Peeled & Cut into 1/2″ Slices
3 Cloves Garlic, Peeled
4-6 Medium Tomatoes, Quartered (I used 4 + 2/3 Pint of Grape Tomatoes)
1/2 TBLS Dried Oregano
1/2 TBLS Dried Parsley
1/2 TBLS Dried Basil
1 – 10.5 oz Can Beef Consommé (or Vegetable Broth for Vegetarian) + 1/2 Can Water
Dried Red Pepper Flakes (if desired)
1/2 Cup Heavy Cream
Salt & Pepper to taste
Grated Parmesan Cheese (if desired)
Set the Instant Pot to saute mode and add the oil to warm. Add onion, celery, garlic, carrots, tomatoes, oregano, basil and parsley cook for about 3 minutes.
Add Consommé/Broth and red pepper if using. Mix well. Close the Instant Pot with pressure valve to sealing and set to cook for 9 minutes.
When cycle is complete, set valve to quick release, open the Instant Pot, and puree the soup using an immersion blender. I prefer mine a little bit chunky.
Set the Instant Pot to Saute mode. Stir in cream and adjust spices with salt & pepper as needed. Ladle into bowls, and sprinkle with grated Parmesan cheese if desired.
Nutrition Information: Serves 6
152.5 Calories
13g Fat
6.5 g Carbs
2 g Protein
Are you on Facebook? You might be interested in the things I may not devote an entire blog post to: recipes, food facts, nutritional information, photos and other things that make my mouth water. If so, visit my This Girl Loves To Eat community at: https://www.facebook.com/ThisGirlLovesHerFood
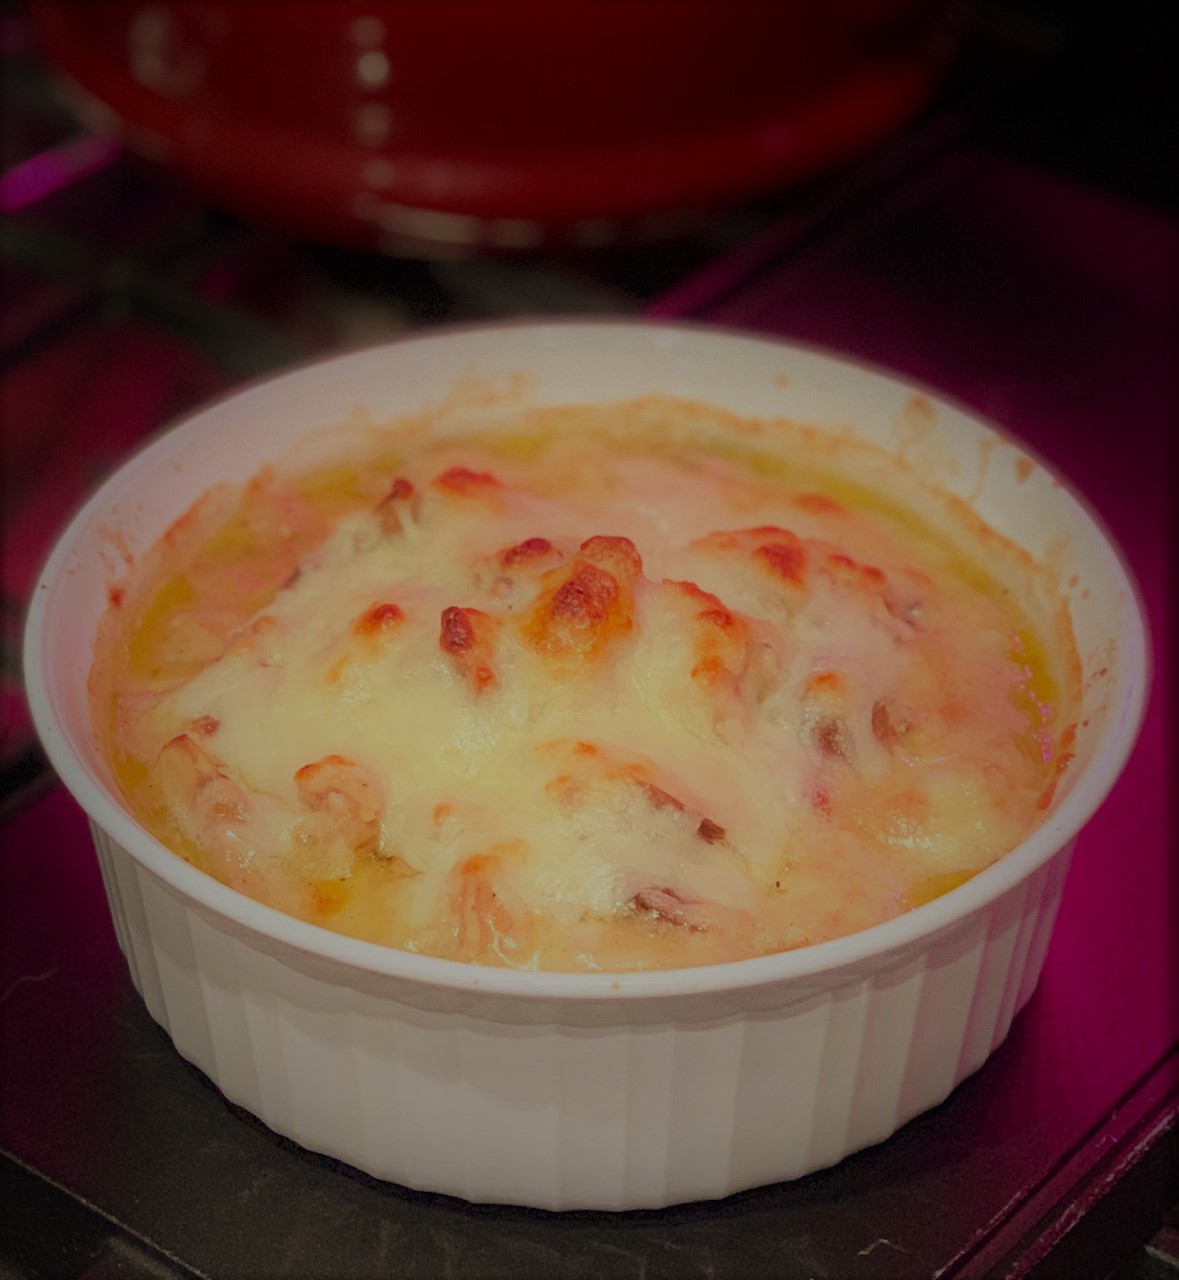
When you follow a Keto, Whole Food, or Paleo diet, weeknight dinners can easily derail your progress if you don’t keep an arsenal of quick and easy recipes on hand. This recipe is both. #ThisGirlLovesToEat
Preheat oven to 425° F and grease a 4 cup baking dish with butter.
Heat oil in a medium skillet. Add onion, garlic, salt and pepper and sauté for 5 minutes, or until onion is translucent. Add the chicken, Parmesan, tarragon, bacon, and mushrooms to the skillet. Cover and cook for 5 minutes. Stir in the wine and simmer for another 5 minutes.
Transfer to the greased baking dish and top with the shredded mozzarella cheese. Put (uncovered) into the oven and bake for 10-12 minutes, or until cheese is bubbling and beginning to brown. I served this over a bed of mashed cauliflower for a perfect #KetoMeal
Make Ahead Tip: If you are making this dish ahead, put into the buttered baking dish and cover/refrigerate. When ready to put in the oven, throw the dish in the microwave for about 3 minutes, at 50% power, to take the chill off, then top with the cheese and bake as directed.
Getting rear-ended by a #TextingTeenager in my Shiny Red Porsche has left me incredibly sore, unable to exercise, do most things with my hands, lift just about everything, go just about anywhere, and, worst of all for my followers, type my blog. 😦 Unfortunately, for my hard earned weight loss gains, it has allowed me to, once again, sit on my butt and eat. #ThisGirlLovesToEat
Thankfully I have good Keto recipes, a stand mixer to stir for me, and a good friend willing to fix my one fingered typing errors, so I’m kind of back.
Keto Banana Muffin Tops
6 TBLS Egg Whites
1 Whole Large Egg
3 VERY Ripe Small to Medium Bananas
1+1/2 Cups Bob’s Red Mill Paleo Baking Flour
2 TBLS Butter Melted
2 TBLS Truvia
2 tsp Cinnamon
1 tsp Baking Powder
1/4 Cup Macadamia Nuts, Walnuts or Pecans (if desired)
In medium bowl combine your baking flour, baking powder, and cinnamon.
In stand mixer combine your egg whites and truvia. Beat on medium/high speed until stiff peaks form then turn off.
In a third bowl combine the whole egg, bananas, butter and nuts (if using).
Add the banana mixture to the dry mixture. Stir until well combined then fold in egg whites.
Spoon mixture into muffin top pan and bake at 350° F for 14 – 16 minutes or until bottoms are browned. You can also line mini-muffin pans with parchment paper and bake for 18 – 23 minutes or until toothpick inserted in middle comes out clean.
Ground chicken breast is one of my favorite ways to build a base for a #Keto meal! It’s so versatile, mixes well with most of my favorite ingredients, and is easy to meal prep for the week ahead, that it’s become my go-to for creating new #KetoRecipes. This recipe for #ChickenBaconRanchMeatballs is fun because you can eat them all alone or pop them on a skewer between a piece of lettuce and 1/2 a plum or cherry tomato and drizzle with some ranch dressing for a fun lunch, light dinner, or appetizer. #ThisGirlLovesToEat
Chicken Bacon Ranch Meatballs
2 Pounds Ground Chicken Breast
4 Pieces Thick Cut Bacon
3 Pieces Thick Cut Peppered Bacon
1 Large Egg
2 Cups Fresh Baby Spinach
4 TBLS Ranch Dressing
1/2 Cup Panko
Olive Oil Spray
Lettuce or Arugula (if desired)
Cherry or Plum Tomatoes (if desired)
More Ranch for drizzling
Spray 2 mini muffin pans (24 holes) lightly with olive oil spray or prepare 2 cookies sheets by lining with foil and spraying the foil lightly with the olive oil spray, then set aside. Preheat oven to 350° F.
Cut the bacon into 1/4″ to 1/2″ chunks and cook in a skillet over medium heat until browned. Remove bacon to paper towels to cool. Remove the bacon grease from the pan and quickly wilt the spinach in the same pan. Put the cooled bacon and spinach into your chopper or vitamix mini cup and pulse until bacon is chopped into small bits & spinach is roughly chopped.
Using your hands (I wear disposable gloves), combine the ground chicken breast, bacon, spinach, egg, 4 TBLS of Ranch Dressing, and Panko in a medium bowl until well mixed. Form the mixture into about 40 2″ balls and pot into either the mini muffin pan or space out on the baking sheets. Lightly spray the tops of the meatballs with the olive oil spray.
Bake in 350° F oven for 18 – 22 minutes, or until the meatballs register 165° F on your meat thermometer.
Remove the balls from the pans and lay on a paper towel lined plate to soak up any excess olive oil spray. Serve with ranch dressing on a bed of lettuce and plum or red tomatoes or thread lettuce, meatball and tomato on a small skewer then drizzle with ranch dressing. #ThisGirlLovesToEat
When I’m prepping for meals there is nothing that brings me more inspiration than chicken thighs. There are so many ways to dress them up and keep them from being boring and they don’t take forever to cook! #ThisGirlLovesToEat
Spinach Stuffed Chicken Thighs
6 Bone-in, Skin-on Chicken Thighs (about 8 oz each)
3 Cups Fresh Baby Spinach
1 TBLS Olive Oil
2 tsp Dried Basil
1 tsp Onion Powder
1 tsp Garlic Powder
1 tsp Freshly Ground Sea Salt
1/2 tsp Freshly Ground Black Pepper
Olive Oil Cooking Spray
Preheat oven to 375° F and spray the bottom of a 13 x 9 Pyrex Baking Dish with Olive Oil Spray. Mix together your spices in a small bowl.
Toss Spinach with 1 TBLS Olive Oil and 2 tsp of your dried spice mix in a medium bowl.
Sprinkle each thigh with some of the spice mix and massage into both top and bottom. Leave about 1 tsp of spice mix to sprinkle over tops at the end.
Gently lift the skin away from the meat and make a pocket for the spinach leaves. Stuff each thigh with the spinach leaves until equally distributed.
Place the thighs in the baking dish and spray tops lightly with olive oil spray. Sprinkle remaining tsp spice mix over thighs and put into preheated oven. Bake for 30 minutes.
After 30 minutes divide the Parmesan cheese evenly between the breasts and put back into the oven until cheese is melted and begins to brown, about 15 minutes more.
I am guilty of not getting enough protein in my diet and need to take every chance I can to pack extra grams in where I can. These #KetoFriendly meatballs can be served as an appetizer, between meal snack, light lunch main with a salad or vegetables, or even added to a sauce with zoodles for a perfect #KetoMeal. Of course, if you aren’t Keto, feel free to add them to any rice, potato, or pasta dish you choose!
2 Cups Fresh Baby Spinach Leaves (it’s fine to leave stems)
1/2 tsp Onion Powder
1/2 tsp Garlic Powder
1/4 tsp Freshly Ground Sea Salt
1/4 tsp Freshly Ground Black Pepper
Olive Oil Cooking Spray
Combine everything except the ground beef in the container for your blender, food processor, or Vitamix. Set your speed to the lowest, or start with a pulse, to begin chopping your spinach up. Once the spinach is broken down, turn the speed up to medium to make sure your ingredients are combined but not liquified. It should only take about 15 – 20 seconds.
Put your ground beef into a medium mixing bowl and pour/scrape the blender contents on top. I put on rubber gloves at this point and use my hands to mix everything thoroughly.
Give the bottom of the basket of your air fryer a very light, quick spritz with olive oil spray. Roll balls with about 1 TBLS of the meat mixture (doesn’t have to be exact) and set them into your air fryer basket. Leave a bit of space between them, you want the air to circulate around them so they cook evenly.
When you’ve filled your basket with 12-15 about 1″ meatballs (that’s how many fit in my Dash Deluxe 6 Qt Air Fryer basket), set your timer for 9 minutes at 375° F.
Shake your basket at about 6 minutes to make sure the bottoms release and get browned. When they’re lightly browned all over, remove them from the basket and cook the rest of the meatballs. You should end up with about 30.
If desired, serve with your favorite low-carb / sugar free marinara sauce. Some good ones are Rao’s, Newman’s Own and Yo Mama’s. You can see all of them (and their nutrition information) at this link. #ThisGirlLovesToEat


 I love my air fryer and have, so far, only experimented once with cooking seafood in it. I did Salmon in it, which turned out so yummy! Tonight I was behind the 8-Ball, having forgotten to get something out for dinner, so seafood attempt number two, with frozen fillets no less, is commencing as we speak!


 Make Ahead Tip: If you are making this dish ahead, put into the buttered baking dish and cover/refrigerate. When ready to put in the oven, throw the dish in the microwave for about 3 minutes, at 50% power, to take the chill off, then top with the cheese and bake as directed.
 Getting rear-ended by a #TextingTeenager in my Shiny Red Porsche has left me incredibly sore, unable to exercise, do most things with my hands, lift just about everything, go just about anywhere, and, worst of all for my followers, type my blog. 😦 Unfortunately, for my hard earned weight loss gains, it has allowed me to, once again, sit on my butt and eat. #ThisGirlLovesToEat


 When I’m prepping for meals there is nothing that brings me more inspiration than chicken thighs. There are so many ways to dress them up and keep them from being boring and they don’t take forever to cook! #ThisGirlLovesToEat


