Keto Breakfast Griddler

Now that I’ve gone to #2ADays with original recipes plus a little something extra, I thought the perfect way to start is with this breakfast to grab and go!

#ThisGirlLovesToEat

Buffalo Spinach Artichoke Dip

Tasting Table is one of my favorite Twitter follows.  I love browsing their website for restaurant reviews, recipes, new spins on classic drinks, and guides to cities I am planning to travel to.

I was surfing their website today and came across an appetizer that included 4 of my favorite tastes in a single dish: bacon, Buffalo sauce, spinach and artichoke hearts!  Add to that the ability to make ahead, the reviewers rated it 100% make again, and it didn’t call for any hard to get ingredients and this girl who loves to eat was sold!

Note:  I did adapt the recipe from the original:

    1. I prefer a bit more bacon (and I buy mine from the butcher case, never pre-packaged because we don’t have great options in my stores);
    2. I made the blue cheese optional (it’s not a favorite of mine) and offered some substitution options; and
    3. I added a bit more hot sauce to mine.

bcartdip

Buffalo Spinach-Artichoke Dip

  • 3 slices (5 ounces) thick-cut bacon (I use 6 slices)
  • 3 garlic cloves, minced
  • ½ medium yellow onion, finely chopped
  • 9 ounces frozen artichoke hearts, thawed and finely chopped
  • 6 cups baby spinach, roughly chopped
  • 8 ounces cream cheese, softened
  • 4 ounces smoked blue cheese, softened (I don’t care for Blue Cheese, so I substitute Gorgonzola.  You can also use Goat Cheese, Feta, Stilton, or Brie)
  • 1½ cups grated Parmesan cheese, divided
  • ½ cup sour cream
  • 6 tablespoons Franks Red Hot Sauce (I like mine spicy so I add a couple TBLS more)
  • Kosher salt and freshly ground black pepper, to taste
  • ½ cup Panko bread crumbs
  • 1 tablespoon olive oil
  1. Preheat the oven to 400°.
  2. In a large skillet, heat the bacon over medium-high heat.  Cook, turning as needed, until the bacon is golden and the fat has rendered, 8 to 10 minutes.
  3. Transfer the bacon to a paper towel-lined plate to drain, then finely chop and set aside.
  4. Add the garlic and onions to the pan and cook, stirring often, until golden, 8 to 10 minutes.
  5. Add the artichoke hearts and spinach and cook until the spinach is lightly wilted, 2 to 3 minutes.
  6. Meanwhile, in a large bowl, stir the cream cheese, blue cheese (or whatever cheese you’ve substituted), 1 cup of the Parmesan, sour cream, and hot sauce until smooth.
  7. Fold in the spinach and artichoke mixture. Season with salt and pepper.
  8. Transfer to a 1½-quart casserole dish and smooth the top with a rubber spatula.
  9. In a small bowl, mix the remaining ½ cup of Parmesan with the chopped bacon, panko crumbs and olive oil.
  10. Sprinkle the panko crumb topping over the dip and place the casserole dish on a sheet pan in case any cheese bubbles over.
  11. Bake until golden brown and bubbling, 25 to 30 minutes, then serve.

tt_logo_image_1The recipe calls for serving with chips.  I like to eat this dip with really thick, freshly made tortilla chips, Triscuits, carrot chips, thick bell pepper slices or celery.

If you use Facebook and are interested in the things I may not devote an entire blog post to: things like health articles, my favorite recipes, fun drinks, food facts, nutritional information, restaurant reviews, photos and other things that make my mouth water, I have a very active page on Facebook you can visit too: https://www.facebook.com/ThisGirlLovesHerFood
The Fridge Isn’t the Best Place to Keep Bacon

This article comes courtesy of Business Insider .

My motto is, “If it’s not broke, don’t fix it.”  Well, that and, “If the Baby/Puppy/Parent (lol) is sleeping, DON’T WAKE IT!” Rebecca Harrington of Tech Insider got this one exactly right, so enjoy this great little piece on how to preserve that delicacy which makes just about everyone (sorry to those who don’t eat swine) happy, bacon!

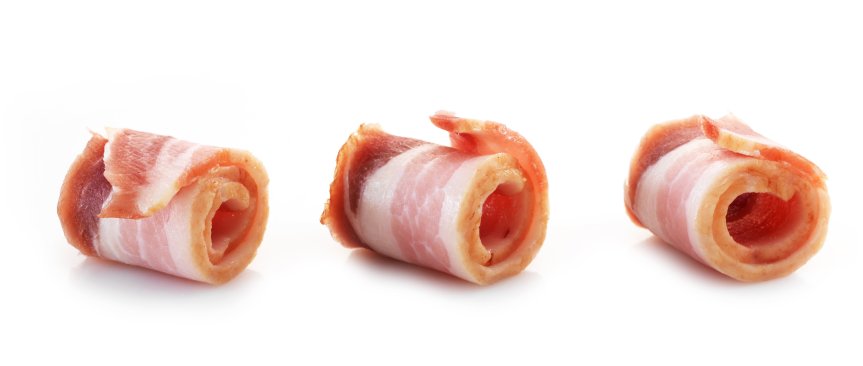
baconrollsI’ve always stored bacon in the fridge. It’s what my mom and dad did.

But by the time I get to the end of the package, that bacon isn’t very fresh anymore.

Turns out there’s a better way.

America’s Test Kitchen chef and food science expert Dan Souza told Tech Insider that the freezer is actually a better place to keep bacon.

“It can help it last longer without going rancid,” Souza says.

Rancidity is what happens when fats start to break down, giving foods an unpleasant taste or smell.

That’s why the freezer is a great place for all kinds of fatty foods, Souza says, from butter to chicken stock.

“It’s dark and cold in there,” he told Tech Insider. “So it slows down rancidity, which is a problem with really fatty things.”

To keep your glorious bacon from going rancid before you can eat it all, it’s best to stick it in the freezer.

But if you freeze it as one big chunk, you’ll never be able to tear a single slice off. Souza says to roll it up and bag it so it doesn’t get stuck together.

Read the original article on Tech Insider. Copyright 2016.

Are you on Facebook?  You might be interested in the things I may not devote an entire blog post to: recipes, food facts, nutritional information, photos and other things that make my mouth water. I may not write a blog post every day, but there are daily updates to my This Girl Loves To Eat community at: https://www.facebook.com/ThisGirlLovesHerFood

Steak & No Bake Baked Potatoes

It’s a hot, lazy Wednesday evening and I’m not in the mood to cook.

I’m looking for something to make for dinner that:

  1. Won’t take a lot of time;
  2. Will satisfy post-basketball practice hunger;
  3. Won’t heat up the house more than the 89° day did already;
  4. Won’t make a huge mess in the kitchen; and
  5. Won’t interrupt my Girls Drinking Wine time

A quick review of items on hand resulted in a hearty dinner that satisfied my family and, bonus, took minimal effort on my part so I could enjoy a rare mid-week treat of girl time!

steakandpotatoesI pulled out my handy (practically hands off) go-to kitchen saviors, my T-Fal Electric Pressure Cooker & cast iron skillet and dinner was well on it’s way to being made.

Baked Potatoes & Boneless Rib-Eye Steaks with Garlic Mushrooms

First, get the potatoes started:

  1. Wash 2 Large Baking Potatoes
  2. Put rack and 1 cup of water into the pressure cooker pan
  3. Place potatoes on rack
  4. Brush Potatoes with a touch of olive oil & sprinkle with sea salt
  5. Close and lock pressure cooker, set to cook on high
  6. Once pressure cooker reaches temperature, cook potatoes for 20 minute
  7. When cooking time is done, unplug machine and leave closed until your steaks are done

While the potatoes are cooking:

  1. Heat the cast iron skillet over medium-high heat;
  2. Place 6 slices of bacon in the pan and cook for about 4 minutes per side (give or take) until crispy but not over browned;
  3. Remove the bacon to a paper towel lined plate to drain.
  4. Salt and pepper 2 Boneless Ribeye Steaks on both sides & put in hot skillet;
  5. Add about 1 cup of sliced mushrooms, 1/2 tsp onion powder, 1 tsp garlic salt & pepper to the pan;
  6. Cook the steaks to desired degree of doneness while also stirring the mushrooms while they cook.  My husband likes his medium rare, so I cook them roughly 4 minutes per side at medium-high heat.

When the steaks are ready:

  • Turn off heat and immediately remove steaks from the pan;
  • Place steaks on a serving plate and mound 1/2 of the mushrooms on each;
  • Release the remaining pressure in the pressure cooker;
  • Place potatoes beside the steaks on plates;
  • Cut the potatoes open, butter generously, crumble 1/2 the bacon inside each potato and top with sour cream, salt & pepper.

Are you on Facebook?  You might be interested in the things I may not devote an entire blog post to: recipes, food facts, nutritional information, photos and other things that make my mouth water. I may not write a blog post every day, but there are daily updates to my This Girl Loves To Eat community at: https://www.facebook.com/ThisGirlLovesHerFood

Ancho-Cherry Pork Chops

My husband loves pork chops.  I’m not a fan so I don’t cook them often.

He bought me a pretty necklace so tonight he’s getting pork chops 😉

Pressure Cooked Ancho-Cherry Pork Chops

  • 4  Bone in Trimmed Pork Chops about 3/4 inch thick
  • 2  TBLS Coconut Oil
  • 6  Pieces Thick Cut Bacon
  • 1/2 Cup Frozen Dark Sweet Cherries
  • 1  Medium Pasilla Chili (Poblano)
  • 1/2 Cup Apple Cider Vinegar
  • 1/2 Cup Water
  • 1/4 Cup Fischer & Wieser Smokey Ancho Cherry Sauce
  • Salt & Pepper
  1. Set the pressure cooker to “Brown” and add the coconut oil
  2. Seed and chop the chili into small pieces
  3. Using kitchen shears, cut the bacon into about 1″ chunks
  4. Add the bacon and chili to the pressure cooker
  5. With the lid open, let the bacon brown and the chili soften (about 8 minutes)
  6. Add the frozen cherries and stir until they defrost
  7. Stir in the apple cider vinegar and water
  8. Sprinkle both sides of the pork chops with salt and pepper
  9.  Brush both sides of the pork chops with he Ancho-Cherry Sauce
  10. Layer the pork chops into the pressure cooker then close and lock lid
  11. Set machine to high
  12. When pressure cooker reaches temperature, cook for 10 minutes
  13. Unplug machine and immediately release the pressure with manual release button

To serve:  Put a scoop of rice or quinoa in the center of the plate.  Pile some of the drained Braised Red Cabbage (yesterday’s recipe) on top of the rice/quinoa then place a pork chop on top of the cabbage.  Spoon some of the cooking juices, cherries, chilies and bacon onto the pork chop and serve immediately.

Are you on Facebook?  You might be interested in the things I may not devote an entire blog post to: recipes, food facts, nutritional information, photos and other things that make my mouth water. I may not write a blog post every day, but there are daily updates to my This Girl Loves To Eat community at: https://www.facebook.com/ThisGirlLovesHerFood

Meatless Monday Treat

It was a rough weekend.

First we had a two day basketball tournament that started early both days, meaning no sleeping in for me, and then we had a party we needed to go to Saturday night that turned into the proverbial shit show:

lamborghini_aventador_lp_720_yellow-800x600While standing around watching the rest of the party goers drinking themselves into oblivion and admiring the host’s new bright yellow half million dollar Lamborghini Aventador, the host, who’s a very tall, very large man, lost his tenuous hold on his balance and began sliding down the rear fender with only me (I’m not a big girl) between him and the hard concrete floor & wall.  I did my best to break his fall without breaking myself but he ended up landing on me in a very awkward position and, in the fiasco of the fall, I threw my red wine all over the back end of his gorgeous car.  In my defense, I kept him from hitting his head on the floor or the wall so there was that…LOL

Suffice it to say that I was in some pain and thus, in no mood to make dinner Sunday night.  I was very glad to remember that we had a leftover pizza in the refrigerator to reheat.  Tonight, due to the second day of pain being even worse, from my neck all the way down my right side, I wasn’t anxious to roll out a gourmet dinner either.  Thank God my husband is pretty easy to feed.

shishito1I can usually dress up a grilled cheese sandwich in a way to satisfy him and tonight was no different.  Real butter, a loaf of sourdough, some bacon that was already cooked & chilling in the meat drawer combined with some pepper jack cheese and we had a winner.  I didn’t want to just let him eat the Cheetos he favors with it, and he didn’t want any of the leftover coleslaw from the other night, so I threw together another quick side he loves:

Blistered Shishito Peppers

  1. Heat 1 TBLS olive oil in a large frying pan over medium-high heat.
  2. Add 1 pkg of fresh Shishito peppers to the hot oil and cook, tossing them every minute or so, for 5 minutes or until the skins are blackened and blistered.
  3. Remove from heat and serve immediately.

shishito2Trader Joe’s sells Shishito peppers pre-bagged, you can get them at your local Asian grocery store (they are beloved in Japan), or your grocery store may have them in your produce section.

Shishito peppers are generally mild, but it seems like one in every batch will light you up! 😉

Are you on Facebook?  You might be interested in the things I may not devote an entire blog post to: recipes, food facts, nutritional information, photos and other things that make my mouth water. I may not write a blog post every day, but there are daily updates to my This Girl Loves To Eat community at: https://www.facebook.com/ThisGirlLovesHerFood


Bacon Roasted Cauliflower Chowder

dinnerreservationsI haven’t been to the grocery store this week and was at a loss as to what to make for dinner tonight.

The meat & cheese drawer gave me a pound of uncooked bacon fresh from the butcher, a wedge of parmesan cheese and another small chunk from a wedge of aged gouda-parmesan.

In the crisper was a bag of fresh sweet mini peppers, a head of cauliflower that was nearing extinction, half a red onion, some carrots, celery, a Rubbermaid container with some still viable sliced Portobello mushrooms and a few other items that found their way right into the compost bucket.

Not a lot to work with, but I’m a gamer (and thankfully my husband will try anything I make) so I trudged forward hoping for some inspiration.

A wrinkly but still salvageable Poblano chili was on the counter and inspiration for a nice warm soup struck.

Bacon & Roasted Cauliflower Chowder

  • ½ Cup Sliced Portobello Mushrooms
  • 6 Slices Bacon, cut into ½ inch pieces
  • ¼ Poblano Chili finely diced
  • ½ Red Onion diced
  • ¼ Cup diced Orange Sweet Bell Pepper
  • 1 Carrot chopped
  • 2 Ribs Celery chopped
  • 2 Cloves Garlic minced
  • 1 Medium Head Cauliflower
  • 4 Cups Beef Broth (4 Bullion Cubes in 4 Cups Boiling Water)
  • 1 – 5 ounce can Evaporated Milk
  • 2 Bay Leaves
  • Lawry’s Seasoned Pepper to taste (1 added about 2 tsp)
  • Reserved Rind of Parmesan or Parmesan-Gouda Cheese
  • Shredded Parmesan or Parmesan-Gouda Cheese (if desired)

Cut the cauliflower in thirds, trim off the stem, spritz with olive or coconut oil spray and roast 45 minutes at 400 degrees.

sweatvegetablesCook the bacon over medium high heat for 5 minutes. Add the diced Poblano chili and continue to cook until bacon is crisp but not too brown. Remove both from pan and drain on paper towel.

In the same pan add the onion, garlic, carrot, celery, and bell pepper.  Saute’ about 8 minutes over medium high heat.  Add the mushrooms and return the bacon and Poblano chili to the pan. Continue cooking another 10 minutes while bacon fat breaks down some more then switch heat to low.

addcauliflowerRoughly chop 1/3 of the roasted cauliflower into small pieces and add to the pan. Add the bay leaves and seasoned pepper, stir and cook on low about 5 minutes to allow the cauliflower to absorb the flavors of the bacon and other vegetables.

Put the remaining 2/3 of the cooled roasted cauliflower and 2 cups of the cooled broth into the Vitamix or Food Processor/Blender container and process on low until well combined. It will have plenty of texture, but if it’s not thin enough to easily pour, add a bit more of the reserved broth.

Increase heat to medium, then add the can of evaporated milk, a can of water and the contents of the Vitamix container to the pan. Stir well to incorporate. Stir in the remaining broth, the reserved cheese rinds (if you have any) and bring soup just to a boil. Return heat to low and simmer about 20 minutes.

soupRemove the bay leaves before serving.  Serve with toasted French bread chunks/croutons or crusty bread and butter.  Sprinkle chowder with shredded parmesan or parmesan-gouda cheese and chopped parsley if desired.

Are you on Facebook?  You might be interested in the things I may not devote an entire blog post to: recipes, food facts, nutritional information, photos and other things that make my mouth water. I may not write a blog post every day, but there are daily updates to my This Girl Loves To Eat community at: https://www.facebook.com/ThisGirlLovesHerFood

Roasted Garlic Cheesy Cauliflower

roastedgarliccheesycauliflowerI bought a couple of heads of cauliflower at the farmer’s market, but wasn’t excited to serve it steamed with cheese, as make-believe rice, wannabe mashed potatoes, or even spiced up and roasted whole.

A trip to Trader Joe’s later, I had some inspiration for a main dish casserole I could serve with a salad.  Later this week it will be a great side dish for smoked sausage or, if I’m feeling inspired, Roasted Frenched Pork Chops.

If you don’t eat, or don’t like pork products, you can easily substitute shredded chicken (grocery store rotisserie or home prepared) for the ham and either leave the bacon out or substitute turkey bacon.  Another option is to cut leftover steak or prime rib into cubes as a substitute for the ham and leave in the bacon.  If you are vegetarian you can leave the meat out completely and add more bell pepper (red, yellow, orange or green). It’s a recipe that’s easy to get creative with.

Roasted Garlic Cheesy Cauliflower

  • 2 Heads of Cauliflower
  • 2 Cups Shredded Pepper Jack Cheese
  • 8 oz Cream Cheese
  • 2 Cups Shredded Aged Gouda (or Trader Joe’s Gouda/Parmesan Blend) Cheese
  • 4 TBLS Butter
  • 1 Green Bell Pepper Diced
  • 3 Chopped Green Onions
  • 6 Slices Cooked Bacon
  • 2 Cups Diced Cooked Ham
  • 1 Clove Garlic, Roasted
  • 3 Shallots, Roasted
  • Freshly Ground Pepper
  • About 1 TBLS Olive Oil
  • 2 TBLS Gluten Free Flour
  • 3/4 cup heavy cream or 1/2 & 1/2 

Preheat oven to 350 degrees.  Grease a 9 x 13 Pyrex baking dish and set aside.

roastedgarlicPeel away the papery skin and cut off the top of the garlic clove.  Place inside a square of foil, drizzle with olive oil, close up the foil package, and place in a shallow pan in the oven.  Do the same for the shallots.  Bake 30-40 minutes and remove from oven.  Set aside for a few minutes then open up foil pouch to let cool.

Break apart cauliflower heads, discard the stem and steam in a steamer in a large pot until tender but not mushy (about 20 minutes per head – you may have to do it in 2 batches).  Transfer cauliflower to Vitamix Container or Food Processor and pulse until florets break apart but do not pulverize.  Remove the cauliflower and put into a large mixing bowl.  Add diced bell pepper, ham, half of the chopped green onions, and half of the crumbled bacon.  Toss to combine.

In heavy saucepan squeeze the roasted garlic and shallots out of their skins and add 3 TBLS butter.  Cook over medium heat until butter melts.  Using a fork or an immersion blender stir/blend until the garlic and shallots are crushed and well combined.  Add a generous amount of pepper, the cream (or 1/2 & 1/2) and bring just to a boil.  Combine the last 1 TBLS of butter (melted) with 2 TBLS of the Gluten Free flour (all purpose if GF isn’t a concern for you) and blend or whisk into the mixture in the pan until the mixture begins to thicken.  Add the cream cheese then 1 Cup of the pepper jack and 1 Cup of the gouda, stirring constantly until melted.  It may not be a flowing sauce, but resemble a big melted blob – that’s ok.  Remove from heat and pour into the cauliflower mixture in a large bowl.  Use a large rubber spatula to stir together until well mixed.

Spread into prepared 9 x 13 pan, sprinkle remaining bacon, green onion and cheeses over the top, cover loosely with foil and bake for 30 minutes; remove foil and continue to bake until cheese is brown and bubbly.  Remove from oven and let cool 5-10 minutes. I serve with a bottle of Frank’s Red Hot for those who like more spice.

Are you on Facebook?  You might be interested in the things I may not devote an entire blog post to:  recipes, food facts, nutritional information, photos and other things that make my mouth water. If so, visit my This Girl Loves To Eat community at:  https://www.facebook.com/ThisGirlLovesHerFood

Roasted Jalapeno Avocado Bacon Pie

Because Thursday is the slowest day at my “real job” I usually have time to fool around in the kitchen to try to create a new dish to serve for dinner.  This week was no different except that I needed to come up with something healthy because I am (BOO – HISSdieting i.e., not eating anything that even resembles Halloween candy or that I can pick up at a drive-thru window, have delivered to my front door, or comes out of a can or box.  No Bueno!

jabpieings Determined to stay on track, into the kitchen I went to make a healthy meal that would taste good, keep me full and make my digestion work hard (and burn calories) all night long.

aha-cartoonHappily I found some of my favorite spicy, salty, satisfying flavors there!  Bacon, fresh jalapenos, a forgotten Roma tomato (thankfully still firm), some ripe avocados from my backyard, green onions, eggs, and a wedge of aged gouda.  AHA Moment: I’d eat breakfast for dinner!

Roasted Jalapeno Avocado Bacon Tortilla Pie

  • 4 Large Eggs
  • 1 1/4 Cups Sour Cream
  • 4 Slices of Bacon (cooked crisp, drained, cooled and chopped)
  • 3 Green Onions
  • 1/2 of 1 Large Roma Tomato
  • 7 Corn Tortillas
  • 1 Medium Avocado
  • 1 Cup Shredded Aged Gouda Cheese
  • 1 Cup Shredded Parmesan Cheese
  • Olive Oil Spray
  • Freshly Ground Salt & Pepper

Preheat the oven to 350 degrees.  Lightly spray the bottom and sides of a 9.5″ Pyrex pie plate with the Olive Oil Spray.

In a small non-stick frying pan heat each of the tortillas until just lightly browned on both sides.  Lay one in the center on the bottom and then layer the rest around the pan overlapping to make sure there is a “crust like” coverage.

In the same pan roast the whole jalapenos until the skin bubbles and begins to blacken.  If you want a bit less spice, remove the seeds and stem first.  Combine both of the cheeses: sprinkle 1/4 of the cheese over the bottom of the tortilla crust.  When peppers are roasted, chop them and scatter over the first cheese layer.

Chop and quickly dry saute’ the whites only of the green onions (chop the greens and set aside) and the Roma tomato with a bit of salt & pepper.  Distribute the onion/tomato mixture over the jalapenos then cover with 1/2 of the remaining cheese.

Chop the avocado then layer it with the bacon over the second cheese layer.

Mix the 4 eggs and the sour cream until well combined and beginning to thicken.  Add cracked salt and pepper then pour carefully over the pie surface taking care not to overflow the edges of the exposed tortillas on the sides. Sprinkle remaining cheese over the top and put pie pan in the center of the pre-heated oven.  Bake 40-45 minutes, or until cheese begins to brown and a knife inserted into the center of the pie comes out with no egg mixture on it and center is cooked through.  Remove from the oven and allow to sit for 10-15 minutes before slicing into wedges to serve.  Top each wedge with the reserved chopped green onions.

jabpie2     jabpie3     jabpie4

To make this a complete meal serve with a salad of Romaine, the reserved 1/2 of the tomato, and any other fresh produce you’d like (I chop a green apple, some jicama, and add a shredded carrot) then dress lightly with olive oil, combined with salt, pepper and some lemon juice to keep it healthy.

Are you on Facebook?  You might be interested in the things I may not devote an entire blog post to:  recipes, food facts, nutritional information, photos and other things that make my mouth water. If so, visit my This Girl Loves To Eat community at:  https://www.facebook.com/ThisGirlLovesHerFood

This Dinner Will Get You Thirsty This Thursday

IMG_4485[1]We missed taco Tuesday this week.

I was just too tired and sad from having to put my beloved lab to sleep Monday, to even think about cooking and getting my Mexican food fix.  The household is slowly recovering so I ventured out to the grocery store and then into the kitchen to throw something together tonight, that wasn’t takeout.  I came up with something tasty, filling and gluten free!

Chicken Stuffed Pasilla Peppers with Arborio Rice

  • 4 Large Pasilla (A.K.A. Poblano) Peppers
  • 1 Red Bell Pepper
  • 1 Orange Bell Pepper
  • 1 Yellow Bell Pepper
  • 2 Roasted Chicken Breasts
  • 6 Strips Crisp Cooked Bacon
  • 1 1/2 Cups Shredded Cheddar Cheese Blend (Cheddar/White Cheddar/Sharp Cheddar)
  • 2 Chopped Green Onions
  • 1/2 Cup Trader Giotti’s Arrabiata Sauce (found at Trader Joe’s stores)
  • 1/2 – 1 1/4 Cup Organic (Gluten Free) Chicken Broth
  • 1 Cup Arborio Rice
  • 3/4 Cup Sour Cream

I bought a nearly 6 pound whole young chicken and roasted it in a 375 degree oven for about 1 hour 45 minutes, took it out to rest and then removed the breasts and placed them in the Vitamix container.  Strain the drippings into a measuring cup and add enough chicken broth to equal 1 1/2 Cups.

In the same oven, while the chicken was cooking, I laid 6 strips of bacon on a cookie sheet and baked them for about 18 minutes, until they were crispy and browned but not yet burning.  Remove the bacon from the oven to drain and cool then cut it into pieces and add to the Vitamix container.

Once the chicken has finished cooking, increase the oven temperature to 400 degrees.

Wash and dry the Pasilla peppers then carefully cut the top off of all four, discarding the stem and seeds.  Take each of the peppers and cut a wide V shape on one side (from the top toward the solid bottom it’ll look like a V-neck shirt).  Place all 4 peppers on a cookie sheet.

Remove the stems and seeds from the bell peppers.  Cut in half and then into quarters until all pieces can lay flat on a cookie sheet.  Bake both sheets of peppers 20-25 minutes until the skins blister and start to blacken.  Remove the bell peppers from pan to cutting board to cool and then cut into small pieces and add to the Vitamix container.

Pulse the mixture until well combined.  Move mixture to a mixing bowl, add 3/4 cup shredded cheese, the chopped green onion and the Arrabiata sauce stirring to combine.

Fill each of the Pasilla peppers with the chicken mixture mounding each until they’re full.  Sprinkle the rest of the cheese over each of the peppers and bake in the 400 degree oven until the cheese is melted and starts to brown.

Rice:  In a medium saucepan with a lid, combine the reserved drippings/chicken broth, 1 TBLS butter or olive oil, and 1 Cup Arborio rice.  Cook over medium heat until it reaches a boil then put lid on, reduce heat to low and simmer for 20 minutes.  Remove pan from heat and allow to steam for 10 more minutes then fluff rice with a fork.

Sauce:  While the rice is cooking, simmer the reserved pieces of Pasilla pepper with about 3/4 cup chicken broth until liquid reduces by half and peppers are fork tender. Move peppers and broth to the cleaned Vitamix container and process until only a few small pieces remain.  Add 3/4 Cup sour cream to the Vitamix container and process until thoroughly combined and smooth.  Add salt and pepper to taste.

Serve:  Place rice in the center of the plate, lay one stuffed pepper on top of the rice and drizzle the sauce over the pepper.

If you are on Facebook and are interested in the things I may not devote an entire blog post to:  recipes, food facts, nutritional information, photos and other things that make my mouth water, I have a Facebook page you can visit too https://www.facebook.com/ThisGirlLovesHerFood