Homemade Red Wine Vinegar

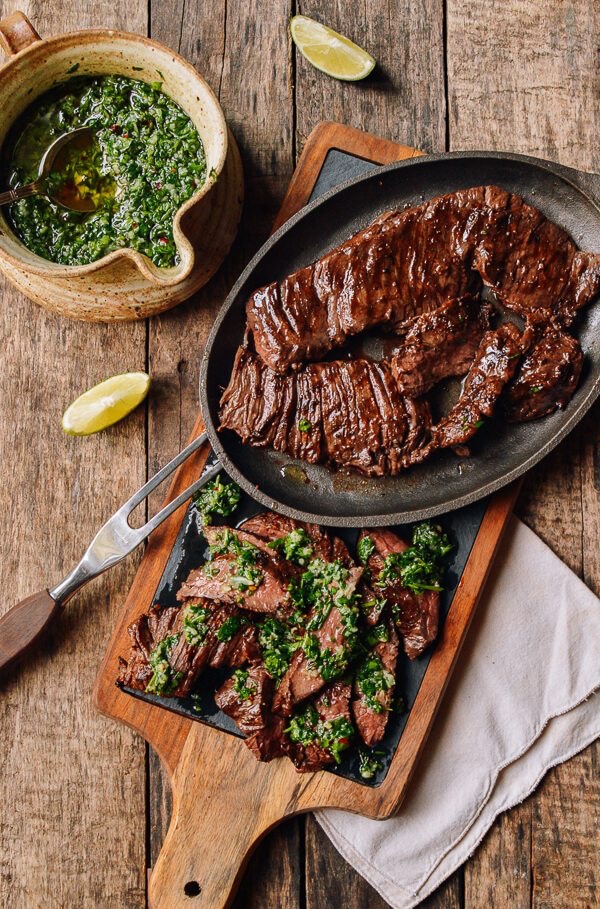
Realizing that #leftoverwine is an oxymoron, the occasion did present when a high quality bottle was opened at the end of a multi-bottle evening and not finished, then said bottle was put into the wine cellar and forgotten for a week past it’s drinking window. Shit!

Time to make some red wine vinegar! I left the bottle, corked, in the dark, cool cellar for an additional month then set to starting my kitchen #chemistryexperiment.

Vintage Red Wine Vinegar

  • Up to 750 ml leftover Red Wine of any variety – in this case, I used: 3/4 bottle Eighty Four Wines 2013 Malbec out of Napa, CA + about 1/4 bottle Bodega Y Vinedos Catena 2019 Malbec out of Argentina
  • 1/2 tsp (2.5 ml) 3% Hydrogen Peroxide (if wine contains sulfites)
  • 1 cup (237 ml) Unchlorinated Water
  • 1/2 cup (118 ml) Raw, Unfiltered, Unpasteurized Vinegar, or a Vinegar Mother – I used Bragg Organic Raw-Unfiltered Apple Cider Vinegar With the Mother

Pour the wine into a dry, sanitized, wide-mouthed, sealable (canning) jar that holds at least a quart. If the wine contains sulfites (it will say so on the back of the bottle), stir in the hydrogen peroxide and let the wine sit for about a minute to neutralize them. Stir in the water with a wooden spoon.

Stir in the raw vinegar well to oxygenate the wine.

Cover the jar with either tightly-woven, quadrupled cheesecloth or a piece of muslin, even a thick paper towel, securing with rubber band/string/a screw on metal canning band, or, like I used, 😉 a zip tie to keep fruit flies out. You can cover it with a paper coffee filter for extra protection from fruit flies if desired. The jar needs to breathe (vent its Carbon dioxide) so do not, under any circumstances, put the metal inner jar canning lid or glass clamped vacuum lid on to seal.

Place your jar on the counter, out of direct light, or in a cupboard, where the temperature stays between 65° and 75°F. The longer you leave it alone to fully develop it’s acidity, especially if you have blended more than one type of wine, the better. Ideally, leave it alone a minimum of one month before checking your acidity level. Your ph should be 4.0 or below.

Bottle half of the vinegar, in a pressure resistant bottle, leaving headspace and replace with the same amount of wine for another batch. Or, you can bottle it all, storing the mother (1/2 C) for another batch or to share with a friend to make her own.

Amazon carries many suitable bottles for storing vinegar

The vinegar can be used immediately (stored in the refrigerator if you like the flavor as it is) or aged longer in your cupboard or on the cool counter top to allow it to mellow further and the flavors to develop more fully.

  • Troubleshooting: Most fermenting problems with vinegar come from trying to ferment in temperatures that are too warm for the fermentation process. Try to keep your jars in a room that’s between 55 and 75°F.
  • Surface growth: If you see anything “scummy” starting to grow on your vinegar while it’s fermenting, scoop off the surface growth. If it smells fine, it is fine.
  • Over-Fermenting: If your vinegar develops an awful smell (like rotting garbage), toss it out. If it smells a little funky (like vinegar), it’s probably fine.
  • Mold Growth: If you’re having problems with mold growing on the vinegar (not simply white scum on the top), toss out the vinegar. Next time, make sure your vinegar is fermenting in a room that’s not above 75 degrees, and is in a place with good airflow.

Are you on Facebook? You might be interested in the things I may not devote an entire blog post to: food news, recipes, food facts, nutritional information, photos and other things that make my mouth water. If so, visit my This Girl Loves To Eat community at: https://www.facebook.com/ThisGirlLovesHerFood

Advertisement

Beyond the “5 Mother Sauces”

While I’ve managed to learn to make passable Béchamel and Hollandaise sauces, the other 3 “essential ‘Mother Sauces’ that all serious cooks should master,” just haven’t been at all essential to meals I prepare. However, the 5 sauces Food & Wine Magazine featured in an April 2019 article are definitely featured much more prominently in my favorite home cooked meals!

  • Chimichurri – Comprised of herbs, olive oil, vinegar or lemon juice, and garlic and/or minced shallot, Chimichurri is a quite versatile, and eminently adaptable sauce that’s great paired with grilled meat or vegetables, or used as a dressing tossed with greens or pasta salad.
  • Hollandaise – F & W’s Justin Chapple shared his secret to making the perfect hollandaise: A blender. Instead of using a double boiler to cook the yolks, Chapple purees the egg yolks in a blender and then streams in hot melted butter, thickening and cooking the hollandaise.  I love this sauce spooned over eggs benedict, steamed or grilled asparagus or as a compliment to a perfectly grilled piece of salmon or steak.
  • Pomodoro – Marinara’s thick, easy, cousin made by simmering crushed tomatoes with a touch of olive oil, garlic, and salt, until it’s thick and a deep rich red. As a sauce for pasta or chicken/veal/eggplant Parmesan, this sauce can easily have some pizzazz added to it by stirring in chopped capers and anchovies, or fresh basil and crushed red pepper.
  • Béchamel – This easy, roux based, sauce is the flavor stepping stone for layering in a lasagna, smearing on a croque madame, or adding cheese so it becomes a mornay sauce for macaroni and cheese.
  • Romesco – Pureed Spanish sauce, made with chilies, tomato, bell pepper, garlic, toasted nuts and olive oil that tastes good on anything from pasta to seafood, grilled vegetables, or even as a spread on a hearty sandwich. Just thinking about these bold, flavorful revisions to the traditional “Mother Sauces” gets my creative culinary juices flowing! #ThisGirlLovesToEat

Turkey Day Prep: Pumpkin Hummus

You know you need something to let people snack on before the big meal, but you don’t want them to be too full to eat the meal you’ve been slaving over for days…

This recipe, from November 2015’s Food & Wine Magazine, takes the edge off but won’t ruin anyone’s dinner! #ThisGirlLovesToEat

How to Make It

In a food processor (I used my Vitamix), combine the chickpeas with the pumpkin, lemon juice, garlic, cayenne and 1/3 cup of water and puree until smooth. Season the hummus with salt and pepper and serve with pita chips or crudités.

Make Ahead

The pumpkin hummus can be refrigerated for up to 3 days.

Pepper-Jelly Cream Cheese Chicken

plated

When I am in a snacking mood, I adore spreading hot pepper jelly on crackers topped with cream cheese.  I don’t get to indulge in that guilty pleasure very often on my #KetoDietPlan, but I had a couple of tablespoons left in a jar of my favorite cranberry, pomegranate, pepper jelly and wondered why I couldn’t use the same combination with chicken, and still stay in my Keto guidelines, so I did.  #ThisGirlLovesToEat

Pepper Jelly Cream Cheese Chicken

  • 4 Skin-on, Bone-in Chicken Thighs (about 8 oz each)
  • 4 TBLS Cream Cheese (softened)
  • 3 Cups Fresh Baby Spinach Leaves
  • 1 tsp Nutmeg (divided)
  • 2 TBLS Pepper Jelly (Any Flavor)
  • Olive Oil Spray

Preheat oven to 375° F and spray the bottom of an 8 x 8 Pyrex baking dish with olive oil cooking spray.

Using your hands (I wear disposable gloves) combine the  softened cream cheese, 1/2 tsp nutmeg, and the spinach leaves in a medium bowl.

Place the thighs in your backing dish and gently lift the skin away from the meat to form a pocket sos you can divide the spinach mixture and fill each thigh with it.  Once you’ve filled each thigh pocket (A.K.A. Saddlebag LOL) spray the skin lightly with olive oil spray then sprinkle the remaining 1/2 tsp of nutmeg & spoon 1/2 tbls of the jelly on top of each thigh.

inthepan

Bake for 40 minutes, or until a thermometer registers 165° – 180° F.  The higher the temperature the more the muscle fiber breaks down and the more tender your meat will be.

Nutrition Information (Serving Size 1 Thigh)

  • 280 Calories
  • 19 g Fat
  • 7 g Carbs
  • 21 g Protein


Thai Street Chicken

thaistreetchickenKeith Schroeder of Cooking Light Magazine wrote a book, and received a James Beard Foundation Focus on Health Book Award, Mad Delicious – The Science of Making Healthy Food Taste Amazing!, in 2014 that doesn’t just talk about the what and how of cooking great meals, but also the why.  This recipe is one that was featured in both his book and the magazine, and perfectly illustrates why guests at his table love every dish this Atlanta chef prepares!

If you replace the brown sugar with Sukrin Gold, this recipe can easily become a flavorful, Keto Friendly meal.

Thai Street Chicken

  • 1/2 Cup Cilantro Stems
  • 1/2 Cup Parsley Stems
  • 1 TBLS Brown Sugar
  • 2 tsp White Pepper
  • 2 TBLS Fish Sauce
  • 1 TBLS Oyster Sauce
  • 4 crushed garlic cloves (I use 4 tsp of jarred, crushed garlic)
  • 1 + 1/2 Pounds Boneless/Skinless Chicken Thighs (About 6)
  • Olive Oil Cooking SPray
  • 1 Cup Julienned Carrots
  • 2 Peeled/Scored/Sliced Cucumbers
  • 12 Sprigs Fresh Cilantro
  • 2 Limes Cut into Wedges

Put the parsley & cilantro stems into a gallon sized zip bag and, using a rolling pin or can of vegetables, bruise the stems by pushing down and rolling over the stems from outside the bag.  Add the brown sugar (or brown sugar alternative), the white pepper, the fish and oyster sauces, and the garlic and combine.  Add the chicken, zip the bag closed, and massage the marinade into the thighs.  Refrigerate for 30 minutes.

While the chicken is marinating, prepare the dipping sauce.

Thai Dipping Sauce

  • 6 TBLS White Vinegar
  • 6 TBLS Brown Sugar (or Brown Sugar Alternative)
  • 1/4 Cup Shaved Shallots
  • 4 TBLS Fresh Lime Juice
  • 1 tsp Fish Sauce
  • 2 Minced Thai Bird Chiles
  • 1 Clove Garlic, Crushed (1 tsp jarred crushed garlic)
  • 1/2 tsp White Pepper

In small saucepan, over medium heat, bring the vinegar, sugar and shallots to a boil.  Simmer for another 10 minutes then remove from heat.  Puree with an immersion blender (or in a blender).

Cool and then stir in the lime juice, fish sauce, chiles, garlic and white pepper.

After 30 minutes, removed the marinated chicken from the zip bag and discard the remaining marinade.  Put the chicken thighs on metal skewers.  Make sure your chicken is long and flat, you don’t want cubes with this style chicken.

Heat an oven safe (if cooking in your oven) grill pan, sprayed with Olive Oil cooking spray, over medium-high heat (or in a 300° oven).

Place the skewers on the hot grill and cook for 15 minutes.  Flip the skewers over and cook another 15 minutes.  You should be able to easily pull off a cooked piece of the chicken when it’s done.  Remove the skewers from the heat, slide the chicken off of the skewers and place on one side of a platter to rest for 10 minutes.

On the other side of the patter, in rows, line up the carrots, cucumber, cilantro springs, and lime wedges.  Serve with the dipping sauce.

Amazing Lemon Everything Sauce

There’s no way around it, when you are dieting or following a low carb lifestyle, you will get tired of the same old, go-to, chicken or fish recipes.  It’s inevitable.  You can avoid this by keeping a stockpile of flavorful sauces to change up your routine.  This lemon sauce is one I’ve used forever!  It found it in the November 2014 edition of Cooking Light Magazine, and it’s a perfect solution to chicken burn out!  This sauce is so versatile that you can spoon it over any style chicken or fish, use it on veggie kebabs, drizzle it over a pile of zoodles, sauteed or steamed asparagus, spinach, broccoli, cauliflower, or even dip luscious steamed artichoke leaves in it!

Amazing Lemon Sauce

  • 2 Cups Unsalted Chicken Stocklemoneverythingsauce
  • 3 Large Eggs
  • 2 TBLS Grated Lemon Zest
  • 2 + 1/2 TBLS Fresh Lemon Juice
  • 1/2 tsp Kosher Salt
  • 1 TBLS Olive Oil

Heat the chicken stock over medium-high heat in a heavy, medium saucepan to 180° or until tiny bubbles form around the edge. Do not boil.  Once you reach the tiny bubble stage, turn the heat down as low as you can.

Combine the eggs, lemon zest, lemon juice, and salt in the bowl of your stand mixer fitted with the wire whip attachment.  Beat on medium until the eggs are frothy and lighter in color.  If you don’t have a stand mixer, you can use a hand blender or whisk by hand in a medium bowl or use your Vitamix or blender.

Slowly add about a cup of the hot chicken stock into the egg mixture 1/4 cup at a time, while stirring on low speed, or lightly by hand, constantly with a whisk.

Once you’ve mixed the cup of stock in, add the egg, lemon, and stock mixture back to the pot, stirring to combine.  Warm the sauce gently, until it thickens enough to a spoon. Turn off the heat.

Whisk in the olive oil to finish and serve warm over your favorite meat, fish or vegetables.  #ThisGirlLovesToEat

Nutrition Information (per 2 TBLS)

  • 19 Calories
  • 1.4 g Fat
  • 1.5 g Protein
  • <1 g Carbs
  • 28 mg Cholesterol
  • 84 g Sodium
  • 5 mg Calcium

Air Fried Skinny Bloomin’ Onion

outbackonionWhile there aren’t many of them left around near me, the worst part of going to Outback Restaurant was having to pass up their Blooming Onion because of the 155 whopping grams of fat and 123 grams of Carbs from the corn starch and flour they have in them from the deep frying.  Thankfully there is a work around now that there’s the Dash air fryer, using this slimmed down recipe, that results in a total of 8 grams of fat and 10 grams of carbs per serving!  That makes this a treat I can add to my #KetoLifestyle on occasion, which makes me very happy!

Air Fried Skinny Bloomin’ Onionairfriedonion

  • 1 Large Sweet Onion (I use a Vidalia) about 1 Pound
  • 6 ounces Beer or Seltzer
  • 1+1/2 Cup Flour (I use Bob’s Red Mill Paleo Baking Flour Mix)
  • 1 Egg
  • 2 tsps Salt
  • 1 tsp Cayenne Pepper
  • 2 TBLS Paprika
  • 1/2 tsp Dried Thyme
  • 1/2 tsp Dried Oregano
  • 1/2 tsp Ground Cumin
  • Freshly Ground Black Pepper
  • Olive Oil Spray

Peel and cut your onion: 1. Cut off 1/2 inch from the pointy stem end of the onion, then peel. 2. Place the onion cut-side down. Starting 1/2 inch from the root, make a downward cut all the way through to the board. 3. Repeat to make four evenly spaced cuts around the onion. 4. Continue slicing between each section until you have 16 evenly spaced cuts. 5. Turn the onion over and use your fingers to gently separate the outer pieces.

In one bowl mix the beer, 1/2 cup of the flour, and the egg.  In a second bowl mix the remaining flour and the seasonings.

Dip the onion in the beer batter first and be sure to get in between all of the petals, next dip the onion in the flour and spice mixture making sure that there is coverage in between every petal. I wear rubber gloves and use a separate hand for wet and dry.

Spray the entire onion with Olive Oil Cooking Spray and Air fry for 13-15 minutes or until golden brown and done in all of the crevices.

While the onion is cooking prepare the sauce.  Combine:

  • 2 TBLS Mayonnaise
  • 2 TBLS Sour Cream
  • 1+1/2 tsp Ketchup (I use sugar free ketchup)
  • 1/2 tsp Worcestershire Sauce
  • 1 TBLS Drained Horseradish
  • 1/4 tsp Paprika
  • Pinch Cayenne Pepper
  • Freshly Ground Salt & Pepper to taste

Cover and refrigerate until ready to serve.

Serve the onion piping hot with the sauce.  #ThisGirlLovesToEat

Avocado Fries II

4

When you get a new #KitchenToy, like the 6 qt, 1700 Watt #DashDeluxeAirFryer you experiment.  My husband said he loved the recipe last week for Air Fried Avocado Fries, but he drenched them in Spicy Ranch dressing, so I’m not sure if he was being objective, and the amount of salt from the almond flour in the main breading component just wasn’t doing it for me, so I decided to give them another shot.  This version wasn’t as heavy, or as salty, and, I think, much better suited to the buttery freshness of the avocado.

Air Fryer Avocado Fries II

  • 2 Medium Avocados
  • 2 TBLS Coconut Flour
  • 2 Large Eggs
  • 3 TBLS Extra Fine Almond Flour
  • 2/3 Cup Crushed Pork Rinds (Any Flavor)  I used 4505 Cracklins BBQ

Using a rolling pin, meat tenderizer, or even a rubber mallet from the garage, crush your pork rinds (TIP: I leave them in their bag or use a paper/zip bag to avoid a big mess) until they 1resemble coarse crumbs.  Using a fork, combine with the almond flour in a shallow dish.

Put the coconut flour in a zip bag or shallow bowl.  In a separate bowl lightly beat the eggs.

Slice the avocado in half, remove from the shell, remove seed and slice each half into 4 portions.

Dip each slice in the egg wash then immediately coat with the crumb mixture.  Lay in a single layer in the basket of your air fryer.

2

Set the temperature to 400° F and set your timer for 8 minutes of cooking time.  Open the drawer at with 1 minute remaining, and, depending on the thickness of your slices, you may want to add 1-2 minutes if you want them crispier/browner.  When your slices have reached your desired shade of brown, remove the basket from your Air Fryer and immediately move them to a serving dish.  I served with Hidden Valley Spicy Ranch dressing, which has only 2 grams of carbs per 2 TBLS serving, making this a perfect #KetoFriendly treat!  #ThisGirlLovesToEat

Fiery Spinach Artichoke Dip

chileartichokedipporkrindsA friend complained that she was spending #SuperBowlSunday at the home of someone who “only eats Keto,” like that was a fate worse than death for her snack choices during the game.  To me that sounded like heaven.  She had no idea what to bring, so I suggested she bring this #KetoFriendly dip with plenty of celery sticks and a couple of bags of 4505 pork rinds and she’d be the hit of the party.  I haven’t talked to her today, but she didn’t end up beside me on my couch, so I assume she wasn’t booted from the party. 😉

Fiery Spinach Artichoke Dip

  • 1 TBLS Butter
  • 1 – 4 oz Can Diced Chiles (Any type and heat level) I used Mild Green Chiles today.
  • 3/4 Cup Chopped Green Onion (white and green parts)
  • 3 Cups Fresh Spinach, chopped
  •  1 – 14 oz Can Artichoke Hearts (in water) drained & chopped
  • 8 oz Cream Cheese, softened
  • 1/4 Cup Mayonnaise
  • 1 tsp Salt
  • 1/4 tsp Black Pepper
  • 1/4 tsp Paprika
  • 1/8 tsp Cumin
  • 1 Clove Garlic, finely chopped
  • 3/4 Cup Shredded Cheddar Cheese
  • 3/4 Cup Shredded Pepper Jack Cheese

Preheat oven to 350°F and grease an 8×8 baking pan with butter.  Combine the shredded cheeses in a bowl and set aside.

In a medium skillet over medium-high heat, melt butter.  Add green onions to the butter and saute for 2-3 minutes then add the diced peppers.  Cook another 2 minutes then layer the spinach on top (do not stir in) and continue cooking another 2 minutes.  Add the salt, pepper, paprika, cumin, and garlic to the pan and stir to combine the vegetables and spices thoroughly.  Remove from heat and set aside to cool.

In a medium mixing bowl, combine chopped artichokes, cream cheese, and mayonnaise, and mix.  Stir in the vegetable mixture from the pan and 1 Cup of the combined shredded cheese (reserve 1/2 cup to sprinkle on top). Stir until completely combined.

Pour mixture in the greased baking dish and spread evenly.  Top with remaining cheese and bake for 20-25 minutes or until bubbly and golden brown. Serve warm with zero carb pork rinds or low net carb veggies like cucumber slices, celery sticks, florets o broccoli or cauliflower, or slices of bell pepper!

This dip also doubles as a great topping for chicken breasts, pork chops, and even steak!  I’ve even rolled it into slices of deli turkey breast, I’ve had sliced extra thick, for a different take on lunch.  Let me know what you think or how you make it your own! #ThisGirlLovesToEat


Avocado Lime Ranch Dressing

indexyresolutions

For those who make them, the time to set your resolutions for 2019 is quickly approaching.  If you’re one of the many vowing to lose a few pounds, why wait until after the first of the year to start?  You can get a head start on your goals quite easily.

It’s not hard at all to cut carbs and sugar from your diet while still enjoying the things you like, and making just that small change can make a big impact on your scale quite quickly.  A great place to start, where even guests at your holiday parties won’t notice a difference: Dips & dressings for vegetables or salads.

Avocado Lime Ranch Dressingavcadodipdressing

  • 1 medium ripe avocado
  • 1/3 cup sour cream
  • 1 TBLS mayonnaise
  • 1/3 cup heavy cream
  • 1/4 cup loosely packed chopped fresh cilantro
  • 1+1/2 tsp garlic powder
  • 1/2 tsp onion powder
  • 1/2 tsp salt
  • freshly ground pepper (to taste)
  • 2 TBLS olive oil
  • juice from 1 medium lime (about 2 TBLS)
  • 1-2 TBLS shallot finely minced

Add all ingredients to your food processor or blender and process until smooth.  Using a rubber spatula, take a taste.  Adjust your seasonings then scrape all contents into a container with a tightly fitting lid and store in your refrigerator.  Use up within a week.

**TIP:  If the dressing is too thick, pour some into a smaller bowl or cup and add a TBLS or two of milk to thin it down to a better consistency.

This is great on salads, over steamed vegetables, as a dip for fresh vegetables or tortilla chips, and even with Mexican food.

Nutrition information:  Calories 80; Fat 9g; Protein 1g; Net Carbs 1g  #ThisGirlLovesToEat