Double Lemon Scones

My niece is marrying a boy from England so, it’s time to brush up on some culinary delights from across the pond! This one comes courtesy of Justin Chapple at Food & Wine Magazine.

Ingredients

  • 2 1/4 cups all-purpose flour, plus more for dusting
  • 1/4 cup granulated sugar
  • 1 tablespoon baking powder
  • 2 tablespoons finely grated lemon zest (can add more to zing up the lemony goodness) plus 1/4 cup fresh lemon juice
  • 1 teaspoon kosher salt
  • 1 tablespoon poppy seeds (optional)
  • 1 stick unsalted butter, cut into cubes and chilled
  • 1 cup heavy cream, plus more for brushing
  • 1 cup confectioners’ sugar

Directions

  1. Preheat the oven to 375°. Line a large baking sheet with parchment paper. In a food processor, pulse the 2 1/4 cups of flour with the granulated sugar, baking powder, lemon zest, salt and 2 teaspoons of the poppy seeds. Add the butter and pulse until it resembles coarse meal. Add the 1 cup of heavy cream and pulse until evenly moistened.
  2. Transfer the dough to a lightly floured surface, gather any crumbs and knead a couple of times until the dough just comes together. Using a lightly floured rolling pin, roll the dough into a 9-by-6-inch rectangle. Using a large knife, cut the dough into 8 scones. Transfer the scones to the prepared baking sheet and brush with heavy cream. Bake in the lower third of the oven for about 25 minutes, until firm and lightly golden. Let the scones cool.
  3. In a medium bowl, whisk the confectioners’ sugar with the lemon juice and the remaining 1 teaspoon of poppy seeds. Brush the scones with the glaze and let stand until set, about 15 minutes.

Make Ahead 

The scones can be stored in an airtight container for up to 2 days.

Are you on Facebook? You might be interested in the things I may not devote an entire blog post to: food news, recipes, food facts, nutritional information, photos and other things that make my mouth water. If so, visit my This Girl Loves To Eat community at: https://www.facebook.com/ThisGirlLovesHerFood

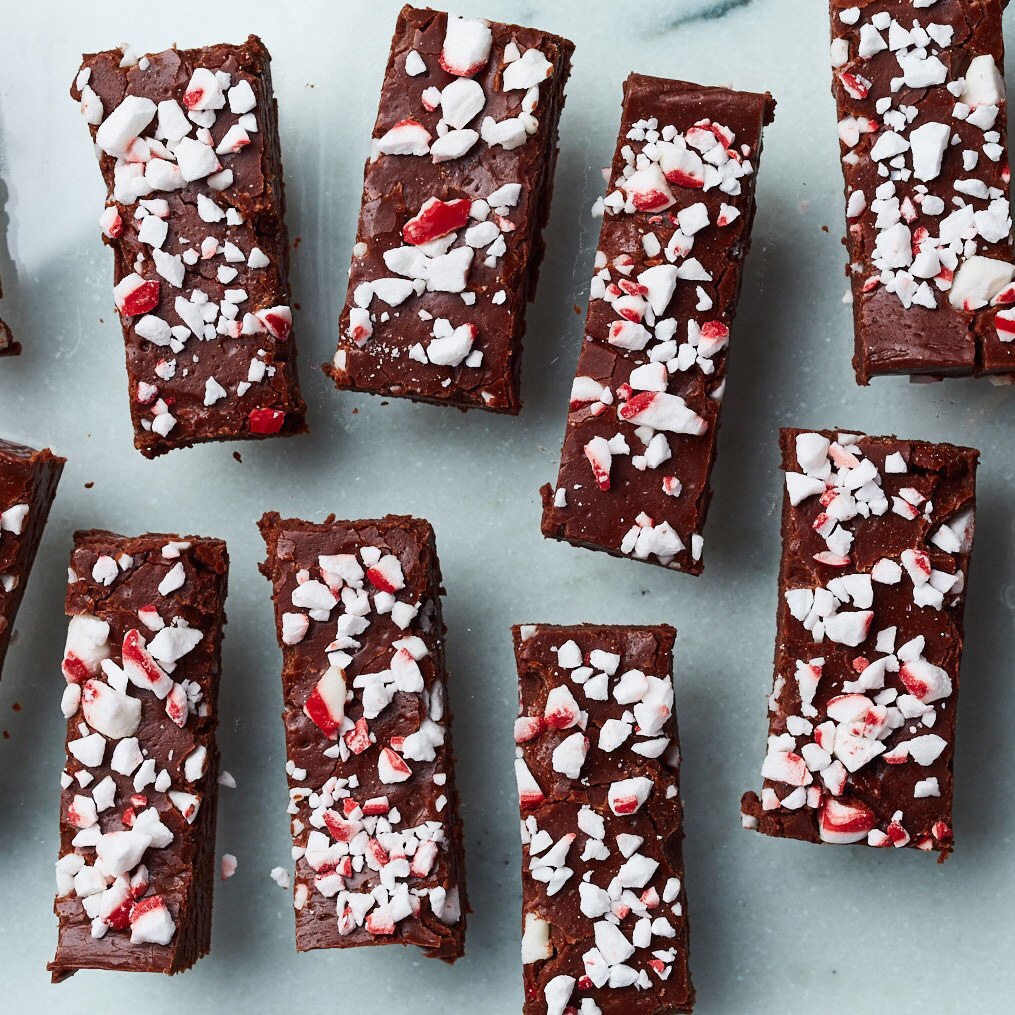
Holiday Bites: Chocolate Peppermint Fudge

One of my favorite things about the December holiday season is the permission we all seem to give ourselves to indulge in every hearty, rich, gooey, decadent dish and treat we can before the calendar changes over welcoming a new year. Calories, fat, and carbs don’t count in December, right? 😂😂

Some treats I make year after year, but I’m always looking for new ways to indulge my love for all things food. This year I tripped across a 2016 recipe from Bon Appétit that has two of my favorite holiday ingredients: chocolate and peppermint. It’s one that’s joining the annual must haves list for sure! #ThisGirlLovesToEat

Chocolate Peppermint Fudge

  • Nonstick vegetable oil spray
  • 2¼ cups sugar
  • 1 cup heavy cream
  • 3 tablespoons light corn syrup
  • ½ teaspoon kosher salt
  • 6 ounces unsweetened chocolate, chopped
  • 4 tablespoons butter, cut into pieces
  • 2 teaspoons vanilla extract
  • 1 teaspoon peppermint flavoring or extract or ¼ teaspoon peppermint oil
  • 2 ounces soft peppermint puff candies, finely crushed

Line an 8×8″ baking dish with foil, pressing into edges. Lightly coat with nonstick spray. Heat sugar, cream, corn syrup, salt, and 2 Tbsp. water in a medium saucepan over medium, stirring, until sugar dissolves. Add chocolate and stir until melted and mixture is smooth, then bring to a boil. Fit saucepan with candy thermometer and increase heat to medium-high. Cook, brushing down sides of saucepan with a wet pastry brush as needed to dissolve sugar crystals, until thermometer registers 238°.

Immediately pour mixture into a large bowl (do not scrape bottom or sides of pot). Dot top of mixture with butter; do not stir. Rinse thermometer, removing any sugar crystals, pat dry, and fit on bowl. Let mixture sit until thermometer registers 110°, 30–45 minutes.

Remove thermometer. Add vanilla extract and peppermint flavoring to mixture and beat with a hand mixer on high speed until mixture is light and thick like frosting and has lost its high gloss (will still have a slight sheen), about 4 minutes.

Scrape into prepared pan; smooth surface, then top with peppermint candies, pressing gently into surface. Cover with plastic and let fudge sit at room temperature until set, at least 4 hours.

Using foil, remove fudge from pan, peel away foil, and cut fudge into a 6×6 grid to make 36 squares.

  • Do Ahead: Fudge can be made 3 days ahead. Keep stored at room temperature.

  • Tips: 1) Crush the candies in a zip bag using a rubber mallet or rolling pin, and 2) A hand mixer is better than a stand mixer for this recipe.

Treat Week: Toasted Pecan Turtles

pecanturtles

We’re in the home stretch of #TreatWeek.  Under a week to go and houses in #EveryTownUSA smell of sweet things destined for sharing with friends and family alike.

Except for the old standbys of fudge and truffles, I usually shy away from making candy, but this year I got coaxed into making turtles, after seeing how ridiculously expensive they were to buy so few in the stores.  Admittedly, I cheated by not making my caramel from scratch, but if it all tastes good in the end, does it matter?  Considering the amount of time it saved me, I’m thinking nope!

Toasted Pecan Turtles

  • 12 oz Pecan Halves
  • 1 – 11 oz Bag Individually Wrapped Caramels (I used Kraft)
  • 2 TBLS Water
  • 1+1/2 – 12 oz Bags Milk Chocolate Chips (I prefer Ghirardelli, but had Nestle’ on hand and the candies tasted just as good)
  • 3 tsp Crisco Solid Shortening

In preheated 350°F oven, on an ungreased baking sheet, toast a pecans in a single layer for 8+1/2 minutes.  Remove from oven and immediately move nuts to a bowl so they stay warm while you’re working with them.

In the microwave, melt the chocolate chips together with the shortening in 30 second intervals until you have a nice, not too thick consistency.

Line 3 baking sheets with waxed paper.  Using a fork, dip into the chocolate and make a 1 – 1+1/2″ thin circle on the waxed paper.  Fan out 3 or 4 pecans in a Y or X pattern.  You want the chocolate to hold the pecans in place and act as a landing spot for any caramel that may spill over in the next step.  Continue until your pans are full or you run out of big enough pieces of pecan to work with.

While the chocolate and pecans start to set up, unwrap all of the caramels and put them into a 1 qt saucepan with the water.  Heat over low-medium heat, stirring constantly, until caramels are melted.

Using a 1/2 tsp measuring spoon, quickly spoon the caramel over the pecan clusters, making sure caramel is touching each of the pecans.

Rewarm chocolate to thin it again, then spoon a small amount on top of each layer of caramel. Put sheets into the refrigerator for 1-2 hours, or until hardened.  If space is an issue, use a cooling rack between sheets so you can stack them.  #ThisGirlLovesToEat


Treat Week: Easy Peanut Butter Truffles

My haste to catch up on my #TreatWeek blog posts has me doing #TwoADays, so here’s today’s bonus post: an easy to create peanut butter truffle that lets you bake a quick batch of cookies while the truffle filling is chilling in the refrigerator waiting to be coated.

peanutbuttertruffle

A couple of notes: even a few drops of water can ruin your coating chocolate.  If you are accustomed to using a double boiler to melt your chocolate, there are easier methods to avoid the chance of having water seize up your chocolate.  While I love, and have gotten more than 20 years’ use out of my Calphalon Professional Anodized Aluminum pots and pans, I have begun slowly replacing them with Le Creuset Cast Iron skillets and Dutch ovens.  When doing things like making candy and melting chocolate, as long as I pay attention, I no longer have to use a double boiler because the heat conduction is so much better!

Easy Peanut Butter Truffles

  • 1/2 Cup (1 Stick) Butter
  • 2 Cups Sugar
  • 1 5 oz Can Evaporated Milk
  • 2 Cups Mini Marshmallows
  • 3/4 Cup Creamy Natural (NOT with the oil on top) Peanut Butter
  • 1/2 tsp Vanilla
  • 1 – 12 oz Bag Dark or Semi-Sweet Chocolate Chips ( I prefer Ghirardelli)
  • 2 tsp Crisco Solid Shortening

Butter the inside side of a heavy saucepan.  Add sugar, evaporated milk, and the rest of the stick of butter. Cook and stir over medium-high heat until mixture is boiling. Reduce heat to medium; continue at a moderate boil for 12 minutes, stirring frequently.

Remove from heat. Stir in marshmallows, peanut butter, and vanilla. Transfer mixture to a medium bowl. Chill for 30 to 45 minutes.

Scoop into 1-inch balls and place onto wax paper lined baking sheet. Freeze for 15 minutes.  In a medium saucepan, combine chocolate and shortening. Cook and stir over low heat until melted.

Dip balls, one at a time, into melted chocolate.  Set wire rack over the lined baking sheet. Place chocolate covered balls on rack to let chocolate setup. If you want to add crushed peanuts to outer coating, make sure to drop them into the coating while it’s still wet so they stick.  You can also use #CandyMelts to add decorative swirls either before or after the coating sets.  #ThisGirlLovesToEat

Treat Week: Truffle Tuesday

redwinetruffles

Due to the death of a close friend, this week’s postings got delayed, so, as you can see, Truffle Tuesday turned into Truffle Sunday

Day 2 of #TreatWeek is one of my favorites: #TruffleTuesday.  Or, as my family (& hairdresser) calls it, the day I start making make #BoozeBalls!

The first, and quickest to prepare are my soft centered Red Wine Truffles.  These truffles are only as good as the wine you use to make them, so I always use the last glass of whatever great blend I have open.  This year that meant that the truffles were made with #2013MountVeederReserve.  A blend of Cabernet Sauvignon, Merlot, Petit Verdot and Malbec.  This blend worked beautifully with the dark chocolate and made for a decadent treat!  A few important words of advice about these truffles:

  • Make sure you chill your truffle filling for AT LEAST 3 hours so it’s easy to scoop.
  • Freeze your scooped portions for at least 30 minutes & try to make them as close to balls as possible.  These can’t really be rolled.  Mine never look #CandyShopPretty, but they taste good. 😉
  • If your truffle filling is not holding it’s shape; i.e. it’s too thin, don’t worry, HERE IS THE FIX: Return your truffle filling to your pan. Warm it over low heat so that it is easy to stir but not completely liquified. Turn off burner and stir in unsweetened cocoa powder, 1 TBLS at a time, until your filling reaches desired consistency.  You don’t want it too thick, remember it will thicken when it chills in the refrigerator.
  • Melt your coating chocolate while your scoops are in the freezer so your coating has time to cool a bit.
  • If you intend to use the candy melts to decorate the outer/hard layer get it prepared in advance.
  • If you are sprinkling any type of decoration that will stick to the outer coating do it as soon as you coat the individual truffle.  The coating hardens very quickly on the cold truffles.
  • Because of their soft centers, these truffles must be kept refrigerated for best presentation and taste.

Red Wine Truffles

  • 2 – 12 oz bag dark chocolate chips (I like Ghirardelli)
  • 3/4 Cup heavy cream
  • 5 TBLS Good Red Wine – Anything with Malbec, Cab Franc, or that’s BIG and BOLD
  • 2 tsp solid Crisco shortening

Heat heavy cream in a saucepan to a simmer over medium heat. Remove from stove and add 1 bag of the chocolate chips and red wine. Let sit for about 5 minutes. Stir until everything is fully incorporated and smooth. Remove to a smaller bowl, cover and chill for at least 3 hours.

Once the truffle filling has chilled, using a cookie scoop or small spoon, scoop out chocolate and form into truffle balls. Place on a parchment-lined baking sheet and freeze for about 30 minutes

While truffles are in the freezer, in a medium saucepan, combine chocolate and shortening. Cook and stir over low heat until melted.

Take 6 truffles out of the freezer at a time and pinch them slightly to make sure they form a “truffle like dome” for the top side.  If, when you start working with the chilled truffles, they aren’t holding their shape, or seem to be getting runny really fast, STOP! and see the note in RED above.  If all is well, continue to the next step.

Working quickly, coat bottom of truffles first and place on a plate lined with waxed paper, then, using a spoon, coat the top of each truffle and decorate with red & gold sprinkles if desired.

They dry/harden on top quickly.  Move on to the next 6 and then move the plate to the refrigerator until it’s time to serve.  #ThisGirlLovesToEat

Treat Week: Spiced Keto Gingerbread Cookies

KetoGingerbreadMen

I love gingerbread cookies but hate making them.  The dough is a sticky mess and has to be refrigerated for hours and re-rolled before it can be cut and baked.  It’s an all day project that I just don’t want any part of, so I don’t make them.  This Keto recipe changed all of that.  It’s fast and easy, only has to be refrigerated for 30 minutes.  I can do that.  #ThisGirlLovesToEat

Easy Spiced Gingerbread Cookies

  • 1/4 Cup Butter softened
  • 2 Cups granulated Stevia (like Swerve)
  • 1 tsp Vanilla
  • 1 TBLS Molasses (Use whatever strength you like, or none at all)
  • 3 Large Eggs
  • 3 TBLS ground Ginger
  • 4 TBLS Cinnamon
  • 1/4 tsp ground Cloves
  • 1/2 tsp ground Nutmeg
  • 1/4 tsp White Pepper (optional)
  • 3 Cups Almond Flour (the finer ground the better)
  • 1 tsp Baking Soda
  • 1/4 tsp Salt
  • 1/2 TBLS Psyllium (helps the cookies stay firm & hold their shape)

In bowl of your stand mixer beat the sugar substitute, butter, molasses, vanilla, and eggs together until fully. Next add all the spices. Finally, add the almond flour, psyllium, baking powder and salt to the mix until just combined. Do not over beat.

Roll out the dough with a rolling pin between two sheets of parchment paper.  You want the dough to be somewhere between 1/8 and 1/4″ thick.  Put the dough into the refrigerator to chill for about 30 minutes before cutting.

Preheat oven to 325°F and remove dough from the refrigerator.  Cut dough using cookie cutters and place on ungreased cookie sheet. Do NOT use parchment paper or any other type of liner.

Bake 12-15 minutes depending on the thickness of your cookies.  They may not feel like they are done, but they will firm up as they cool.  Leave sitting on the pan for a few minutes and then finish cooling on a wire rack.

Decorate with Keto Royal Icing if desired:

  • 4 TBLS Powdered Stevia (like Swerve) + 1 TBLS Water / Heavy Cream or Milk.  I use 1 TBLS Heavy Cream and about 1/2 TBLS of water to thin it down a bit.
  • You can use a decorating bottle or bag fitted with a decorating tip, or a plastic lunch bag with the corner cut off and the decorating tip slipped inside.

Treat Week is Here!

dippedmacaroons2

Christmas is two weeks from tomorrow.  Those words just struck fear into most of the people who read them, me included.  I haven’t gotten my tree yet, very few decorations are out, but all is not complete chaos, I have gotten my baking organized.  Organized, not done. 😉

We’ve all got to get our acts in gear though, it’s time to take treats into the office, get them sent to the kids’ schools, and have them ready for coaches, babysitters, postal carriers, UPS drivers, dry cleaners, house keepers, gardeners, pool cleaners, and the rest of the village we need to show our appreciation to for helping make our lives a little bit easier.

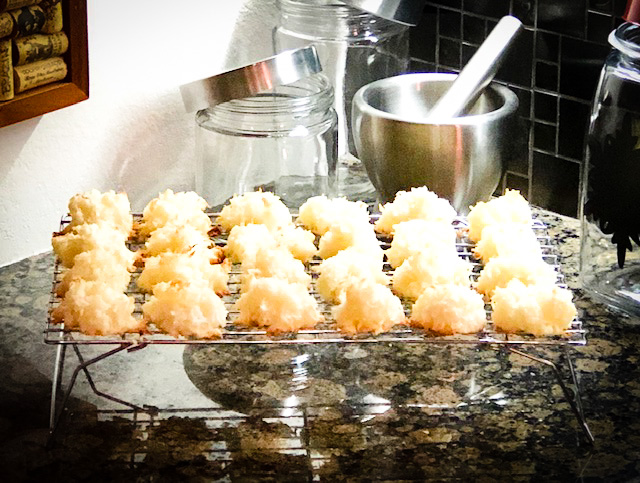
One of my favorite cookies to make is the macaroon.  While many people proclaim themselves #CoconutHaters, I push them out of the way and take the stand that it just leaves #MoreForMe!  I love the big glob of sweet, juicy coconut with the browned bottom and edges, and I don’t skimp when I dip my macaroons in the chocolate either, they get a solid coat!

I’ve tried all the fancy recipes and frankly none are better than the one found on the  #BackOfThePackage of Baker’s Angel Flake Coconut!

CoconutMacaroons

Baker’s Coconut Macaroons

  • 1 – 14 oz pkg Baker’s Sweetened Angel Flake Coconut (5 Cups)
  • 2/3 Cup Sugar
  • 6 TBLS Flour
  • 1/4 tsp Salt
  • 4 Egg Whites
  • 1 tsp Almond Extract

Heat the oven to 325°F then, using butter, lightly grease and flour two cookie sheets.

Put the coconut into a medium mixing bowl and run a large fork through it to separate any clumps.  Sprinkle the sugar over the coconut and mix it in thoroughly, then do the same with the flour and salt.  Using a rubber spatula, mix in the egg whites and almond extract until all is well combined.

Using a tablespoon as a scoop, place 18 loosely packed mounds of the coconut mixture onto each of the cookie sheets.  Do not overload the spoon, roll into balls or pack too tightly.  You want the heat to circulate and get inside so the cookies bake completely without burning underneath.

Bake for 20-22 minutes, or until bottoms are golden brown and you start to see edges crispy brown on some of the pieces on top of the cookies.  Remove from oven and take immediately from the pan to a wire rack to finish cooling.

If you are going to dip in chocolate, it’s easy:  I use milk chocolate chips, but you can use any kind you like, you can even get the dipping chocolate they sell in the fruit department by the bananas and strawberries.  I melt about 1/2 cup at a time in 30 second increments and then dip half the cookie in until it has as much chocolate as I like.  I move the cookies to wax paper to harden.

Store the cookies in a sealed container with wax paper between the layers.  #ThisGirlLovesToEat