What The F…?

This article from Epicurious.com needs no more introduction or explanation. #MindBlown

Leave the Peel on When You Use a Garlic Press

Not peeling garlic takes this gadget from unnecessary to unparalleled.

BY DAVID TAMARKIN

June 11, 2015

A good cook is an open-minded, curious cook. But when I saw my friend take out his garlic press, my face puckered into a judgemental scowl. I was throwing some serious shade.

“Don’t worry, don’t worry,” my friend said. “I know how to use it properly.”

Poor thing. He thought I was doubting his garlic press skills. Dude didn’t realize that I was hating on the mere presence—the idea! the existence!—of the press itself.

What my friend did next wiped the judgemental expression from my face.

First, he opened the press and inserted an unpeeled clove of garlic.

Photos by Chelsea Kyle, food styling by Katherine Sacks

Then he closed the press and squeezed on the handle, extracting golden, fragrant minced garlic.

“What’s your problem?” my friend asked. My expression had gone from shady to incredulous.

“The peel!” I said. “Where’s the peel?”

My friend opened the press. The peel, of course, was inside, emptied of garlic but barely torn. None of it, not even a speck, had gotten mixed up with the minced garlic on the cutting board.

That’s when my feelings about the garlic press changed. Prior to this moment, I’d seen the press as a clunky and unnecessary tool. If I was going to spend the time to peel a clove of garlic, I may as well take the extra 30 seconds to run my knife over it, right?

But now that I knew that you didn’t have to peel the garlic? This was a game changer. Not to mention a time saver. Visions of garlic mojo—not to mention Epi’s Food Editor Rhoda’s garlic oil—raced through my head. Mince 8 cloves of garlic? Make it 20. I don’t care. I have a garlic press!

Actually, no I don’t.

I pointed to my friend’s press. “Can I borrow that?”

That was weeks ago. I still haven’t returned it.

  • I, for one, will be finding an excuse to dig out my #GarlicPress today! #ThisGirlLovesToEat

Are you on Facebook? You might be interested in the things I may not devote an entire blog post to: food news, recipes, food facts, nutritional information, photos and other things that make my mouth water. If so, visit my This Girl Loves To Eat community at: https://www.facebook.com/ThisGirlLovesHerFood
Three Pepper Cacio de Pepe

Recipes like this are why it’s so damn hard to stay Keto. 😂😂😂 Food & Wine Magazine just keeps enticing me to #TheDarkSide!

Three Pepper Cacio e Pepe

  • 3 tablespoons extra-virgin olive oil
  • 1 teaspoon crushed pink peppercorns
  • 1/2 teaspoon coarsely ground Tellicherry pepper
  • 1/2 teaspoon ground Szechuan pepper
  • 12 ounces uncooked bronze-cut fusilli col buco pasta (such as Giusto Sapore) or bucatini pasta
  • 1 1/2 ounces pecorino Romano cheese, grated with a Microplane grater (about 1 cup), plus more for garnish
  • 1 1/2 ounces Parmigiano-Reggiano cheese, grated with a Microplane grater (about 1 cup)
  • 1 Cup reserved pasta cooking water

Are you on Facebook? You might be interested in the things I may not devote an entire blog post to: food news, recipes, food facts, nutritional information, photos and other things that make my mouth water. If so, visit my This Girl Loves To Eat community at: https://www.facebook.com/ThisGirlLovesHerFood

Turkey Day Prep: Cute & Fun Napkins

I’m not a particularly artistic or crafty girl, but this project from #FoodNetwork looks like something even I can do! Made from paper napkins, these turkey napkins are fun, fairly easy to assemble and a surefire way to add a little extra gobble to every place setting. It’s a great way to get little hands involved – or a project for those not cooking that will keep “helpers” out of your way in the kitchen! Here’s their step-by-step guide. #ThisGirlLovesToEat

To make the turkey napkins you’ll need:

  • 8″ x 4″ (Rectangular Fold) Red Paper Napkins (1 per place setting)
  • 8″ x 8″ (Square) Orange Paper Napkins (1 per place setting)
  • Woven Brown Napkin Rings (1 per place setting)
  • Peel Off Glue Dots (4 per place setting)
  • Glue on Google Eyes (2 per place setting)
  • Orange Felt & Scissors

Assembly:

  1. Unfold red napkin so it’s halfway open.
  2. Start with the red napkins and use an accordion fold (fold, flip, fold) to fold each up completely (as pictured). When you’re done, it should be about an inch wide. Moving onto the orange napkin, fold in the edges of the napkin, about 1/2-inch on each side. Then do an accordion fold on the orange napkin, the width should be a little under an inch.
  3. Layer the two napkins so that the orange napkin fits into the grooves of the red napkin. Don’t worry if the two don’t perfectly line up — slight imperfections will actually lend some nice extra texture.
  4. Gently work the napkins back into their accordion fold and carefully slide the napkin ring onto the middle of the napkins.
  5. Gently work with the napkin arrangement to see what it will look like when the two top corners of the red napkin are touching. Using your glue dots, attach the top two inner corners of the red napkins together with a glue dot. You want the napkin “feathers” to fan out.
  6. Cut a small triangle out of the orange felt and use a glue dot to affix your turkey’s beak to the napkin ring.
  7. Using two more glue dots, affix the two eyes above the beak, creating the turkey face.

To see the step-by-step instruction photo gallery, visit this link.

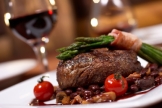
Broiled Flat Iron Steak

broiledflatironsteakWhen I’m meal prepping, I like to multi-task.  Often I have something in the air fryer, the pressure cooker, in the oven, and even in the broiler simultaneously.  It’s easy to do that when you pre-plan your meals and know your timeline.

I love this marinade for flat iron steak (or any cut of beef) because it allows me to do other dishes while the meat sits in the bag to absorb all of the flavors for four hours.  If you marinate the steak while you’re at work during the day, you’ll be ready to have a great meal on the table for your family in under 30 minutes.  Steam a package of vegetables in the microwave and it’s a simple clean up as well!

Broiled Flat Iron Steak

  • 2 Pounds Flat Iron Steak
  • 2/3 Cup Red Wine (I used full-bodied Westerly Merlot)
  • 1/2 Cup Olive Oil
  • 4 Cloves Crushed Garlic
  • Freshly Ground Sea Salt & Black Pepper

Combine all of the marinade ingredients in a gallon sized zip bag then add the raw steak to the bag.  Push out as much air as you can then zip the bag closed.  Place the bag in the refrigerator and allow the meat to marinate for 4-6 hours.

Set the oven temperature to broil.

Line a broiler pan with foil and top with either the broiler pan top or a roasting rack if one fits on top of your pan.  My oven is a Kitchen Aid and didn’t come with a broiler pan.  There was an option to order one by mail or $49 + Tax and shipping.  I searched the part number on Amazon and found it (with the included roasting rack) for $34.51 + free shipping!  I use it all the time!

When oven has reached it’s temperature, place the pan under the broiler and cook for 6-8 minutes per side.  If you have a nice thick piece of steak you should get a medium end result.  Adjust your time up or down to fit your desired degree of doneness.

For most tender result, slice diagonally across the grain.  #ThisGirlLovesToEat

Nutrition Information (8 – four ounce servings)

  • 331 Calories
  • 26 g Fat
  • 3 g Carbs
  • 21 g Protein

Low Carb Pumpkin Cheesecake Mousse

pumpkin-mousseI saw this on Pinterest and not only is it quick & easy to make, it is sinfully delicious without being heavy in calories or carbs!  Thanks go to The Sugar Free Mom, Brenda Bennett, for this wonderful, easy to make, treat!

Low Carb Pumpkin Cheesecake Mousse

Instructions

  1. In a KitchenAid or any stand mixer blend cream cheese and pumpkin until smooth.
  2. Add the rest of the ingredients and blend until whipped and fluffy about 5 minutes.
  3. Taste and adjust sweetener to your liking if needed.
  4. Pipe into serving glasses and top with cacao nibs or brown sugar sub like Sukrin if desired. Best if Chilled about an hour to set and thicken but still fantastic to enjoy immediately!

  5. Keep refrigerated until ready to serve.

Recipe Notes

Net Carbs: 4g

Amount Per Serving (0.5 cup)
Calories 280 Calories from Fat 243
% Daily Value*
Total Fat 27g 42%
Saturated Fat 16g 80%
Cholesterol 95mg 32%
Sodium 186mg 8%
Potassium 154mg 4%
Total Carbohydrates 5g 2%
Dietary Fiber 1g 4%
Sugars 2g
Protein 3g 6%
Vitamin A 132.1%
Vitamin C 2.2%
Calcium 7.4%
Iron 3.9%
* Percent Daily Values are based on a 2000 calorie diet.
If you’re interested in the things I may not devote an entire blog post to like:  health articles, my favorite recipes, fun drinks, food facts, nutritional information, restaurant reviews, gadget reviews, photos and other things that make my mouth water, I have a community page on Facebook:  https://www.facebook.com/ThisGirlLovesHerFood

Creamy Avocado Bomb Sauce

This sauce, found on Pinterest,  could be used on anything from salad, to tacos, quesadillas, taquitos, egg rolls, or just eaten with chips.  The best part is you won’t need to feel guilty, at least about the dip…

  • 1 avocado
  • 1/2 cup plain Greek yogurt
  • 1/2 to 1 jalapeno
  • 3 cloves garlic chopped
  • 1/2 bunch fresh cilantro
  • 1/2 fresh squeezed lime
  • Pinch of salt
  • Freshly ground pepper
  1. Wash ingredients well, especially the cilantro because it can hold in a lot of dirt.
  2. Cut lime and avocado in halves. 
  3. Remove the avocado seed
  4. Scoop the avocado from its shell in put into Vitamix or food processor.
  5. Add 1/2 cup plain Greek yogurt, 1/2 jalapeno, 3 garlic cloves, pinch of salt and 1/2 bunch of cilantro into Vitamix/food processor. 
  6. If you do not like your dip/dressing super spicy, remove seeds of jalapeno beforehand.
  7. If you want it extra spicy, add an entire jalapeno or substitute a habanero or hotter pepper.
  8. Squeeze 1/2 lime into mix. 
  9. Blend for 3 minutes.
  10. Do a taste test. You may need to add more salt, pepper or lime juice, depending on your personal taste. 
  11. If you would like a thinner sauce, if you are using as salad dressing, add just a touch of water to thin out. Start with a tablespoon and thin a bit at a time.
  12. Blend another 1-2 minutes.
  13. Pour into a sealed container, refrigerate until ready to eat.

If you use Facebook and are interested in the things I may not devote an entire blog post to: things like health articles, my favorite recipes, fun drinks, food facts, nutritional information, restaurant reviews, photos and other things that make my mouth water, I have a very active page on Facebook you can visit too: https://www.facebook.com/ThisGirlLovesHerFood