What’s the White Stuff on Cooked Salmon?

The white stuff on salmon is called albumin. Albumin is a protein that exists in the fish in liquid form when it’s raw that coagulates and becomes semi-solid when you subject the salmon to heat when cooking. As the meat cooks, the coagulated albumin gets squeezed out and becomes a white coating.
The more aggressively you cook your salmon the more albumin will appear on its surface.

Think of what happens when you wring out a wet towel. The water inside the fibers of the cloth is pushed out as you squeeze the fibers closer together. The same principle applies to salmon. As salmon cooks, the flesh contracts, pushing out albumin to the fillet’s surface. The higher the heat, the more quickly the flesh contracts, and the more albumin becomes visible.

To have as little albumin as possible visible on your finished dish, follow these guidelines:

  • Cook your salmon at a lower temperature for a longer amount of time. It’s gentler on the fillet, resulting in a super-tender piece of fish with less nasty white stuff.
  • If you are searing salmon (and fish in general), always do so with the skin side down. The skin acts as a protective barrier between the fish and the hot metal pan. **TIP: Even if you plan on taking the skin off, cook your fish skin-side down for 90% of the way, turn off the heat, and then flip the fish so the skinless side cooks on the pan’s residual heat.
  • Don’t overcook your salmon. You want it medium to medium-rare in the center, still a bit translucent. Overcooking salmon is the easiest way to get albumin everywhere. **TIP: When you can push on the top of your salmon with a fork, and the the layers of flesh separate easily and seem moist, your fish is finished cooking.

Thanks to my friends at Epicurious for the cooking tips! #ThisGirlLovesToEat

Advertisement

Lazy Sunday Skewers

salmonskewers

You work all week looking forward to the two long lazy days off, but how often do you just get to relax and do absolutely nothing on Saturday and Sunday?  If you’re like most people, there’s errands to run, kids to shuttle to one sporting or social event or another, family gatherings, and maybe even date night on one or both nights so that by Sunday you’re exhausted.

The last thing you want to do on your one day off is spend it in the kitchen.  Skewers are the perfect solution to that cooking dilemma.  Skewers are also great for grilling at picnics, parties, & tailgates.

No matter which recipe you are making there are some simple kebab tips:

  1. Cut the ingredients into similar-size pieces and prepare as the recipe directs.
  2. If marinating, refrigerate 1 hour for fish and up to overnight for meat and poultry.
  3. Preheat a grill to high.
  4. If using wood skewers, soak skewers in water for at least 20 minutes.
  5. Thread the ingredients onto skewers.
  6. Use 2 skewers per kebab, side-by-side, to keep the food from spinning and make flipping on the grill easier.
  7. Grill the kebabs, turning, until the ingredients are charred and cooked to desired doneness, 3 to 15 minutes.

Rosemary Lamb: rosemarylambskewers

  • Marinate 1 pound cubed lamb leg in 1/2 cup olive oil, the juice of 1 lemon, 4-6 stems fresh rosemary (leaves stripped), 3 smashed garlic cloves, and salt & pepper.
  • Skewer with 1 to 1+1/2  inch chunks of zucchini & grill.

Garlic-Dijon Salmon:

  • Marinate 1 to 1+1/2 pounds de-boned, skinned, chunks wild-caught salmon in 1/4 cup olive oil, the juice of 1/2 a lemon, 3 minced garlic cloves, 2 TBLS chopped fresh parsley, freshly ground sea salt and pepper.
  • Skewer with slices of lemon between the salmon. Grill for 3 to 4 minutes per side.
  • Serve on top of grilled asparagus spears.

caesarskewer

Chicken Caesar:

  • Mix 1 pound ground chicken2 tablespoons Caesar dressing1/2 cup Parmesan1/4 cup breadcrumbs and 1 teaspoon lemon zest.
  • Form into mini burgers, skewer and grill.
  • Serve on whole romaine leaves with grilled crusty garlic bread and more dressing.

bucaneerporkskewerBuccaneer Pork:

Boil 1 cup water, 3 TBLS each salt and brown sugar, 2 tsp pickling spices & 4 garlic cloves. Add 1 cup rum, then cool. Add 1 pound cubed pork tenderloin and marinate. Skewer with pineapple chunks. Grill, basting with bottled jerk sauce.  Serve over steamed white rice#ThisGirlLovesToEat

Salmon in Parchment

If you are always on the lookout for quick and easy weeknight recipes, and don’t stop here first, do what I often do when I am looking for inspiration and follow Food Porn on Twitter.

Today there was a quick and easy to follow video for Salmon Baked in Parchment that will help you get dinner on the table in under 30 minutes!

4salmonrecipes

  • Pesto Salmon
  • Teriyaki Salmon
  • Lemon Dill Salmon
  • Garlic Butter Salmon


I’ve done the lemon dill salmon and it came out perfect.  Next on my list to try is the pesto salmon.  This girl loves pesto and this girl loves salmon!  Let’s face it, #ThisGirlLovesToEat 

If you use Facebook and are interested in the things I may not devote an entire blog post to: things like health articles, my favorite recipes, fun drinks, food facts, nutritional information, restaurant reviews, photos and other things that make my mouth water, I have a very active community page on Facebook you can visit too: https://www.facebook.com/ThisGirlLovesHerFood

Weeknight Salmon in Parchment

For all of us trying to get more fish, and heart-healthy Omega-3’s, into our diets, this quick and easy recipe from Tastemade (the link takes you to the video – which is handy if you have trouble folding the parchment) takes 15 minutes from prep to cook to table!

INGREDIENTS

  • 30-inch long piece of parchment paper
  • ½ bulb of fennel, thinly sliced
  • 1 large scallion, cut into 2-inch-long pieces
  • 4 oz salmon fillet
  • Salt
  • Paprika
  • 1 slice lemon
  • ¾ Tbsp butter
  1. Preheat oven to 425ºF.
  2. Fold parchment paper in half and cut out a large heart shape. Fold open the heart.
  3. In the middle of the right side of the heart, place 3–4 pieces of scallions and a few pieces of fennel. 
  4. Place the salmon skin-side down on top of the scallions and fennel. 
  5. Top salmon with salt, paprika and the lemon slice. Add the pat of butter on top.
  6. Fold the heart-shaped paper over the fish until the edges meet. (This means the crease will lift off the table.) Begin overlapping folds from the top left and work your way around to the bottom left, at which point you can twist it or paper clip it.
  7. Transfer to a baking sheet and place in oven for 8 minutes, or until meat thermometer reads 140ºF. Serve in the bag on a plate.

Toss a salad together while the salmon is baking and you’ve gotten a completely healthy meal on the table in under 30 minutes on a weeknight!

If you use Facebook and are interested in the things I may not devote an entire blog post to: things like health articles, my favorite recipes, fun drinks, food facts, nutritional information, restaurant reviews, photos and other things that make my mouth water, I have a very active page on Facebook you can visit too:https://www.facebook.com/ThisGirlLovesHerFood

Keep the Protein in Cooked Salmon

albumin
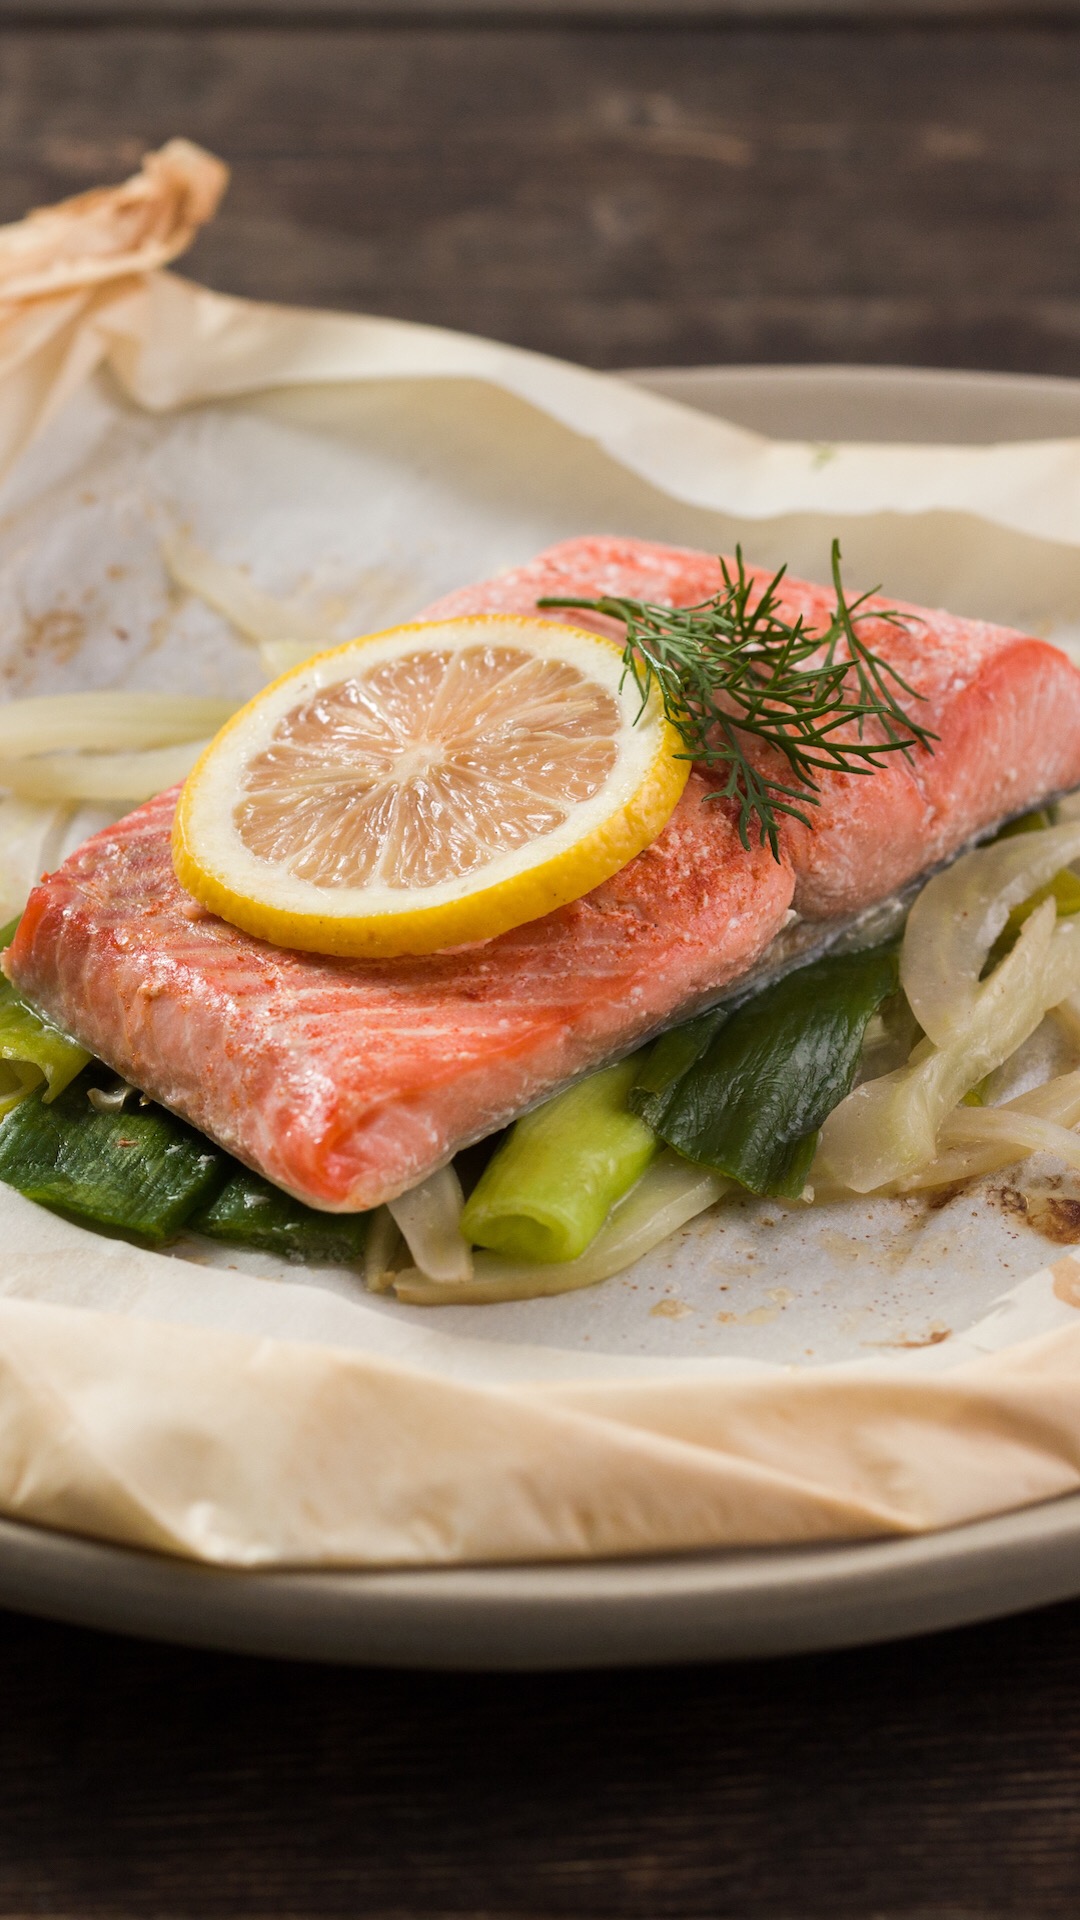
We’ve all noticed it, the white stuff that oozes out of our salmon no matter how long or short we cook it, whether poached, baked or grilled.  It really ruins the presentation. I have always wondered if it’s normal, and what I did wrong to make my salmon not look as pretty as it is when served to me at a restaurant.

What is that white stuff?

It’s called albumin, which is coagulated protein that is escaping the salmon filet because you (ok I) didn’t take 10 minutes to prep the fish properly to minimize this loss of protein.

What’s the 10 minute fix?

America’s Test Kitchen came up with a simple solution for keeping more if the protein inside the fish you are preparing:

  • 10 minutes in a basic brine solution (about 1 tablespoon of salt per cup of water) before cooking.  “The salt partially dissolves the muscle fibers near the surface of the flesh, so that when cooked they congeal without contracting and squeezing out albumin.”

It’s that easy to preserve your dinner’s nutrients and keep the salmon looking pretty.

Once you’ve brined your salmon, you can finish prepping your filets for the oven or grill and/or stuff them then poach, grill, or bake as you choose.

I’m making salmon for dinner tonight and am definitely going to let my filets spend a few minutes swimming in a zip bag filled with salt water.  Sounds painless to me.

Are you on Facebook?  You might be interested in the things I may not devote an entire blog post to: recipes, food facts, nutritional information, photos and other things that make my mouth water. I may not write a blog post every day, but there are daily updates to my This Girl Loves To Eat community at: https://www.facebook.com/ThisGirlLovesHerFood


Simple Salmon Croquettes

salmoncroquettesI have a standby recipe I use for salmon patties that stand up to being cooked on the grill, but I got really behind this Easter and couldn’t find that recipe when it came time to prep.  Never one to be timid in the kitchen, and knowing that my husband would tell me if they sucked, I gathered my ingredients and started throwing them into my Vitamix.

Sriracha Cream Sauce

  • 2/3 Cup Sour Cream
  • 2 TBLS Fresh Squeezed Lemon Juice
  • 2-3 TBLS Fresh Dill Chopped
  • 2-4 TBLS Sriracha Hot Sauce (depending on how spicy you like it)

Combine and refrigerate until you are ready to serve dinner

Simple Salmon Croquettes

Combine these ingredients in your Vitamix (or food processor/blender) in the following order:

  • 1 Medium Zucchini (or Yellow Squash) cut into chunks
  • 2 Shallots (peeled & halved)
  • Juice of 1 Medium Lemon
  • 3 tsp Worcestershire Sauce
  • 2 Large Eggs
  • 1/2 Cup Shredded Parmesan/Romano/Asiago Blend Cheese
  • 2 tsp Ground Pepper
  • 4-5 Stems Fresh Dill (remove leaves from stems)

When the ingredients are well combined, add:

  • 2 Pounds Fresh Salmon Fillet (skin removed)
  • 2 Cups Panko Crumbs

Heat 2 TBLS olive oil in a large skillet (I used cast iron, but it doesn’t really matter).

When pan is well heated, scoop golf ball sized (or so) amounts of the mixture into your hands and flatten into 1/4 to 1/2 inch thick patties.  The thinner they are the faster they will cook.  I use about 1/2 inch as my guide.  Fill the pan with patties and fry over medium heat for 3-5 minutes per side.  Because the ingredients are minced, they cook fairly quickly.   Once each side is browned, remove patties to a paper towel lined plate and continue in batches until all of the mixture is cooked.

Serve immediately on a mound of  yesterday’s Simple Sweet Potatoes and beside a crisp green salad for a light, yet hearty, mid week meal.

Are you on Facebook?  You might be interested in the things I may not devote an entire blog post to: recipes, food facts, nutritional information, photos and other things that make my mouth water. I may not write a blog post every day, but there are daily updates to my This Girl Loves To Eat community at: https://www.facebook.com/ThisGirlLovesHerFood