Easy Antipasto Bites

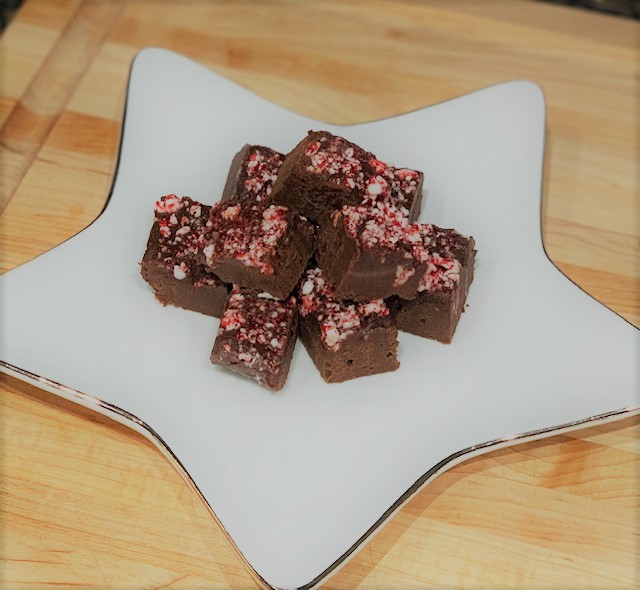
Gatherings are easier with quick, #MakeAhead, appetizers. #AntipastoBites can be made the day before and kept, in a sealed container, in the refrigerator until you’re ready to serve. The flavors are better when closer to room temperature, so, get them out 15-30 minutes before serving.

  • 1/2 c. Extra-virgin olive oil, plus 3 Tablespoons, divided
  • 9 oz. Fresh cheese tortellini
  • Kosher salt
  • Freshly ground black pepper
  • 2 tbsp. Balsamic vinegar
  • 8 oz. Mozzarella balls (in deli case near specialty cheeses)
  • 1/2 tsp. Italian seasoning
  • 1/4 tsp. Red pepper flakes
  • 4 oz. Sliced salami (or Prosciutto, Pepperoni, Sopressata, etc.)
  • 1/4 lb. Roasted red peppers, chopped into bite-sized pieces
  • 1 Bunch fresh basil
  • 14 oz. Artichoke hearts (drain & chop into bite-sized pieces)
  • 1/4 lb. Green olives (Can substitute black if you prefer)
  1. In a large pot of boiling water, add 1 tablespoon oil. Cook tortellini according to package directions until al dente. Drain and transfer to large bowl.
  2. Season cooked tortellini with salt and pepper. Add balsamic vinegar and 2 TBLS olive oil and mix to combine. Set aside.
  3. Marinate mozzarella: In a small bowl, add mozzarella balls, Italian seasoning, red pepper flakes, and remaining 1/4 cup olive oil. Mix to combine and set aside.
  4. Assemble skewers by layering one piece each mozzarella, salami, roasted red pepper, tortellini, basil, artichoke heart, and green olives.

Are you on Facebook? You might be interested in the things I may not devote an entire blog post to: food news, recipes, food facts, nutritional information, photos and other things that make my mouth water. If so, visit my This Girl Loves To Eat community at: https://www.facebook.com/ThisGirlLovesHerFood

Advertisement

Low-Carb Bread Machine Bread

One of the biggest complaints I, and many others, have about Keto Bread is that it tends to taste too eggy.  I’ve been on a mission to eliminate that and discovered that, with my new bread machine, I can bake #KetoFriendly, #EggFree, loaves of bread. 

Of course, buying a new bread machine means yet another tool I need to find a home for in my #StorageChallengedKitchen.  But #ThisGirlLovesToEat, so I’ll find a corner somewhere. 😉

My machine is a Cuisinart Convection Breadmaker and does have a low-carb setting, so that is a bonus.

Keto Bread Machine White Bread

  • 2+1/2 tsp Bread Machine Instant Yeast
  • 1 + 1/3 Cup 90º F Tap Water
  • 2 TBLS Sugar
  • 1/4 Cup Neutral Oil (Vegetable or Canola) – unless you want the flavor in your bread, then you can use Olive Oil (I like to use a blend of Olive-Avocado Oil)
  • 3 tsp Vital Wheat Gluten
  • 3 Cups/300 g (weigh it if you can) Carbalose® Lo-Carb Flour (I have used Bob’s Paleo Flour as well)
  • Salt or other seasonings as desired (I always add a bit of salt)

Using a paper towel, lightly oil the inside of your bread machine pan and the kneading paddle.  Plug in your bread machine (but do not preheat), add your yeast, sugar and warm water to the pan and close the machine lid.  Set a timer for 12 minutes to allow your yeast to activate (start bubbling).

As soon as your yeast is nice and foamy, add (in this order) your oil, the wheat gluten, any spices you are using, and the flour.

Close your lid and set the machine to Low Carb setting (if it has one) or bake at basic mode for a 1.5 pound loaf.

**Tip:  To keep your loaf from having a hole in the middle, when the rise cycle starts, remove the paddle and center your loaf back in the pan without handling it too much.

Allow loaf to cool in the pan then slice into 12 slices.

Nutrition Information Per Slice (with Canola Oil)

    • Calories   120
    • Protein     8.25 g
    • Carbs        4.83 g
    • Fat             7.42 g

Are you on Facebook? You might be interested in the things I may not devote an entire blog post to: food news, recipes, food facts, nutritional information, photos and other things that make my mouth water. If so, visit my This Girl Loves To Eat community at: https://www.facebook.com/ThisGirlLovesHerFood

Homemade Red Wine Vinegar

Realizing that #leftoverwine is an oxymoron, the occasion did present when a high quality bottle was opened at the end of a multi-bottle evening and not finished, then said bottle was put into the wine cellar and forgotten for a week past it’s drinking window. Shit!

Time to make some red wine vinegar! I left the bottle, corked, in the dark, cool cellar for an additional month then set to starting my kitchen #chemistryexperiment.

Vintage Red Wine Vinegar

  • Up to 750 ml leftover Red Wine of any variety – in this case, I used: 3/4 bottle Eighty Four Wines 2013 Malbec out of Napa, CA + about 1/4 bottle Bodega Y Vinedos Catena 2019 Malbec out of Argentina
  • 1/2 tsp (2.5 ml) 3% Hydrogen Peroxide (if wine contains sulfites)
  • 1 cup (237 ml) Unchlorinated Water
  • 1/2 cup (118 ml) Raw, Unfiltered, Unpasteurized Vinegar, or a Vinegar Mother – I used Bragg Organic Raw-Unfiltered Apple Cider Vinegar With the Mother

Pour the wine into a dry, sanitized, wide-mouthed, sealable (canning) jar that holds at least a quart. If the wine contains sulfites (it will say so on the back of the bottle), stir in the hydrogen peroxide and let the wine sit for about a minute to neutralize them. Stir in the water with a wooden spoon.

Stir in the raw vinegar well to oxygenate the wine.

Cover the jar with either tightly-woven, quadrupled cheesecloth or a piece of muslin, even a thick paper towel, securing with rubber band/string/a screw on metal canning band, or, like I used, 😉 a zip tie to keep fruit flies out. You can cover it with a paper coffee filter for extra protection from fruit flies if desired. The jar needs to breathe (vent its Carbon dioxide) so do not, under any circumstances, put the metal inner jar canning lid or glass clamped vacuum lid on to seal.

Place your jar on the counter, out of direct light, or in a cupboard, where the temperature stays between 65° and 75°F. The longer you leave it alone to fully develop it’s acidity, especially if you have blended more than one type of wine, the better. Ideally, leave it alone a minimum of one month before checking your acidity level. Your ph should be 4.0 or below.

Bottle half of the vinegar, in a pressure resistant bottle, leaving headspace and replace with the same amount of wine for another batch. Or, you can bottle it all, storing the mother (1/2 C) for another batch or to share with a friend to make her own.

Amazon carries many suitable bottles for storing vinegar

The vinegar can be used immediately (stored in the refrigerator if you like the flavor as it is) or aged longer in your cupboard or on the cool counter top to allow it to mellow further and the flavors to develop more fully.

  • Troubleshooting: Most fermenting problems with vinegar come from trying to ferment in temperatures that are too warm for the fermentation process. Try to keep your jars in a room that’s between 55 and 75°F.
  • Surface growth: If you see anything “scummy” starting to grow on your vinegar while it’s fermenting, scoop off the surface growth. If it smells fine, it is fine.
  • Over-Fermenting: If your vinegar develops an awful smell (like rotting garbage), toss it out. If it smells a little funky (like vinegar), it’s probably fine.
  • Mold Growth: If you’re having problems with mold growing on the vinegar (not simply white scum on the top), toss out the vinegar. Next time, make sure your vinegar is fermenting in a room that’s not above 75 degrees, and is in a place with good airflow.

Are you on Facebook? You might be interested in the things I may not devote an entire blog post to: food news, recipes, food facts, nutritional information, photos and other things that make my mouth water. If so, visit my This Girl Loves To Eat community at: https://www.facebook.com/ThisGirlLovesHerFood

Cheesy Poblano Chicken Bake

PoblanoChickenBrocBake
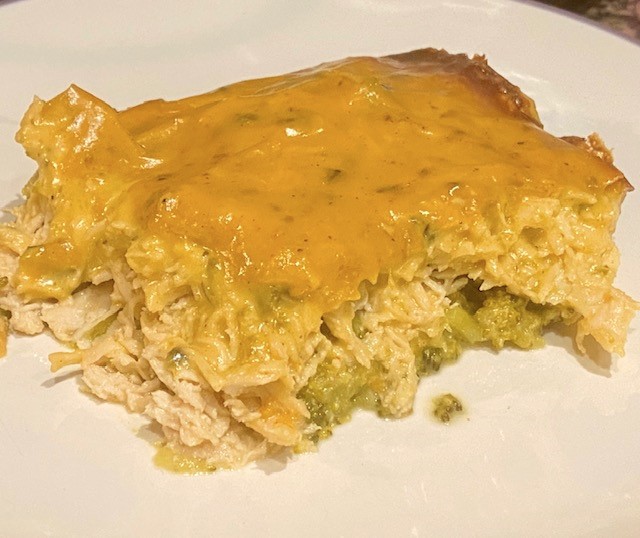
Playing around during #Keto meal prep this weekend, I came up with a high protein/low carb chicken and broccoli casserole that’s a great dinner with a salad or perfect for a grab-and-go lunch that can easily be reheated in the microwave at work!  #ThisGirlLovesToEat

Cheesy Poblano Chicken Bake

  • 1 Poblano Chili, seeded & finely chopped
  • 4 TBLS Butter, divided
  • 8 oz Fresh Broccoli Florets, trimmed
  • 1.75 lb (28 oz) Chicken Breast (uncooked and cut into appx 2 x 2 chunks)
  • 2 TBLS Bob’s Red Mill Paleo Baking Flour
  • 1/2 Cup Water
  • 1 Cup Half & Half
  • 6 oz Sharp Cheddar Cheese, shredded
  • 1/4 tsp Black Pepper
  • 1/4 tsp Salt
  • 1/4 tsp Garlic Powder

Preheat the oven to 350º F and spray the bottom of a 9 x 11 inch Pyrex baking dish with olive oil cooking spray.

In a microwave steamer, cook the raw broccoli on high power for 4 minutes.  Layer the cooked broccoli into the Pyrex baking dish.

Using the same steamer, cook the chicken in the microwave for 5 – 6 minutes, just until cooked thru.  Remove the chicken to your stand mixer with the paddle attachment and shred the chicken on low (about 2 minutes).  Layer the chicken on top of the  broccoli layer.

In a medium saucepan, combine 2 TBLS of the butter and the chopped Poblano pepper and saute until the peppers are soft and the butter has turned green (5-7 minutes).  Add the remaining 2 TBLS butter, salt, pepper and garlic powder, and, once melted, stir in the flour.  Cook while stirring constantly for about 2 minutes, over medium heat, until the mixture is bubbling and very well combined.

Add milk then water, and whisk until smooth, scraping roux out of the corners of the saucepan.  Increase heat to medium high, bring to a simmer, stirring constantly until the mixture thickens, 2 to 4 minutes.  Remove from heat and stir in the cheese until smooth.  Add the paprika.

Pour the cheese sauce over the top of the chicken layer and spread to the edges of the pan.

Bake 20-30 minutes, or until sauce is bubbling and the casserole is warm throughout.

Nutrition Information (6 Servings)

  • 350 Calories
  • 20 g Fat
  • 2 g Carbohydrates
  • 37 g Protein

Are you on Facebook? You might be interested in the things I may not devote an entire blog post to: food news, recipes, food facts, nutritional information, photos and other things that make my mouth water. If so, visit my This Girl Loves To Eat community at: https://www.facebook.com/ThisGirlLovesHerFood


Holiday Bites: Sugar Free Peanut Butter Cups

I am a Reese’s Mini Peanut Butter Cups, but they are Hell on the diet…these are Keto Friendly & give me a little less guilt.  #ThisGirlLovesToEat

Sugar Free Peanut Butter Cups

  • 9 oz Bag Lily’s 55% Cacao Sugar Free Chocolate Chips
  • 3/4 Cup No Sugar Added Peanut Butter
  • 2 TBLS Crisco Solid Shortening
  • 2 TBLS Butter

Melt together the chocolate chips and the shortening over low heat until smooth.  Using either a silicone mini muffin pan or a mini muffin pan lined with mini muffin liners, drizzle about half of the melted chocolate into each cup, making sure to drag or brush it up the sides of each.  Put pan into the freezer for 15 minutes.

Meanwhile, melt together the peanut butter and butter until smooth and remove from heat.  Take frozen chocolate cups from the freezer and divide the peanut butter into each cup then top with the remaining melted chocolate.

Place pan back into the freezer for at least 2 more hours then remove the chocolates from the muffin liners.  Store in a sealed container in the refrigerator.

Nutrition Information (Per 1 Peanut Butter Cup)

  • 66  Calories
  • 1.45 g  Fat
  • 4 g  Carbs
  • 1.3 g  Protein

Are you on Facebook? You might be interested in the things I may not devote an entire blog post to: food news, recipes, food facts, nutritional information, photos and other things that make my mouth water. If so, visit my This Girl Loves To Eat community at: https://www.facebook.com/ThisGirlLovesHerFood

When is it OK to Eat Food With Mold On It?

In this season of food gifts and party leftovers, this article, previously published by My Recipes, is particularly important and worth sharing & re-sharing. #ThisGirlLovesToEat

“We’ve all let something languish in the fridge a bit longer than we realized. It’s not unreasonable to look at a single patch of mold on a strawberry and wonder if the whole lot has to be tossed. But what about a block of cheese with a quarter-sized fuzzy spot? Is that safe to trim and eat? Or does it have to go, too?

Fortunately, this handy guide from the U.S. Department of Agriculture can have the final say on what stays and what goes when you spot mold on your food.

4 Moldy Foods You Can Eat:

Hard salami or dry-cured country ham

It’s A-OK for hard salamis to have a thin white coating on the outside of the meat. This mold is put there on purpose: to produce flavor and protect the cured meat from bacteria. It’s safe to consume, as is any mold that grows on dry-cured country ham. Large slabs of the super salty pork are often used in restaurants as part decor, part conversation starter (and also a tangy topper to everything from pasta to avocado toast). If you buy one of these delicacies, don’t fear a little mold growth on the crust. Scrub it off (be sure to dry the ham well) before eating. 

Cheeses made with mold

The mold in blue, Gorgonzola, Stilton, Brie, and Camembert is to be expected. After all, these cheeses are injected with mold before they ripen—that’s why they’re so funky and delicious. But not all molds are made to eat, so you can’t assume all molds on cheese get the approval. Hard cheeses, like Gorgonzola and Stilton, aren’t harmed by a little extra mold. Cut the spot away—half an inch to one inch all the way around—and enjoy. Softer cheeses, like Brie and Camembert, have to go if you spot mold growing on them. The fingerlike organisms of mold can reach deep into these softer cheeses and may develop into toxic substances.

Hard cheeses

Even cheeses that aren’t made with mold veins are safe to eat if you spot a speck of mold growing on them. Cheddar, for example, just requires you to trim an inch around the moldy spot (some experts argue you only need a half-inch buffer; do what feels safest for you) and toss that before diving in. Be sure to use a clean knife, and keep the blade away from the mold to prevent cross-contamination. When you’re finished slicing for your sandwich or burger, be sure to rewrap the cheese in a fresh covering so you don’t reinfect with mold spores.

Firm fruits and vegetables

Tough vegetables and fruit, like carrots, potatoes, and turnips can take the mold in stride. The mold threads have a hard time penetrating deep into these dense plant foods. Trim off an inch around the mold, and eat or cook as you planned. Softer fruits and vegetables, like cherries, strawberries, and corn, should be tossed. Mold can easily spread to nearby areas, even if you can’t see the spores with your naked eye.

When can molds be toxic? 

All molds can cause allergic reactions and respiratory problems. That doesn’t mean they’re toxic. However, in the right conditions, some molds can turn into mycotoxins, poisonous substances that can make people physically sick. These substances are produced by certain molds that are most commonly found in grain and nut crops. However, they’ve also been known to show up in apples, grape juice, celery, and other fresh produce. That’s why, when in doubt, throw the moldy foods out.

Which moldy foods should I always toss? 

The USDA says these foods are no good when you spot mold. Their high moisture content or porous nature makes them prime for rapid mold development. Don’t risk getting sick just to finish up Tuesday night’s pot roast. Toss it, and fry up a grilled cheese instead.

Foods you should always toss:

  • Luncheon meats, bacon, and hot dogs
  • Cooked leftover meat and poultry
  • Cooked casseroles
  • Cooked grains and pasta
  • Soft cheeses, like cottage cheese, chevre, cream cheese, and Neufchatel
  • Yogurt and sour cream
  • Jams and jellies — Mycotoxins can spread in these foods easily, so it’s not enough to scoop out a mold part and keep going deeper into the jar.l
  • Soft fruits and vegetables — They’re porous, which means mold can spread rapidly, even if you can’t spot the spores.
  • Baked goods and bread
  • Peanut butter, legumes, and nuts — Any foods processed without preservatives are at a high risk of developing mold spores. Be extra cautious and keep them stored appropriately.”

Holiday Bites: Naughty But Nice Peppermint Fudge

I was honest when I said that I abide by the adage that calories, fat, and carbs don’t count in December, but that doesn’t mean that I don’t try, where I can, to trim all of them to try and stay loyal to my Keto lifestyle.  So, this is the Chocolate Peppermint Fudge from a couple of days ago, just slimmed down a bit… As written, each of the 36 pieces clocks in at 77 Calories, 5.6g Fat, and 2.6g Carbs.  Because this fudge turned out so rich, and was so thick from the 8 x 8 pan, I cut each piece in half again so the nutrition information in that case would be: 38.5 Calories, 2.8g Fat and 1.45g Carbs.  My sweet tooth was completely satisfied with one piece halved. #ThisGirlLovesToEat

naughtybutnicefudge

Naughty But Nice Peppermint Fudge

  • 1 TBLS Melted Butter
  • 1 Cup Truvia
  • 1 Cup Heavy Cream
  • 3 TBLS Keto Light Corn Syrup
  • 2 TBLS Water
  • 1/2 tsp Kosher Salt
  • 4 Ounces Unsweetened Baking Chocolate
  • 2 Ounces 60% Bittersweet Baking Chocolate
  • 2 tsp Vanilla
  • 4 TBLS Butter, cut into pieces
  • 1/8 to 1/4 tsp Peppermint Oil (to taste – see tip below)
  • 2 Ounces Peppermint Candies, finely crushed

Line an 8×8″ baking dish with foil, overlapping the edges.  Melt 1 TBLS Butter and brush the foil with it thoroughly.

Heat Truvia, cream, corn syrup, salt, and 2 Tbsp. water in a medium saucepan over medium heat, stirring, until sugar dissolves.  Add chocolate.  Stir until melted and mixture is smooth, then bring to a boil.  Fit saucepan with candy thermometer and increase heat to medium-high.  Cook, brushing down sides of saucepan with a wet pastry brush as needed to dissolve sugar crystals, until thermometer registers 238° F.

Immediately pour mixture into a large bowl.  Dot top of mixture with butter; do not stir.  Rinse thermometer, removing any sugar crystals, pat dry, and fit on bowl.  Let mixture sit until thermometer registers 110° F, 30–45 minutes.

Remove thermometer.  Add vanilla extract and peppermint flavoring to mixture and beat with a hand mixer (I admit I used my stand mixer…I don’t own a hand mixer :|) on high speed until mixture is light and thick like frosting and has lost its high gloss (will still have a slight sheen), about 4 minutes.

Scrape into prepared pan; smooth surface, then top with peppermint candies, pressing gently into surface.  Cover with plastic and cool in refrigerator until set, at least 3 hours.

Using foil, remove fudge from pan, peel away foil, and cut fudge into a 6×6 grid to make 36 squares.

Nutrition Information: (Makes 36 Squares – 1 piece per serving)

  • 77  Calories
  • 5.6 g  Fat
  • 2.6 g  Carbs
  • <1 g  Protein

Do Ahead: Fudge is best stored in a tightly sealed container, between layers of waxed paper, in the refrigerator.

Tips: 1) Crush the candies in a zip bag using a rubber mallet or rolling pin, 2) Peppermint oil is quite strong so, for less intense peppermint punch, you can easily cut it to 1/8 tsp, and 3) A hand mixer is better than a stand mixer for this recipe, but I do admit that I got lazy this time and used the stand mixer and it turned out just fine.

Low-Carb Homemade Corn Syrup

There’s no way to avoid it, if you’re baking or making candy: you are going to need light corn syrup at some point to get a good result.  After a few trials (and errors), I finally came up with a corn syrup recipe that is close enough to maintain the integrity of the recipes without adding any weird after tastes or textures!

lightcornsyrup

Low-Carb Light Corn Syrup

  • 3/4 Cup Water
  • 1/2 Cup Truvia
  • 3/4 tsp Vanilla
  • Pinch of Salt
  • 3/4 tsp Xantham Gum

In a small saucepan over medium heat, mix the water and Truvia.  Bring to a low boil and stir in the Vanilla.  Reduce Heat to low.

Spoon out 1 TBLS of the hot Truvia mixture and, in a small bowl, stir in the Xantham Gum.  It will be quite thick and sticky.  It’s ok if it’s not entirely smooth.

Stirring continuously, add the Xantham gum mixture to the saucepan.  Return the heat to medium and bring the mixture back to a low boil.  Cook for one minute until the mixture starts to thicken. Remove from heat.

Pour the corn syrup thru a fine mesh strainer, pressing the corn syrup thru while leaving any unincorporated Xantham gum solids in the strainer.

Allow to cool slightly before using.  As this cools further it can become crystallized, although mine did not.  Mine just thickened into a jelly like consistency.  If either happens, just put it in the microwave for 10 – 15 seconds and stir it again before you’re ready to use it.  Makes about 1/2 Cup and doesn’t keep real long, so plan to make it when you will be likely to use it up.  #ThisGirlLovesToEat

Are you on Facebook? You might be interested in the things I may not devote an entire blog post to: food news, recipes, food facts, nutritional information, photos and other things that make my mouth water. If so, visit my This Girl Loves To Eat community at: https://www.facebook.com/ThisGirlLovesHerFood

Holiday Bites: Crab & Brie Wontons

If you feel like the dishes have barely been done following Thanksgiving dinner when discussions and planning for December holiday parties and dinners begins, you could be right.  For those of us who love to entertain and treat our friends and family to fine meals, there are never enough days to plan the perfect meal.  This appetizer, from the December 2019 issue of #EatingWellMagazine, is rich and flavorful while also being surprisingly low in calories, fat, and carbohydrates!  #ThisGirLovesToEat

crabandbriewontons

Crab Wontons with Brie

  • 4 ounces Lump Crab Meat, drained & picked over
  • 4 ounces diced Brie Cheese
  • 1/4 Cup Mayonnaise
  • 2 TBLS Minced Jalapeno
  • 2 TBLS Minced Chives
  • 1/4 tsp Ground Black Pepper
  • 1/8 tsp Salt
  • 24 Wonton Wrappers
  1. Place a rimmed baking sheet in the oven; preheat to 350°F.
  2. Combine crabmeat, Brie, mayonnaise, jalapeño, chives, pepper and salt in a medium bowl. Scoop about 2 teaspoons of the crab mixture into the center of each wonton wrapper. Use your finger or a pastry brush to moisten the edges of the wrapper with water. Carefully lift two opposite points up until they touch. Gently pinch together to seal. Fold the remaining two points up toward the center just to close the opening. Pinch the edges together to seal into a four-pointed star.
  3. Carefully transfer the wontons to the hot baking sheet. Generously coat them with cooking spray. Bake until golden brown, 16 to 18 minutes.

To make ahead:  Assemble wontons (Step 2) up to 8 hours ahead. Cover and refrigerate.

Nutrition Information:

Serving Size 2 Wontons

  • Calories – 121
  • Fat – 7 g
  • Carbs – 10 g
  • Protein – 5 g

Chicken Bacon Ranch Meatballs

chickbaconranchmb2

Ground chicken breast is one of my favorite ways to build a base for a #Keto meal!  It’s so versatile, mixes so well with most of my favorite ingredients, and is so easy to meal prep for the week ahead, that it’s become my go-to for creating new #KetoRecipes

This recipe for #ChickenBaconRanchMeatballs is fun because you can eat them all alone or pop them on a skewer between a piece of lettuce and 1/2 a plum or cherry tomato and drizzle with some ranch dressing for a fun lunch, light dinner, or appetizer.  #ThisGirlLovesToEat

Chicken Bacon Ranch Meatballs

  • 2 Pounds Ground Chicken Breast
  • 4 Pieces Thick Cut Bacon
  • 3 Pieces Thick Cut Peppered Bacon
  • 1 Large Egg
  • 2 Cups Fresh Baby Spinach
  • 1 TBLS Olive Oil
  • 4 TBLS Ranch Dressing
  • 1/2 Cup Panko
  • Olive Oil Spray


Using your hands, combine all of the ingredients in a medium bowl until well mixed.

Spray the basket in your air fryer lightly with olive oil spray, place a layer of meatballs, with space between for the air to flow around, set the temperature to 380° F, and set the timer for 8 minutes. Cook the meatballs, shaking them to turn them about halfway through so they brown evenly.

Quick, easy and oh so tasty!