Skinny Buffalo Chicken Burritos

I saw this video on #TikTok and got inspired to use the method but slim down the ingredients used to make it #KetoFriendly and not just low fat, like the original intended. Thanks, Nikita Fair for the inspiration!

  • 1 Pound Chicken Breast, cut into 4 equal pieces
  • 1/4 Cup Franks Red Hot Buffalo Sauce
  • 1 Cup Cottage Cheese
  • 1 TBLS Ranch Seasoning (Homemade or Store Bought)
  • Paprika
  • Garlic Salt
  • Ground Pepper
  • 1 Cup Shredded Cheddar Cheese
  • 4 Mission Carb Balance Flour Tortillas

Sprinkle the chicken breasts with the garlic salt, pepper, and paprika and cook at 375°F in the air fryer for 10-12 minutes until internal temperature reaches 160°F. Remove chicken, cover with foil and set aside while you prepare the sauce.

In mini (or full size) blender jar, combine cottage cheese, buffalo sauce, and ranch seasoning and blend on medium-high until smooth.

Uncover chicken and chop into about 1/2” chunks. Combine with sauce and cheese. Divide chicken mixture equally onto the 4 tortillas. Fold the tortillas and place seam side down on a hot sauté pan. Brown burrito on both sides and wrap in foil to keep warm if not serving immediately. Can be stored in refrigerator or freezer and warmed back up.

Nutrition information: 541 Calories 27.5 g Fat 5.5 g Carbs 61.5 g Protein

Are you on Facebook? You might be interested in the things I may not devote an entire blog post to: food news, recipes, food facts, nutritional information, photos and other things that make my mouth water. If so, visit my This Girl Loves To Eat community at: https://www.facebook.com/ThisGirlLovesHerFood

Creamy Poblano Chicken Soup

chickenpoblanosoupAfter another Southern California winter week with temperatures over 80 degrees, I was looking for any excuse to make soup.  Today the Santa Ana Winds blew in and dropped the temperature to a “Brisk” 69 degrees so I rushed to get the pressure cooker and Vitamix working so I could enjoy my favorite cool night meal:

Creamy Poblano Chicken Soup

  • 2 Roasted Poblano Peppers
  • 1 Roasted Sweet Potato (or Yam)
  • 1 Roasted Small Yellow Onion
  • 1 TBLS Olive Oil
  • 32 oz Chicken Stock (I use Emeril’s)
  • 4-5 Cloves Garlic Finely Chopped
  • 8 oz Cream Cheese (Room Temperature)
  • 1 lb diced chicken breast
  • 2 Cups Shredded Colby & Monterey Jack Cheese
  • Freshly Ground Sea Salt & Pepper to taste
  1. Roast the sweet potato in the pressure cooker for 15 minutes on high.  Remove and set aside.
  2. Using the Brown function on the pressure cooker, roast the Poblano peppers, the quartered onion and the garlic in the olive oil for 10 minutes after the cooker comes up to temperature.  Remove from pan when done.
  3. Add the chicken to the pressure cooker pan and again set it to the Brown function.  Cook the chicken for about 10 minutes, or until just cooked through.
  4. Remove the seeds and stems from the peppers.
  5. Add peppers, onion, sweet potato, garlic, 1 Cup of the broth, and cream cheese to the Vitamix container.  Process on low to medium speed until well combined and smooth.
  6. Add the chicken to the Vitamix container and process on the low setting until chicken shreds and is no longer in chunks.
  7. Pour contents of Vitamix container back into the pressure cooker pan.  Add remaining 3 cups of stock, the shredded cheese.  Stir until well combined.  Taste and adjust the seasoning if desired.
  8. Close the lid of the pressure cooker and select the Stew/Soup function.  After the machine reaches cooking temperature, cook for 10 minutes.
  9. When cooking is complete, release pressure, stir and serve soup while hot.

Serve with buttered toasted sourdough croutons, a dollop of sour cream and sliced avocado if desired.

**Vegetarian Option:  Don’t add the chicken if you would like to serve this as a side or keep it meat-free.

Are you on Facebook?  You might be interested in the things I may not devote an entire blog post to: recipes, food facts, nutritional information, photos and other things that make my mouth water. I may not write a blog post every day, but there are daily updates to my This Girl Loves To Eat community at: https://www.facebook.com/ThisGirlLovesHerFood

Hawaiian BBQ Chicken & Pineapple Risotto

pressurecookerIn case you’ve missed my posts from the last two days, I’m in love with my new T-Fal 6 quart electric pressure cooker!

Most nights my husband makes a brief stop at home after work before heading to the gym, then back home to spend some quality time on his stationary bike while I’m holding down the fort and figuring out/preparing (or ordering) what we’ll be eating for dinner.  That didn’t leave me a lot of time (if any) to get my early evening workout in and I felt more like a short order cook than a valued member of my household.  Realizing how much time & effort the pressure cooker saves me has changed my attitude and freed me up to get back to my post-work workouts too!

hawaiianbbqTonight’s dinner did take some extra time because it involved cooking two separate dishes in the slow cooker, but the short time needed for the risotto to cook allowed me to prep the main dish for it’s turn in the pot!  Next time I will prepare the rice/grain/potato side earlier in the day and reheat so dinner can still be prepped in one step.

Pineapple Risotto

  1. Preheat the pressure cooker to the brown setting.
  2. Pour contents of 20 ounce can of crushed pineapple (in juice not syrup) in to a 4 cup measuring cup.  Add water to equal 4 cups + an additional cup and set aside.
  3. Add 1 TBLS Olive Oil to the pressure cooker then 2 cups Arborio Rice and lightly toast it.  The rice will turn from solid white to translucent as it absorbs the oil, then back to white. When a couple of grains look golden your rice is toasted!
  4. Add about 2 TBLS of sweet wine (like Moscato) and stir the rice until the wine has fully evaporated.
  5. Pour the contents of the measuring cup and the additional water to the pressure cooker, mix, close and lock the lid.  Set to cook on high for 6 minutes.

When timer sounds, release the pressure and open the cooker.   Remove the inner pot from the cooker immediately to keep the rice from over-cooking.  The rice may still be slightly liquid.  Stir, and the rice will absorb the extra liquid in about 30 seconds. If the rice is still very wet, put the open pressure cooker back in the base unit set to brown, and finish cooking it this way.  It’s ok if it’s a little sticky for this recipe.

Hawaiian BBQ Chicken

  • 2 lbs boneless skinless chicken breasts, chopped into 2″ chunks
  • 2 Cups Fresh Pineapple Chunks (or 1 – 20 oz can chunks in juice)
  • 1/2 Cup Water (if using fresh or frozen pineapple chunks)
  • 1 Cup Light Coconut Milk (in the can)
  • 1 Cup Spicy-Sweet BBQ Sauce (I use Guy Fieri Kansas City Smoky & Sweet)
  • Dried Crushed Red Peppers to taste
  • Diced Scallion (about 1/4 Cup) green and white parts
  • Shredded Coconut (if desired)
  1. In a medium mixing bowl, combine the coconut milk, BBQ sauce and crushed red peppers.  If you are using canned pineapples, drain 1/2 of the juice into the BBQ sauce mixture.
  2. Add the chicken pieces to the measuring and stir to coat.
  3. Layer the pineapple on the bottom of the pressure cooker pan.  If using fresh or frozen pineapple chunks add 1/2 cup water.
  4. Pile the chicken on top of the pineapple but do not mix together.
  5. Pour the remaining sauce over the top of everything and close/lock the lid.
  6. Cook on medium for 9 minutes then push button to release steam/pressure and unlock lid.
  7. Remove the chicken & pineapple from the pressure cooker with tongs and turn unit to the brown setting.
  8. Add 1 1/2 TBLS Cornstarch to 1/4 cup or so cold water then pour into sauce and whisk for about 1 minute to thicken.
  9. Pour thickened sauce over the removed chicken and pineapple.

Pile a good amount of the pineapple risotto on the plate and cover it with some of the chicken, pineapple and sauce.  Sprinkle a bit of coconut and green onions on top and enjoy!

Are you on Facebook?  You might be interested in the things I may not devote an entire blog post to: recipes, food facts, nutritional information, photos and other things that make my mouth water. I may not write a blog post every day, but there are daily updates to my This Girl Loves To Eat community at: https://www.facebook.com/ThisGirlLovesHerFood


What Goes With Quinoa?

So my first foray into pressure cooking went off without me getting maimed or burned, so I guess I’ll be using my new toy again soon!  I made a huge batch of quinoa that turned out light, fluffy and quite tasty.  Just one problem: we aren’t big eaters of any grain at dinner time outside of rice, so I was left at a bit of a loss as to what to do with my big bowl of quinoa.

lemonchickenquinoaThe cupboards, refrigerator and freezer were rather bare due to the two week vacation we had just returned from, so I was left with very few options.  A lemon, Roma tomato, small avocado, a bag of frozen edamame, and 1/2 lb of frozen diced chicken breast were all I could salvage to throw together some kind of dinner hearty enough to satisfy my husband.

Lemon Chicken with Avocado & Tomato Quinoa

  • 1 1/2 Cups Cooked Quinoa (See yesterday’s post)
  • 1 Small Roma Tomato (diced)
  • 1 Small Ripe Avocado (diced)
  • 1 Cup Frozen Shelled Edamame (Soybeans) Cooked
  • Juice of 1 Large Lemon
  • 2 Tbls Olive Oil
  • 1/2 Lb Fresh Diced Chicken Breast
  • 1 tsp Minced Garlic
  • 1/8 tsp Dried Dill
  • 1/8 tsp +/- Arrowroot (to thicken the sauce)
  • Pinch Cayenne Pepper
  • Freshly Ground Salt & Pepper

Juice the lemon, stir in the arrowroot and set aside.  In a medium frying pan, heat 2 TBLS olive oil and the minced garlic over medium-high heat.  Add the diced chicken, season with freshly ground sea salt and pepper, and brown for about 2 minutes per side.  Add the edamame, dill, cayenne pepper and lemon juice mixture to the pan and continue cooking about 3 minutes until edamame and chicken are done and sauce is well incorporated.

Spoon about 1/2 Cup of the cooked quinoa and about 1/3 of the chicken mixture into a bowl. Top with the diced avocado and tomatoes and add more ground pepper to taste.

Light enough for my post-vacation diet yet hearty enough that 2 bowls satisfied my husband’s appetite.  Win-Win!

Are you on Facebook?  You might be interested in the things I may not devote an entire blog post to: recipes, food facts, nutritional information, photos and other things that make my mouth water. I may not write a blog post every day, but there are daily updates to my This Girl Loves To Eat community at: https://www.facebook.com/ThisGirlLovesHerFood

Rainy Day Delight

It’s such a rare occasion in Orange County, California to have a cold, rainy, stormy day that I was excited to see a wet patio outside my window when I got up this morning.  WOO HOO!  I am SO getting the slow cooker out and making some chili!

white-chili

Not my usual rip-off of Mom’s XLNT Brick of Chili Con Carne based chili with ground beef, cubes of left over steak, canned crushed tomatoes and red beans.  Nope!  Today’s a White Bean Chicken Chili day.

It’s a ridiculously easy recipe and practically cooks itself.

Rainy Day White Bean Chicken Chili

  • 1 Can Diced Ortega Chilis (Mild or Hot – your choice)
  • 2 Boneless, Skinless Chicken Breasts – about 1 1/2 lbs (Frozen or Thawed)
  • 16 oz Chicken Broth
  • 1 – 16 oz Bag of Dry Great White Northern Beans
  • 2 tsp Dried Cilantro Flakes
  • 1 tsp Ground Black Pepper
  • 2 tsp Onion Powder
  • 1 tsp Devil’s Dust (or any Smoked Chili seasoning you use)
  • Sour Cream and Chopped Fresh Cilantro to serve (if desired)
  • 1 Ripe Avocado Chopped (if you have one)

In a large stock pot, 6 to 8 cups water on to boil.

Using a large colander, rinse and drain the white beans.  Pick out any icky ones and then add to the boiling water.  Boil the beans for about an hour then turn off the heat, cover and let stand for another hour.

While the beans are soaking get the other ingredients going in the slow cooker set on low heat.

  • Empty the can of diced green chilis (undrained) into the bottom of the slow cooker
  • Put the frozen chicken breasts on top of the chilis
  • Pour the chicken broth over the breasts
  • Dust the tops of the breasts with the spices (ending with the cilantro)

When the beans have finished soaking, empty them into a colander and then transfer them to the slow cooker.  Stir just enough to mix everything together and leave it the chili to cook for 6-8 hours on low heat.

About 4 hours into the cooking time, shred the chicken beasts with  forks and mix the chicken back into the chili.

When the cooking time has completed taste the chili, adjust the spices and serve with a dollop of sour cream and a sprinkling of fresh cilantro on top.  If you’re lucky enough to have a ripe avocado on hand, do yourself a “flavor” and chop it up to put on top of your bowl of chili!

You can speed this recipe up, making it one you can throw together in 10 minutes or less when you are leaving for work so it can cook all day, by substituting 3 cans of white beans from the grocery store.

I can’t wait for dinner time!

Are you on Facebook?  You might be interested in the things I may not devote an entire blog post to: recipes, food facts, nutritional information, photos and other things that make my mouth water. I may not write a blog post every day, but there are daily updates to my This Girl Loves To Eat community at: https://www.facebook.com/ThisGirlLovesHerFood

This Dinner Will Get You Thirsty This Thursday

IMG_4485[1]We missed taco Tuesday this week.

I was just too tired and sad from having to put my beloved lab to sleep Monday, to even think about cooking and getting my Mexican food fix.  The household is slowly recovering so I ventured out to the grocery store and then into the kitchen to throw something together tonight, that wasn’t takeout.  I came up with something tasty, filling and gluten free!

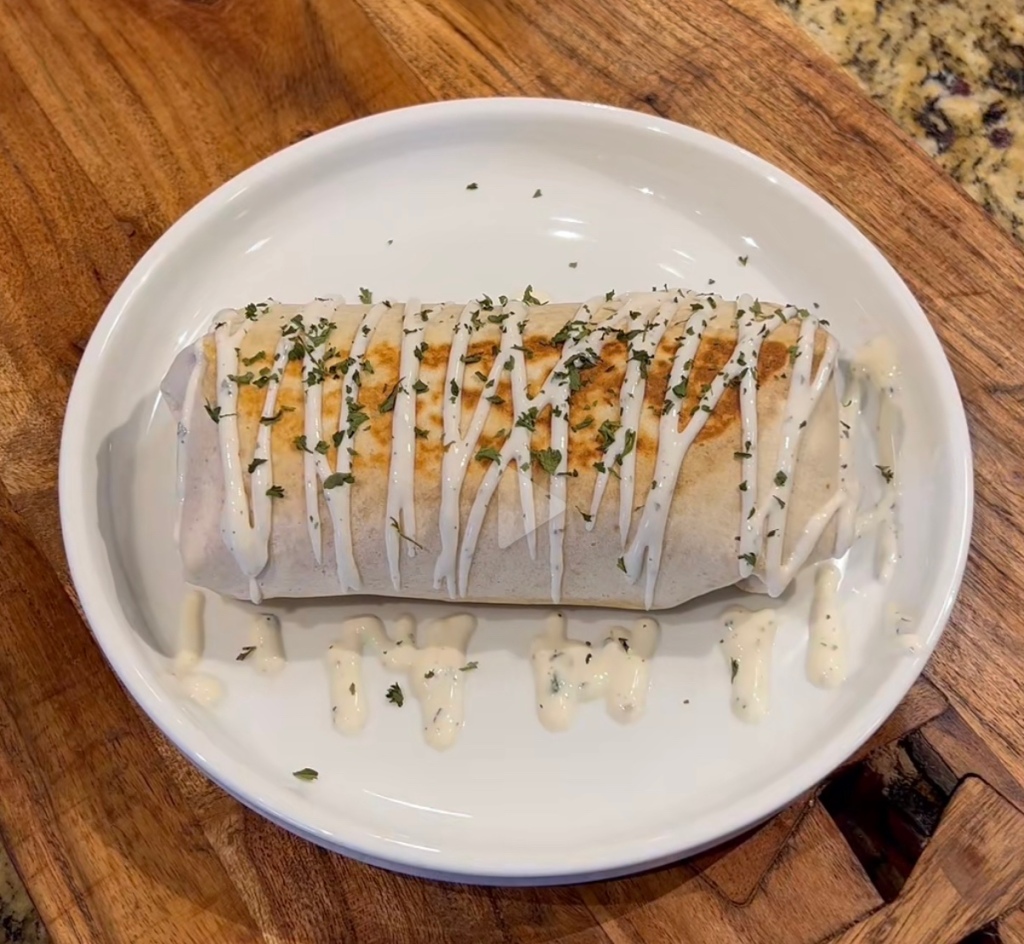
Chicken Stuffed Pasilla Peppers with Arborio Rice

  • 4 Large Pasilla (A.K.A. Poblano) Peppers
  • 1 Red Bell Pepper
  • 1 Orange Bell Pepper
  • 1 Yellow Bell Pepper
  • 2 Roasted Chicken Breasts
  • 6 Strips Crisp Cooked Bacon
  • 1 1/2 Cups Shredded Cheddar Cheese Blend (Cheddar/White Cheddar/Sharp Cheddar)
  • 2 Chopped Green Onions
  • 1/2 Cup Trader Giotti’s Arrabiata Sauce (found at Trader Joe’s stores)
  • 1/2 – 1 1/4 Cup Organic (Gluten Free) Chicken Broth
  • 1 Cup Arborio Rice
  • 3/4 Cup Sour Cream

I bought a nearly 6 pound whole young chicken and roasted it in a 375 degree oven for about 1 hour 45 minutes, took it out to rest and then removed the breasts and placed them in the Vitamix container.  Strain the drippings into a measuring cup and add enough chicken broth to equal 1 1/2 Cups.

In the same oven, while the chicken was cooking, I laid 6 strips of bacon on a cookie sheet and baked them for about 18 minutes, until they were crispy and browned but not yet burning.  Remove the bacon from the oven to drain and cool then cut it into pieces and add to the Vitamix container.

Once the chicken has finished cooking, increase the oven temperature to 400 degrees.

Wash and dry the Pasilla peppers then carefully cut the top off of all four, discarding the stem and seeds.  Take each of the peppers and cut a wide V shape on one side (from the top toward the solid bottom it’ll look like a V-neck shirt).  Place all 4 peppers on a cookie sheet.

Remove the stems and seeds from the bell peppers.  Cut in half and then into quarters until all pieces can lay flat on a cookie sheet.  Bake both sheets of peppers 20-25 minutes until the skins blister and start to blacken.  Remove the bell peppers from pan to cutting board to cool and then cut into small pieces and add to the Vitamix container.

Pulse the mixture until well combined.  Move mixture to a mixing bowl, add 3/4 cup shredded cheese, the chopped green onion and the Arrabiata sauce stirring to combine.

Fill each of the Pasilla peppers with the chicken mixture mounding each until they’re full.  Sprinkle the rest of the cheese over each of the peppers and bake in the 400 degree oven until the cheese is melted and starts to brown.

Rice:  In a medium saucepan with a lid, combine the reserved drippings/chicken broth, 1 TBLS butter or olive oil, and 1 Cup Arborio rice.  Cook over medium heat until it reaches a boil then put lid on, reduce heat to low and simmer for 20 minutes.  Remove pan from heat and allow to steam for 10 more minutes then fluff rice with a fork.

Sauce:  While the rice is cooking, simmer the reserved pieces of Pasilla pepper with about 3/4 cup chicken broth until liquid reduces by half and peppers are fork tender. Move peppers and broth to the cleaned Vitamix container and process until only a few small pieces remain.  Add 3/4 Cup sour cream to the Vitamix container and process until thoroughly combined and smooth.  Add salt and pepper to taste.

Serve:  Place rice in the center of the plate, lay one stuffed pepper on top of the rice and drizzle the sauce over the pepper.

If you are on Facebook and are interested in the things I may not devote an entire blog post to:  recipes, food facts, nutritional information, photos and other things that make my mouth water, I have a Facebook page you can visit too https://www.facebook.com/ThisGirlLovesHerFood