This dreamy pie comes from the magicians at Bon Appétit. It’s easy and boozy! My favorite dessert combination. 😉 It’s not a pie you can make at the last minute though. You need to allow for at least 8 hours freezing time so the consistency is right, so plan ahead if you’re making this.
The Tequila you use matters – don’t just pour any old tequila in or you could ruin this pie. Food & Wine Magazine recently published a list of 10 Top Blanco Tequilas and any of these would be great in this pie:
- Espolon Blanco $26 100% agave tequilas, with a silky texture and a spicy kick
- Tapatio Blanco $36 Smoky & complex, w/anise and classic herbaceous agave notes
- Astral $39 Potent, floral tequila, agave juice ferments w/the pulp—a long-abandoned traditional approach
- Casa Noble Crystal $40C Certified Organic; Vegetal and funky (in a good way)
- Siempra Valles Blanco $40 Earthy Agave from the Jalisco lowlands
- Pasote Blanco $45 This subtle tequila from master distiller Felipe Camarena heads toward the lighter, greener side of agave, with grass and mint
- Fortaleza Blanco $50 Guillermo Sauza started Fortaleza almost 30 years after his family sold its namesake brand. All of his tequilas—including this minty, unaged version—are superb
- Expresiones del Corazóne Artisianal Edition Blanco $60 Agave at two different sugar levels is distilled and blended for this flavorful blanco—think eucalyptus, black pepper and plantain
- Roca Patrón Silver $69 Emphatically agave-scented, this is made with the traditional tahona method, using a two-ton volcanic rock to crush the roasted piñas
- Casa Dragones Blanco $75 This one is smooth w/lime peel and pine needle notes

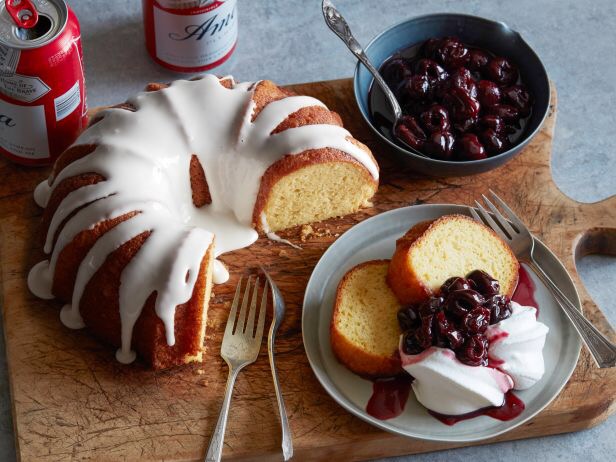
Frozen Margarita Pie
- 6 TBSP Unsalted Butter
-
10 graham crackers
-
3 Tbsp. sugar
-
½ tsp. kosher salt. divided
-
¾ cup chilled heavy cream
- 5 limes, divided
- 1 14-oz. can sweetened condensed milk
- 3 Tbsp. tequila blanco
Melt 6 Tbsp. butter in a small saucepan over medium heat. Let cool slightly.
Crumble 10 graham crackers into the bowl of a food processor. Add 3 Tbsp. sugar, ¼ tsp. salt, and melted butter to bowl and process until mixture resembles wet sand.
Transfer graham cracker mixture to a shallow 9″ pie pan. Using a measuring cup, press firmly into bottom and up sides of dish. Freeze 20 minutes.
Meanwhile, whisk ¾ cup heavy cream in a medium bowl until cream begins to thicken to the point you see ripples and stiff peaks begin to form, 3–5 minutes.
Cut 4 limes in half and juice into a fine-mesh sieve set over a glass measuring cup (you should have about ½ cup juice). Pour lime juice into another medium bowl and whisk in 14 oz. condensed milk, 3 Tbsp. tequila, and remaining ¼ tsp. salt until smooth.
Fold half of whipped cream into lime juice mixture, carefully folding under and over while turning the bowl. Add remaining whipped cream and continue to fold until no streaks remain.
Remove pie pan from freezer and pour in filling. Using the back of a spoon, gently spread filling to edge of crust.
Using a microplane, zest half of the remaining lime over pie.
Freeze pie at least 8 hours, or preferably overnight. #ThisGirlLovesToEat

 I saw this on
 When I was young it seemed that there wasn’t a cookie that I didn’t love. #ThisGirlLovesToEat 😉 Snickerdoodles were a particular favorite of mine! I don’t know what I’ve been doing wrong, but somehow I’ve never managed to bake one that I absolutely loved.
 I was feeling a little down today so I headed to the kitchen to change my attitude.
 counter, as quietly as she could, eating as many cookies as she could (1 big one) before I got to her to get the plate out of her reach!
 One look at this video and all I could think was, “Yum!” I was able to eyeball the measurements of the ingredients pretty accurately from the video but, just to be safe, a quick Google hunt led me to the recipe at


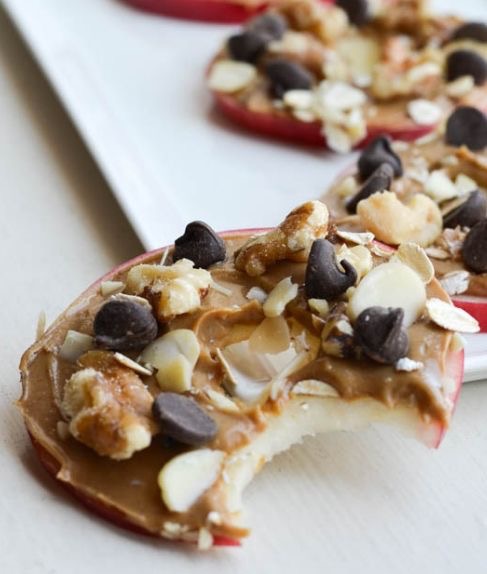

 Most people who put themselves on diets at the beginning of each year wrongly assume that they have to deprive themselves of anything sweet and especially anything that falls under the category of dessert. Thankfully they are wrong on both counts.