Chicken Teriyaki Bowls

sunday-dinner-01I had nothing planned for Sunday family dinner after spending the afternoon enjoying the unexpected 88° day outside.  I swore not to order pizza 2 Sundays in a row, so I quick thawed a few individually wrapped chicken breasts that I bought at Costco and checked the cupboards for what I could do with them.

My first thought was that I had snipped some fresh basil from the garden and knew that I had some pine nuts and olive oil, I could do a quick pesto and throw the chicken over some pappardelle pasta.  That got vetoed because we had enjoyed a block of cream cheese covered with some jarred Trader Joe’s pesto Saturday afternoon with some pita crackers.  Damn!

I opened the refrigerator and saw the fresh pineapple that I had ripening to slice and soak in Malibu Rum and inspiration hit.  I’d make some homemade teriyaki and we’d have chicken bowls for dinner.  Whew!  Crisis averted.

Quick Teriyaki Sauce

  • 4 TBLS Honeyteri
  • 1/2 Cup Low Sodium Soy Sauce
  • 1 + 1/2 Cups Water
  • 8 TBLS Brown Sugar
  • 1 tsp minced ginger
  • 1+1/2 tsp minced garlic (preferably roasted)
  • 4 TBLS Corn Starch dissolved in 1/2 Cup Cold Water
  • 3 tsp Crushed Red Pepper Flakes
  • 3 tsp Sesame Seeds

In 1 +1/2 Quart Saucepan whisk together honey, soy sauce, water, brown sugar, ginger, garlic, and crushed red peppers over medium heat. Dissolve cornstarch in water and whisk into sauce cooking about 2 more minutes until sauce thickens. Remove from heat and stir in the sesame seeds.  Makes about 4 cups.  Store any unused sauce in a tightly covered container in the refrigerator.

Bowl Prep:

  • Prepare 6-8 Servings of White or Brown Rice
  • Thinly slice a green bell pepper, 2 ribs of celery, 2 carrots (julienne or matchstick sized), and 1/4 of a medium onion (if desired)
  • Quickly stir-fry the vegetables in a splash of olive oil until onion is translucent and other vegetables have softened
  • Cut 3-4 Boneless skinless chicken breasts into 1 x 1 inch strips (give or take), salt and pepper, and stir fry in a well oiled pan over medium-high heat until chicken is cooked through.
  • Thinly slice the green portions only of a green onion

Assemble Bowls:chixteri

  • Scoop some rice into the bottom of the bowl
  • Add a layer of the vegetable mixture
  • Top with a generous portion of the chicken
  • Generously spoon teriyaki sauce over the top of the chicken until well coated
  • Sprinkle with sliced green onion

This is a really easy make ahead meal.  Prepare everything and store separately in covered containers in the refrigerator.  It is easily and quickly reheated for a weeknight meal!

If you are on Facebook and are interested in the things I may not devote an entire blog post to, recipes, food facts, nutritional information, photos and other things that make my mouth water, I have a page on Facebook you can visit too:  https://www.facebook.com/ThisGirlLovesHerFood


All-American Meal

meatloaf

During the entire Election 2016, this admitted Political Junkie made every night of both conventions and each of the 3 debates, plus a few other random “big political news” nights, events for a special meal to eat in front of the television.

So, when my husband asked me what gourmet meal I’d be preparing I was surprised to find myself unprepared with a ready-to-answer menu.  Uh Oh!  He suggested meatloaf which I immediately shook off as not fancy enough for a night I anticipated would involve a lot of anticipatory butterflies for the historic, ultimate glass ceiling shattering moment in history I hoped would be happening for women while we’d be eating our dinner on the west coast.

As the day wore on I started to change my mind about the simple, unassuming meatloaf.

meatmashpeasWhat screams Americana more than the steady weeknight fare of everyone’s youth more than meatloaf, mashed potatoes and peas?  Nothing I could come up with.  Throw in an apple pie and the perfect Tuesday Election Night 2016 meal vote was cast! 😉

Simple Weeknight Meatloaf

  • 2 1/2 – 3 Pounds 85% Lean Ground Beef
  • 1 Sleeve Saltine Crackers Crushed
  • 1 Can Fire Roasted Diced Tomatoes
  • 2 Large Eggs
  • 1/3 Cup Ketchup or Jarred Spaghetti/Marinara Sauce

Preheat oven to 350°F.

  1. In bowl of stand mixer (or large mixing bowl if combining ingredients by hand) put (in this order) crackers, eggs, can of tomatoes (undrained), meat, and ketchup.
  2. Using bread hook attachment, turn stand mixer to lowest setting and mix until ingredients start to combine and form a loaf shape.
  3. Remove hook and using a large wooden spoon or rubber spatula, finish combining until no dry crackers show through the meat.
  4. Mound into a loaf pan but don’t pack too firmly.
  5. Put loaf pan into preheated oven and set timer for 1 hour and 20 minutes.  At about 30 minutes use a turkey baster and suction off any fat that has begun to accumulate along the edges of the loaf pan.  Also, use your ketchup or spaghetti/marinara sauce to top the meatloaf.
  6. At 60 minutes again suction the fat from the edges of the pan with a turkey baster.  I do this to avoid spillage into my oven and also to avoid having my meatloaf sit in fat during the entire baking time.
  7. At an hour and a twenty minutes, slide your meatloaf out of the oven and insert a meat thermometer into the middle, making sure not to let the tip of the thermometer touch the bottom of the pan.  Your meatloaf should read 160°F for medium in the center.
  8. If you want your center to be more medium well, put your meatloaf back into the oven for another 5 minutes or so and check the temperature again.  For medium-well it should read 165°F and the rest of your meatloaf will be more well done at or above 170°F.

If you want mashed potatoes to be ready when your meatloaf comes out you can throw some small red potatoes (skin on or off) into a pot of boiling water and cook them for 15 minutes.  Turn them off, drain the water and throw them into the bowl of your stand mixer with some milk, salt & pepper and butter.  Using the paddle attachment mix until well combined but don’t over mix.  Throw some foil over the top of the bowl and they’ll stay hot until you’re ready to eat.

If you are on Facebook and are interested in the things I may not devote an entire blog post to, recipes, food facts, nutritional information, photos and other things that make my mouth water, I have a page on Facebook you can visit too:  https://www.facebook.com/ThisGirlLovesHerFood

Mushroom-Spinach Spaghetti

mushspinspagKnowing that tonight will be a long one while we stay up late to watch the results of Election Night 2016, I am prepping dinner for tomorrow night ahead of time.  A recipe I love, that has no sauce, is easy to assemble, throw in the refrigerator a day ahead, and, as a bonus, is one that my husband will take to work for lunch afterward without complaint!

Mushroom-Spinach Spaghetti

  • 1 Pound Spaghetti, Spaghettini, or Angel Hair Pasta
  • 24 oz Sliced White and/or Baby Portobello Mushrooms (I used a combination of both)
  • 4 oz Fresh Spinach
  • 1 Stick Butter (8 TBLS)
  • 2 TBLS + 2 TBLS + 2 TBLS (all separate measures) Olive Oil
  • 4 oz Shredded Parmesan Cheese
  • 3 TBLS Garlic and Onion Spice Blend (You can combine equal amounts of onion powder and garlic powder if you don’t have a prepared blend on hand)
  • Fresh Ground Sea Salt
  • Fresh Ground Pepper

mush1Put your stick of butter (8 TBLS) into a large skillet, I prefer a well seasoned cast iron skillet, over medium-high heat.

When your butter has melted, add your mushrooms and 2 TBLS olive oil poured over the top.  Cook, stirring occasionally so that mushrooms don’t stick to pan, for about 2 minutes, then add yourmush1a garlic and onion spice blend, salt and pepper.  Continue cooking and stirring the mushrooms for about another 3 to 4 minutes until most of the moisture has been absorbed by the mushrooms.  Remove the mushrooms to a large mixing bowl and set aside.

spin1Add 2 TBLS olive oil to the skillet and add your spinach to the pan.  Using tongs to toss the spinach with the oil, cook tossing constantly until all of the spinach is wilted but not cooked all the way.  Immediately remove from the pan to the samespin2 bowl as the mushrooms and stir the mushrooms and spinach together.  Set bowl aside and allow to cool while you prepare the pasta.  When your mushroom-spinach mixture has cooled, sprinkle your 4 ounces of shredded parmesan cheese over and stir it in completely.

Prepare your pasta according to package directions with one important change:  Make sure that you break the noodles in half lengthwise before you put them in the water.  When your pasta has finished cooking drain it and toss it with your remaining 2 TBLS olive oil then add it to your mushroom-spinach mixture.  Use your tongs to make sure your mushroom-spinach mixture is well combined and coating your pasta completely then either serve immediately or pour it into a 9 X 13 Pyrex baking pan and cover to keep warm.

mushspinspag

If you plan to make this a day ahead like I am, place covered baking pan in the refrigerator. To prepare for serving the next day, top cold pasta with a couple of TBLS butter (divided into small pats) and reheat in a 350°F oven for about 30 minutes.  You can also just toss individual servings into the microwave. 😉

With this easy (and inexpensive) make ahead dinner, the only decision you’ll need to worry about making tomorrow night is which wine to drink!

If you are on Facebook and are interested in the things I may not devote an entire blog post to, recipes, food facts, nutritional information, photos and other things that make my mouth water, I have a page on Facebook you can visit too:  https://www.facebook.com/ThisGirlLovesHerFood


Mrs. Fields Peanut Butter Cookies

pbcookieI love peanut butter cookies, something about them feels more special than a chocolate chip cookie.  Just like a sugar cookie tells me it’s Christmas, peanut butter cookies feel like a cold winter night with a warm cup of cocoa.  My mom wasn’t big on cooking dinner, but she did bake.  Cookies were easy, and peanut butter cookies were my dad’s favorite, so they were one that she made once in a while.

I’m not in bakeries often, but when I do get enticed by their heavenly smell and break down and buy them, I’m usually disappointed.  I’m impatient and can never wait to get home, I rarely even make it to the car, before I’m unfolding that waxed bakery bag and taking a big bite of salty peanut butter goodness.  More often than not, they are either too dry, too doughy or too greasy and leave me sorry that I bought them.

There have been very few exceptions, but among my favorite peanut butter cookies are: Mrs. Fields, French’s Bakery (Costa Mesa, Irvine, Mission Viejo, and Orange, CA), and Disneyland.

Lucky for all of us, Debbie Fields shared her recipe for her peanut butter cookies on her blog in 2012.  A bonus for the Gluten-Free crowd, there is no flour in it!

Mrs. Fields Peanut Butter Cookies

mfpbcookies1 cup peanut butter, creamy or chunky
1 cup sugar
1 large egg
1 teaspoon vanilla
coarse salt or sugar, your choice

Preheat oven to 350°.  In a large mixing bowl, combine peanut butter and sugar. In a small bowl, lightly beat the egg, then add vanilla directly to it and stir. Add egg mixture to peanut butter mixture and stir until well combined. Roll dough into walnut-sized balls and place on a prepared cookie sheet. Using the tines of a fork, create a crosshatch pattern, flattening the dough about half the thickness. Sprinkle the top of each cookie with a pinch of coarse salt or sugar, depending on your tastes. Bake for 10 minutes, or until barely golden brown around the edges. Makes 30 cookies

HINT:  A good-quality, natural peanut butter adds even richer flavor, but  you may need to add more sugar. Taste dough to determine.

HINT:  Kick these cookies up another notch by dipping cooled cookies in melted semi-sweet chocolate. Allow to cool completely before serving.

I never realized that there was no flour in these, which makes them gluten-free, but also explains why they never taste dry or doughy to me.

Next I’ll see if I can hunt down recipes for my other favorites so I can do an unscientific side by side taste test with my family to see which ones they prefer.

If you are on Facebook and are interested in the things I may not devote an entire blog post to, recipes, food facts, nutritional information, photos and other things that make my mouth water, I have a page on Facebook you can visit too:  https://www.facebook.com/ThisGirlLovesHerFood

Get Rid Of Garlic Breath!

bowl-of-garlic-clovesI LOVE garlic! 

If a recipe calls for 1 clove you can guarantee that I’ll be adding at least two, but more than likely three.  Unfortunately, I am one of those people who doesn’t just get garlic breath, I sweat garlic for at least a day after I’ve eaten it in any form.

One of my favorite aggressively garlic forward meals is Shrimp Scampi.

Extra Tasty Shrimp Scampi

  • 1 + 1/2 Pounds Large Fresh (or Frozen) Shelled & Deveined Shrimp
  • 1/2 Pound Asparagus Chopped into 1″ Chunks
  • 4 TBLS Olive Oil
  • 6 TBLS Butter
  • 1 Cup Dry White Wine (like a Sauvignon Blanc)
  • 4 TBLS Chopped Fresh Parsley
  • 4 to 6 Cloves Fresh Garlic, Minced
  • 1/2 to 3/4 teaspoon Red Pepper Flakes (or more to taste)
  • 2 TBLS Freshly Squeezed Lemon Juice
  • Freshly Ground Sea Salt
  • Freshly Ground Black Pepper
  • Steamed Jasmine Rice
  • A Freshly Baked French Baguette (for sopping up the extra sauce)

scampi

Leaving the tail on or removing it from the shrimp is an individual choice.  I prefer to leave it on so the maximum shrimp taste is passed into the sauce, but my husband complains about having to remove them, so I usually do just to avoid listening to him bitch…

  1. Prepare the jasmine rice and set aside (keep warm)
  2. Heat a large sauté pan or cast iron skillet over medium high heat
  3. Add olive oil, butter, garlic, and red pepper flakes
  4. Sauté about 30 seconds then add chopped asparagus
  5. Sauté about 90 seconds then add shrimp
  6. Add the wine and make sure that the shrimp is covered completely with the sauce
  7. Spread the shrimp so they are in a single layer in the pan and cook for about 3 minutes
  8. Turn the shrimp over and cook for another minute
  9. Remove the pan from the heat
  10. Squeeze the lemon over the shrimp, lightly salt & pepper and toss shrimp & asparagus with the chopped parsley

Serve the shrimp & asparagus over a bed of the steamed jasmine rice along side a hunk of the baguette, making sure to pour a generous amount of sauce over it all. Enjoy!

Once dinner is over and you’re ready to start getting kisses from your grateful family, you might want to start thinking about the garlic breath you’ve unleashed on an unsuspecting audience…

Apparently the Italians, who serve a salad and/or a fruit course after a pasta course, have known what they were doing all along.  The September 2016 issue of the Journal of Food Science reported the findings of a study that concluded that chewing on lettuce,  raw apples, or fresh mint after consuming a meal high in garlic reduced the concentration of the garlic smell on the subjects’ breath by 50%.

If you are on Facebook and are interested in the things I may not devote an entire blog post to, recipes, food facts, nutritional information, photos and other things that make my mouth water, I have a page on Facebook you can visit too:  https://www.facebook.com/ThisGirlLovesHerFood

Spicy Cognac-Mushroom Rice

mushrice

I’m throwing caution to the wind this holiday season and tossing my tried and true recipes out the window.  Well, at least a few of them.  So, out goes the usual wild rice side dish and in it’s place I’m going to add a whole lot more flavor:

Spicy Cognac-Mushroom Rice

  • 4 Cups Cooked Brown Rice
  • 4 Cups Cooked White Rice
  • 1 – 26.5 oz Can Black Beans (drained)
  • 12 oz Sliced White Mushrooms
  • 12 oz Sliced Portobello Mushrooms
  • 8 TBLS (1 Stick) Butter
  • 1/2 Yellow Onion Chopped
  • 1 – 4oz Can Diced Jalapeno Peppers (drained)
  • 1/2 Cup Cognac
  • 3 TBLS Honey
  • 2 TBLS Low Sodium Soy Sauce
  • Freshly Ground Sea Salt (to taste)
  • Freshly Ground Black Pepper (to taste)

Prepare your rice using whatever method you prefer.  I prefer my pressure cooker so I can combine the white and brown rice and do it all at once, but you can do it on the stovetop, use your rice cooker or even do it in your microwave if you prefer.

  1. Using a large skillet, I use my cast iron skillet, melt your butter.
  2. Add in the sliced mushrooms and let brown, stirring, for 10 minutes.
  3. Next add the onion, jalapeño, salt and pepper and let cook for another two minutes.mush1
  4. Add the honey and stir until it’s well incorporated.
  5. Add the cognac and let reduce for 2 minutes.
  6. Add the soy sauce and stir, then add the drained black beans.
  7. Cook for another 5 minutes over low heat until the liquid thickens a bit.
  8. Pour over the rice in the large bowl.
  9. Stir together and then season with more salt and pepper to taste if needed
  10. Pour rice into a serving dish – I am using a disposable 9 x 13 covered cake pan with a lid for mess free transport.

I am using my unsuspecting friends at tomorrow’s USC homecoming tailgate as guinea pigs.  We are deep frying Duck and this seemed like a good way to do a test run.

If you are on Facebook and are interested in the things I may not devote an entire blog post to, recipes, food facts, nutritional information, photos and other things that make my mouth water, I have a page on Facebook you can visit too:  https://www.facebook.com/ThisGirlLovesHerFood


Crab Stuffed Mushrooms & Wine

New-turkeys
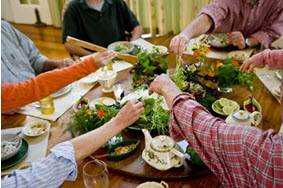
We all know that the turkey and sides are the stars of Thanksgiving, but there needs to be a little something to nibble on before the feast so people don’t knock each other over like ravenous fiends when the buffet is ready.

Inevitably I end up making too many snacks, but my excuse is that I never know if I’ll have a few people “helping out in the kitchen” for the hours leading up to dinner, or if the entire crowd will be at the house hanging out for drinks and watching football.

I like to assign Thanksgiving appetizers to someone else when I can and ask them to keepturkey-cheese-ball-8 them fairly simple: some type of tray with fruit, veggies, crackers and sliced cheese or a cheese ball.  This year I am not hosting, we get to be the guests, but I’ll be taking a few dishes to add to the spread.

My main goal was to find something that wouldn’t appeal to the kids so they’d be less likely to eat so much that they ruin their dinner.  I’d rather they eat fruit, if that’s there to snack on.  An added bonus: just by saying the word mushroom the kids will come nowhere near them, so their grubby little hands won’t be picking them up and down!

Crab Stuffed Mushroom Caps

  • ¼ teaspoon ground cayenne pepper
  • ¼ teaspoon onion powder
  • ¼ teaspoon ground black pepper
  • ¼ cup grated parmesan cheese
  • 1 – 8oz package softened cream cheese
  • 1 tablespoon minced garlic
  • 1 tablespoon olive oil
  • pinch of salt
  • 24 – 30 fresh whole white mushrooms
  • 1/8 cup finely chopped celery
  • 1 can lump crab meat
  • fresh arugula (if desired)
  • fresh rosemary (if desired)

Preheat oven to 375°F

  • Line a baking sheet with a silicone liner or parchment paper
  • Using a fine mesh colander or a regular colander lined with cheesecloth, break up the crab to make sure no shell remains and leave it to drain
  • Clean and dry mushrooms
  • Remove stems, trim rough edges, then chop stems and set aside
  • Place caps (empty cavity up) on the baking sheet
  • Heat oil in a small pan.  Stir in chopped stems, celery, garlic and a pinch of salt. Cook until moisture disappears.  Remove from heat
  • Stir in crab, cayenne pepper, onion powder, black pepper, parmesan cheese, and cream cheese.
  • Use a spoon to fill each of the mushroom caps and return them to baking sheet
  • Bake in pre-heated oven 20 minutes

crabstuffedmushroomsServe immediately on a platter lined with fresh arugula and sprigs of rosemary if desired.

Another great thing about this crab stuffed mushroom recipe is that it is easily matched with the wines you are already likely to be serving with your Thanksgiving feast:

  • Pinot Grigio
  • Champagne
  • Sauvignon Blanc
  • Soave
  • Pinot Noir

If you are on Facebook and are interested in the things I may not devote an entire blog post to, recipes, food facts, nutritional information, photos and other things that make my mouth water, I have a page on Facebook you can visit too:  https://www.facebook.com/ThisGirlLovesHerFood


Hadley’s Famous Date Shake

I love fruit and most vegetables although I will readily admit that cauliflower, unless it’s swimming in butter, lemon and herbs or covered with a luscious cheese sauce, leaves a lot to be desired.  Don’t even get me started on the smell.  Gross!

My grandma was a health nut when I was growing up.  She bought off on every do-it-yourself or make-it-at-home heath trend and we were her willing samplers.

She always had cut up vegetables for us kids to snack on, although my dad and grandpa would be snacking on things she wouldn’t touch like Spam, Vienna sausages, deviled ham, pickled herring, creamed chipped beef, sardines, and really anything canned they could spread on a saltine or Triscuit cracker.

She bought a yogurt maker and fruit dehydrator but I think the amount of time it took to get a finished product, and the lack of enthusiasm her efforts were met with, led her to toss them into the garage with the other gadgets of brief interest.

hadleylogoOne thing that she did instill in all of her kids and grandkids though was a love of fruits and nuts.  Anytime we would be in the desert at one of their condos, a required stop was Hadley’s Fruit Orchard for nuts, fresh and dried fruits, and their specialty, a date shake.  Made with the sinfully delicious Deglet Noor Date, it’s pretty much heaven in a cup.

Hadley’s Famous Date Shakedate-shake-ingredients

  • 1/8 to 1/4 Cup Chopped Hadley’s Cooking Dates
  • 1/3 Cup 2% Milk
  • 1 Cup Vanilla Ice Cream
  • 1 Ripe Banana, a sprinkle of nutmeg or cinnamon (if desired –  additions on their menu, not part of the original recipe)

In a blender, combine dates with 1/4 cup of the milk. Blend to a creamy consistency. Add ice cream and the rest of the milk and blend to desired thickness. Serves 2.

deglet-noor-dates-californiaI am now about 2 hours away from Palm Springs, which puts me 2 hours away from Hadley’s but thankfully Hadley’s has entered the information age and I can order their fruits and nuts online!  Looks like I’ll be ordering some dates so I can indulge my need for a bit of memory refreshment. 😉

If you are on Facebook and are interested in the things I may not devote an entire blog post to, recipes, food facts, nutritional information, photos and other things that make my mouth water, I have a page on Facebook you can visit too:  https://www.facebook.com/ThisGirlLovesHerFood

Sunday Family Dinner

family_dinner_tableWhen I was a kid, we saw my mom’s parents all the time.  They lived just a few miles away so we often saw them during the week when they came to our various games.  On those nights, because Grandma always seemed to be on some new diet, Grandpa was excited to eat whatever junk food was being served at the snack bar, but at least twice a month, my grandparents would come to our house for a proper Sunday dinner.

My Mom didn’t have a big cooking repertoire, so dinner would be one of a four things:

  1. Roast on her counter top Farberware rotisserie;
  2. Flank or Top Sirloin Steak marinated with an envelope of Lawry’s tenderizing marinade for beef then grilled on the BBQ;
  3. Spaghetti.  Her Bolognese was one of the few things she made from scratch and my Grandpa Bob loved it; or
  4. Meatloaf.  Another basic meal that, inexplicably,  my grandparents loved coming over for.

Unless we were having spaghetti, we always had some version of the same side dishes:

  • Green salad tossed in Bob’s Bleu Cheese or Thousand Island Dressing bobsbcdressingbobs1000dressing
  • Some type of boxed potato she could throw in the oven
  • Rice-A-Roni
  • Peas, Broccoli with cheese sauce, or corn

I wasn’t kidding, cooking was not her thing.

If she was making dessert it was one of a very few things:

  • Basking Robbins Ice Cream
  • Frosted Cake
  • Cookies
  • Cherry Surprise

You may be asking yourself, what in the world is Cherry Surprise?  It was Mom’s go-to, minimal effort, no-bake, bring to any occasion dessert:

  • 2 Angel Food Loaf Cakes or 1 Angel Food Round Cake
  • 1 Large Box Instant Vanilla Pudding
  • 1 Cup of Milk
  • 16 oz Sour Cream
  • 2 Cans Comstock Cherry Pie Filling
  • Reddy-Whip Canned Whipped Cream or a Tub of Cool Whip Thawed

Assembly Directions

  1. Tear the angel food cake into small chunks and put the pieces into a 9″ x 12″ Pyrexafcake baking dish
  2. In a medium bowl (or the bowl of your stand mixer) combine the milk, sour cream, and pudding.  Mix on low until combined then switch to high and mix another 2 minutes, scraping bowl occasionally, until pudding is thick and fluffy.
  3. Using a rubber spatula, spread all of the pudding mixture over the cake layerpudding-layer.  Tap the baking dish against the counter to help the pudding settle into pockets between the pieces of cake.
  4. Pour the contents of both cans of cherry pie filling over the top of the pudding layer, spreading to evenly distribute the cherries
  5. Cover loosely and refrigerate for at least 2 hours
  6. Scoop portions onto plate and top with whipped creamcherry-delight

Simple, but always a crowd pleaser.

I try and do Sunday dinner but tonight didn’t even live up to Mom’s limited menus, I ordered pizza.  To be fair, we did eat it together as a family while watching Sunday night football. 😉

I’ll do better tomorrow.

If you are on Facebook and are interested in the things I may not devote an entire blog post to, recipes, food facts, nutritional information, photos and other things that make my mouth water, I have a page on Facebook you can visit too:  https://www.facebook.com/ThisGirlLovesHerFood

Apple Cider Sangria

Yesterday I made a batch of spicy apple cider that filled the house with a delicious early fall smell.  Tonight I think I’ll spice things up a bit more by sharing a recipe I have for a large batch cocktail featuring my sweet spicy apple cider.

Fall Apple Cider Sangriaapple-sangria

  • 1 Granny Smith Apple
  • 1 Fuji Apple
  • 1 Golden Delicious Apple
  • 1 Lemon
  • 1 Navel Orange
  • 2 Cups Spicy Pressure Cooker Apple Cider
  • 4 Cans Stoli Ginger Beer
  • 1 Bottle Sauvignon Blanc Wine – I prefer one that has peachy/apple/honeysuckle undertones when I am making this Sangria.  One that leans toward the citrus/grapefruit might throw the taste off.
  • 1/4 Cup Cinnamon and 1/4 Cup Granulated Sugar

cinnamonsugarrimPrepare Serving Glasses:  Combine 1/4 cup granulated sugar and 1/4 cup cinnamon and pour onto a shallow rimmed plate (like a salad plate); Dip the rim of your serving glass into water and then touch edge of glass into the cinnamon/sugar mixture on the plate; Lightly tap the excess off of each glass and set them aside.

Prepare the Sangria:

  1. Using a Mandolin or other thin slicer (I prefer the OXO 6 Piece Grater Slicer) thinly slice the apples, orange and lemon.
  2. Fill a Large (At least 1 gallon) Pitcher, or Mason Jar with a dispenser with the fruit.
  3. Add apple cider, ginger beer, and Sauvignon Blanc wine.
  4. Stir mixture, pour into the prepared serving glasses and garnish with thin slices of apple on a small skewer if you desire.

TIP:  If you are not a White Wine person, a lot of people aren’t, here are some recommendations for the type of wine you are looking for in this recipe:

Angeline Sauvignon Blanc – About $13 “With graceful aromas of white peach and nectarine, green apple and lemon…”

Low Hanging Fruit Sauvignon Blanc – About $8  “Flavors of honeydew melon, lemon-lime and ripe apple, followed by a refreshing crisp finish.”

Cloud Break Sauvignon Blanc – About $8  “lively flavors of honeydew melon, juicy peach and pear.”

This would be a great light drink to serve while the family is gathering before Thanksgiving dinner is served, an easy picnic or tailgate treat, and would be a really fun poolside treat.

With a 7:30 PM Thursday night USC game two weeks away, I can’t think of a better time to break this recipe out alongside my cider as a bit of a treat on, what may very well be, our first chilly night of the season!

Cheers!

If you are on Facebook and are interested in the things I may not devote an entire blog post to, recipes, food facts, nutritional information, photos and other things that make my mouth water, I have a page on Facebook you can visit too:  https://www.facebook.com/ThisGirlLovesHerFood