Oreo Red Wine Nutella Cupcakes

red-wine-nutella-cupcakes-with-oreo-nutella-filling-and-red-wine-frosting-767x1024I was sourcing articles related to wine and the picture, almost as much as the title convinced me, although I am seriously deficient in the cupcake decorating department, to give these a try.

I’m not sure what appealed to me more, the wine or the chocolate, but I figured I could manage combining them without staining everything in my kitchen.  I might even be able to pipe on the frosting without too much problem, so I’m off to the store to make these grown up delights!

I found this little bit of deliciousness at a blog I saw on Pinterest: www.yummyaddiction.com.

One thing: I noticed the blogger didn’t specify what type of wine she used or recommend a type.  For my own personal taste, with the cocoa, cinnamon and brown sugar in the cake, I am going to go with a red wine with a similar flavor profile like a Zinfandel, Petite Syrah or maybe a Pinot Noir or Malbec.

Oreo Red Wine Nutella Cupcakes

Makes: 10 cupcakes
For the cupcakes:
  • 1 cup all-purpose flour
  • ¼ cup cocoa powder
  • 1 teaspoon baking soda
  • ½ teaspoon baking powder
  • ¼ teaspoon salt
  • ¼ teaspoon ground cinnamon
  • ¼ cup unsalted butter, at room temperature
  • ¼ cup brown sugar
  • 2 tablespoons granulated sugar
  • 1 egg
  • ¼ cup red wine, any kind you like
  • ½ teaspoon vanilla extract
  • ¼ cup Nutella
  • 10 Oreos
For the filling:
  • ½ cup Nutella
  • 5 Oreos
For the frosting:
  • 1 cup red wine, any kind you like
  • ¼ cup granulated sugar
  • ½ cup unsalted butter, at room temperature
  • 2 cups powdered sugar
  • 1 teaspoon vanilla extract
  • salt, to taste
  1. Preheat oven to 350 degrees F. Line 10 muffin cups with cupcake liners. Set aside.
  2. The cupcakes. In a medium bowl, sift together the flour, cocoa powder, baking soda, baking powder, salt, and cinnamon. In a large bowl, cream the butter and sugars together until fluffy. Add the egg and beat to combine. Scrape down the sides of the bowl as needed. Beat in the vanilla extract. Stir in Nutella and red wine until evenly combined. Slowly add the flour mixture to the wet ingredients and mix until just combined. Place an Oreo cookie on the bottom of each cupcake liner. Pour batter over each Oreo cookie and fill each cupcake liner about ¾ of the way full. Bake the cupcakes for about 20 minutes or until a toothpick inserted in the center comes out clean. Remove from oven and place on a wire rack to cool completely.
  3. The filling. In a ziplock bag, place the Oreos and use a mallet to crush the cookies into small pieces. In a small bowl, combine Nutella with crushed Oreos. Set aside.
  4. The frosting. In a small saucepan, combine red wine and sugar. Cook over mediumoreo-red-wine-nutella-cupcakes-center heat, stirring, until sugar dissolves and wine comes to a boil. Reduce heat and simmer for 20 minutes (until the liquid is reduced to about ¼ cup or a light syrup texture). Let cool.
  5. Beat the butter until until smooth and creamy. Slowly add in powdered sugar (1/2 cup at a time), vanilla, and ¼ cup of prepared wine syrup. Beat until no lumps remain. Taste the frosting and add salt to cut the sweetness, if you prefer.
  6. Assembling the cupcakes. Cut out the center of each cupcake with a sharp knife. Fill the cupcakes with Nutella & Oreo filling. Transfer the frosting to a piping bag fitted with a decorative tip. Pipe frosting into a swirl on each cupcake. Enjoy!

If you use Facebook and are interested in the things I may not devote an entire blog post to: things like health articles, my favorite recipes, fun drinks, food facts, nutritional information, restaurant reviews, photos and other things that make my mouth water, I have a very active page on Facebook you can visit too:https://www.facebook.com/ThisGirlLovesHerFood

Cold Outside? Warm Up Your Insides!

its-freezing-pnts-brrr-9666002I’ll be honest, cold is relative to where you are in the world.  Today I’m thankful to not be in Central or Eastern Europe, which is seeing temperatures as low as -30°C (-22°F).  Brrr

Here, in Irvine, CA today it is 62°F and raining which means I am under a warm blanket with my two Labrador Retrievers snuggled up beside me and the fireplace on as I sip on some coffee laced liberally with some Bailey’s Irish Cream.  I use the words, “I’m freezing” in nearly every conversation I have today, but I am loving this weather.  At this time last year, we were heading into what was billed as the hottest February on record with day after day of temperatures in the upper 90’s that led to 2016 being called one of the hottest, if not THE hottest year on record, so excuse my exaggeration with the term “freezing” as, in order to be cold last year, I had to have my air conditioner running.

Today I saw a picture at one of my favorite websites, www.bonappetit.com, for Chili Colorado, that made my mouth water.

colorado-chili-1-of-1

I hadn’t yet decided what to make for dinner, but, after seeing this picture, no further searching was needed.  This will definitely be dinner, and a couple of workday lunches as well!  I am not a big pork fan, so I’ll be making the beef option.

***Note I always trim all of the visible fat away so that the meat is as lean as possible.

Rick Martinez’s Mom’s Chili Colorado

  • 5 Dried Ancho Chilis
  • 2 Dried Pasilla Chilis
  • 2 Dried Guajillo Chilis
  • 8 Cups Chicken Stock (3 Cups + 5 Cups Separated)
  • 2-3 Pounds Boneless Pork Shoulder (or 2-3 Pounds Boneless Beef Shoulder)
  • Salt and Pepper
  • Oilve Oil (My substitution for Vegetable Oil)
  • 6 Cloves Garlic Chopped
  • 2 Bay Leaves
  • 1 TBLS Ground Cumin
  • 2 tsp Chopped Fresh Sage
  • 2 tsp Chopped Fresh Oregano

Now Let’s Cook!

  1. Remove the stems and seeds from all of your chilis.  Make sure you have chosen soft and pliable chilis.  If they are dry and brittle they are too old.  They will be tasteless and ruin your dish.
  2. Cover chiles with 3 cups of your chicken stock (it should already be boiling) and let them steam, covered with plastic wrap, for about 30 minutes until they are plump and tender. Put the chilis and all of the soaking liquid into a blender and purée until very smooth.
  3. Cut 2 to 3 pounds boneless pork shoulder (or boneless beef shoulder) into ½” pieces and season with salt and pepper.
  4. Brown the meat in a large, heavy pot over medium-high heat with a couple of TBLS of olive oil so meat doesn’t stick. 
  5. Chop your 6 cloves of garlic and throw it in the pot along with 2 bay leaves, 1 TBLS ground cumin, 2 tsp each of chopped fresh sage and chopped fresh oregano.  Stir that around for about a minute, or until very fragrant.
  6. Add in your remaining 5 cups of chicken stock and simmer uncovered for about an hour.
  7. Stir in the chile purée and simmer for another 45 minutes until the meat is very tender and the sauce is a thick, mahogany-red color.
  8. Season with additional salt and pepper.
  9. Serve with flour tortillas – you can serve rice and beans for a full, authentic Mexican meal, if you desire, as well.

Just imagine the love and attention you’ll get from your family when they come into the house and are surrounded by the smell of chili Colorado simmering on the stove 😉 !

If you use Facebook and are interested in the things I may not devote an entire blog post to: things like health articles, my favorite recipes, fun drinks, food facts, nutritional information, restaurant reviews, photos and other things that make my mouth water, I have a very active page on Facebook you can visit too:https://www.facebook.com/ThisGirlLovesHerFood

Upside Down Banana Bread

udbb1Since this New Year’s Day is “Upside Down,” you know, all of the official festivities happening on Monday, January 2, what better way to kick-off (no pun intended) our entire day of parade and football watching than with this upside down take on my favorite overripe fruit concoction?

Our whole holiday week between Christmas and New Year’s Day has been spent at home, except for an escape on Wednesday for my birthday dinner WITH a 102°F temperature, so I did no baking, we did no entertaining, and I’ve really done nothing but sleep and drink hot tea.  I’m trying to rally, despite being sick, and make some kind of effort for tomorrow, yet another day of being sick at home, but at least there will be something I might want to eat.

My husband (he who is Twitter challenged) managed to send this Buzzfeed video to me in a message a couple of months ago as a hint, then I saw it again last night.  It looks easy enough so why not?  I’ll give it a try.

Upside Down Banana Bread

4-5 ripe bananas
3 eggs
½ cup oil
½ cup granulated sugar
1 Tbsp. ground cinnamon
2 cups flour
½ cup butter
1 cup brown sugar
2-3 bananas, sliced
Vanilla ice cream

  • Preheat oven to 350°F/175°C.
  • In a large bowl, mash the ripe bananas.
  • Add the eggs, oil, sugar, and cinnamon, mixing until evenly incorporated.
  • Add the flour and mix until the batter has no large pockets of flour. Set aside.
  • In a pot over low heat, melt the butter, then mix in the brown sugar until dissolved.
  • Bring up the heat to medium, cooking until the mixture starts bubbling.
  • Remove the caramel from heat and pour into a greased 9×9 baking pan.
  • Lay the banana slices evenly on top of the caramel.
  • Spread the banana bread batter on top.
  • Bake 40-50 minutes.
  • Cool until the bottom is barely warm.
  • Use a knife to loosen the edges from the pan.
  • Place a plate upside-down on top of the pan, then invert the pan, flipping the banana bread onto the plate.
  • Slice, then serve with vanilla ice cream.

TIP**  It’s important to make sure you are using a 9 x 9 pan.  If you use an 8 x 8 pan, like I did my first try, you need to increase the baking time by about 10 minutes and be prepared, you’ll be cleaning up the brown sugar that will bubble up and spill over the sides and burn onto the bottom of your oven.  Trust me, the smoke alarms blaring, dogs running around barking and the cleanup weren’t worth not following the exact directions.  UG!

It’s very sweet, so you might want to start with a small square and go back for seconds. Who am I kidding?  Put it in a bowl and pile the ice cream on!  And, before you ask, “Yes, I do intend to start my day with glorified cake and ice cream!”  #TheDietStartsTuesday 

If you’re on Facebook and are interested in the things I may not devote an entire blog post to: my favorite recipes, drinks, food facts, nutritional information, photos and other things that make my mouth water, I have a page on Facebook you can visit too:https://www.facebook.com/ThisGirlLovesHerFood

Baked Cheese Puff Appetizer

My grandma called these cheese puffs, but if you prefer the French name, Bon Appétit calls them Gougères.

These delicate cheese puffs always impress. The dough takes a couple of times to get “just right,” but this is now one of my favorites to make for a crowd.

  • 1 Cup water
  • 6 TBLS (¾ stick) unsalted butter, cut into pieces
  • ¾ tsp kosher salt
  • Pinch of nutmeg
  • 1¼ Cups all-purpose flour (I cut the carbs by using Bob’s Red Mill Paleo Baking Flour)
  • 4 Large eggs (at room temperature)
  • 6 Ounces (1½ cups) grated Comté or Gruyère cheese
  • ½ tsp freshly ground black pepper
  • 1 Large egg yolk

Preparation

Preheat oven to 400°. Bring butter, salt, nutmeg, and 1 cup water to a boil in a medium saucepan, stirring until butter is melted. Remove from heat, add flour, and stir to combine.

Cook mixture over medium heat, stirring vigorously with a wooden spoon, until mixture pulls away from sides of pan and forms a ball, about 2 minutes. Continue to cook, stirring vigorously, until a dry film forms on bottom and sides of pan and dough is no longer sticky, about 2 minutes longer. Remove pan from heat and let dough cool slightly, about 2 minutes. Mix in whole eggs one at a time (I use my hands), incorporating fully between additions. Mix in cheese and pepper.

Scrape dough into a piping bag fitted with a ½” round tip (alternatively, use a plastic bag with a ½” opening cut diagonally from 1 corner). Pipe 1” rounds about 2” apart onto 2 parchment-lined baking sheets. Whisk egg yolk and 1 tsp. water in a small bowl; brush rounds with egg wash.

Bake gougères until puffed and golden and dry in the center (they should sound hollow when tapped), 20–25 minutes.

Tips** These go FAST!  I’d advise you make a double batch.  You can add a bit of spice to these by adding dried red pepper flakes or finely chopped jalapeño when you add in the cheese and pepper.

Dough can be made 4 hours ahead. Cover and chill.  Gougères can be baked 2 hours ahead; reheat before serving.

If you’re on Facebook and are interested in the things I may not devote an entire blog post to: my favorite recipes, drinks, food facts, nutritional information, photos and other things that make my mouth water, I have a page on Facebook you can visit too: https://www.facebook.com/ThisGirlLovesHerFood

NYE Drinks With a Twist

champagneAre you tired of serving the same champagne cocktails every New Year’s Eve?  I’ll let you in on a secret. I’m tired of drinking them!

Let’s face it, 2016 wasn’t a year that many of us would like to relive.  Between the circus of a Presidential election that has called the United States’ brand of democracy into question, the staggering number of terrorist acts perpetrated worldwide, and the deaths of some of the most beloved entertainers of our time, I think a few unique drinks are exactly what is called for to help give the boot to a year that’s left a rotten taste in most of our mouths.

vodkamartiniA simple and classy option is to stick with a straight forward cocktail served “on-the-rocks” or “up” like a Martini, James Bond style.   If your party is going to be one with low music and quiet conversation this is the type of drink to take it there.

My “Go-To” Martini Recipe

  • Fill cocktail shaker up halfway with ice cubes
  • Skewer 3 Martini Olives and Place in Chilled Martini Glass
  • Using a mister filled with dry Vermouth, give one short spritz over the olives
  • Add 1 + 1/2 to 2 Shots of Quality Vodka (I prefer Grey Goose L’Orange) to the cocktail shaker and give a couple of quick shakes
  • Strain vodka into glass over the skewered olives  enjoy

**Tip – If you like your martini dirty, add a cap of olive juice to the vodka in the cocktail shaker.  You can add (or substitute) pearl onions to your olive skewer if you prefer.

bluemooncosmoIf you want to shake up your boring martini affair and add some life to your party, change your music to something a bit more upbeat and consider serving one (or more) of the following variations:

Blue Moon Cosmo Martini

  • 1 ounce fresh lime juice
  • 1 ½ ounces Grey Goose L’Orange vodka, well chilled
  • 1 ounce blue curacao
  • 1 ounce white cranberry juice
  • sugar (optional)
  • Place all in a shaker with ice and shake well.
  • Pour into chilled glass and garnish with a lime slice

**TipDip rim into cranberry juice then sugar.

Pomegranate Cosmo

pom-cosmo

  • 5 strips lemon zest
  • 5 strips orange zest
  • 2 teaspoons sugar (I use Superfine Bakers Sugar)
  • 1 cup crushed ice
  • 2-ounces pomegranate juice
  • 1 tablespoon fresh lemon juice
  • 3-ounces Grey Goose L’Orange Vodka
  • 2 tablespoons pomegranate seeds, divided


  • Place 3 lemon and 3 orange zest strips in a cocktail shaker
  • Sprinkle with sugar and muddle
  • Add crushed ice, pomegranate juice, fresh lemon juice, and vodka
  • Shake well and strain into 2 chilled cocktail glasses
  • Garnish with pomegranate seeds, remaining 2 strips each of lemon and orange zest
  • Serve

**TipDip rim into pomegranate juice then sugar.

If you were the lucky recipient of an Echo Dot or other Alexa voiced Amazon assistant, for a holiday gift, you can source the tunes for your party using Spotify.  You can also stream music from Spotify.com thru your network connected devices, like your home theater or stereo.  My son turned me on to this music source and for a limited time you can subscribe to their premium “Unlimited Streaming” option for .99 for 3 months.

Hopefully these libations and tunes will help us all usher in a more festive 2017!

If you’re on Facebook and are interested in the things I may not devote an entire blog post to: my favorite recipes, drinks, food facts, nutritional information, photos and other things that make my mouth water, I have a page on Facebook you can visit too:  https://www.facebook.com/ThisGirlLovesHerFood


Baked Jameson Cherry Brie Bites

I went looking for something simple but spectacular that would pair equally well with both cocktails and wine before dinner and came across this amazing photo by Spencer Burton for Las Vegas Weekly:

scaled-cherry_baked_brie_by_spencer_burton_h_t1000

It turns out that these are one of the most popular items on the appetizer menu at one of my favorite Las Vegas watering holes: Nine Fine Irishmen, located in the center of the casino at New York New York.

I pulled the dinner menu up on the internet and had to search for it.  I was looking for Baked Jameson Cherry Brie Bites but couldn’t find it.  Now that I’ve seen where they have it hidden at the bottom of the appetizers, it’s easy to see how I missed it the last time I stopped in for a pint of #Guinness and a splash of whiskey.

They list it simply as “Baked Brie” with an unimaginative description of: “Brie Cheese, Whiskey Marinated Cherries, Puff Pastry, Balsamic Reduction, Toasted Baguettes” and they don’t show the mouth watering picture.  Not a great sales job at all!

I’m much more intrigued by the glowing description that Brock Radke gave in his November 2013 article describing the, then new item as, “the perfect bite-sized delight for the holiday season. Bonus: Irish whiskey is involved.

I’m sold.  Point me to the kitchen!

Jameson Cherry Baked Brie Bites

  • 5-7 squares of puff pastry (5×5 inch, cut into four pieces)
  • 1½ lb. Brie cheese (cut into 1-inch cubes)
  • 1 cup dried tart cherries
  • ½ cup Jameson Irish Whiskey
  • 2 tbsp. light corn syrup
  • 2 eggs, beaten well
  • fresh ground pepper (to taste)

Now it’s time to prep the cherries:

  1. Soak cherries in Jameson overnight.
  2. Cook cherry-whiskey mixture in a small pot on low heat until fruit softens, then add corn syrup and mix well.
  3. Use a hand-mixer or blender to purée the mixture, then chill and let sit for 2 hours.

When your cherry mixture has finished chilling it’s time to assemble the bites:

  1. Heat oven to 425°F.
  2. Gently separate one square of puff pastry dough and spread a fingernail-sized portion of Brie in the middle.
  3. Add a small dollop of cherry purée and season with pepper.
  4. Fold dough so all corners are sealed.
  5. Spray a baking tray with nonstick cooking spray and place bites on tray in rows.
  6. Brush the top of each pasty pocket with egg.
  7. Bake for approximately 10 minutes or until golden brown.
  8. Let sit for two minutes before serving.

The part I’m missing in this recipe is that they don’t mention the balsamic reduction. Based on the picture it appears that they reserve some of the whiskey-cherry purée to add to the top for presentation with a couple of sprout leaves.

Helpful tip:  You can cut the preparation time by buying whiskey soaked cherries online or at your local Total Wine or Bevmo if they carry them.  I keep a jar on hand that are soaked in my favorite bourbon-whiskey, Maker’s Mark, and I’m sure that you can prepare the same a few days ahead and keep them well sealed in your refrigerator so that you can shorten the prep time.

If you’re on Facebook and are interested in the things I may not devote an entire blog post to: my favorite recipes, drinks, food facts, nutritional information, photos and other things that make my mouth water, I have a page on Facebook you can visit too:  https://www.facebook.com/ThisGirlLovesHerFood

Easy Turkey Day Appetizer

mb1
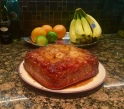
One of the things I am in charge of this Thanksgiving is an appetizer.  I was going to get fancy and knock myself out with something that would be difficult to keep warm and wouldn’t likely taste that great cold, but I’ve decided to take another tack.

Instead of going in a direction that is completely opposite of the main meal, I thought instead that I would create something that would compliment and whet the appetites of the rest of the guests for the main event, plus I’d be able to incorporate one of my favorite Thanksgiving side dishes from last year, Zinful Cran-blueberry Sauce!

Turkey Meatballs with Zinful Cran-Blueberry Sauce

Zinful Cran-Blueberry Sauce

  • 1 & 1/3 Cups Granulated Sugar
  • 1 Cup Zinfandel Wine (Best Quality you can afford – if you wouldn’t drink it, don’t cook with it)
  • 1 – 12 oz Package Ocean Spray Fresh Whole Cranberries
  • 1 Cup Frozen Blueberries
  • 1 Whole Cinnamon Stick
  • 1/4 tsp Nutmeg
  • 1/2 tsp Vanilla
  • Orange or Tangerine Zest

Bring sugar, wine and cinnamon stick to a boil in a medium saucepan.  Add remaining ingredients and return to a boil, stirring constantly.  Reduce heat to low and simmer 15-20 minutes.  You may want to use a splatter shield to avoid splashing when cranberries pop. Remove and discard cinnamon stick. Set aside to pour over cooked meatballs.

Make the Meatballs

  • Canola Oil Spray or PAM
  • 4 Pounds Ground Turkey
  • 2 Cups Bread Crumbs or Panko
  • 4 Eggs
  • 4 Cloves Garlic Chopped
  • 1 Large Granny Smith Apple Grated
  • 1 tsp Crushed Fennel Seeds
  • 8 tsp Chopped Fresh Sage
  • 3 tsp Freshly Ground Salt
  • 1 1/2 tsp Freshly Ground Pepper

Preheat oven to 450°F and spray 2 large baking sheets with non stick spray

  1. Combine turkey, breadcrumbs, eggs, garlic, grated apple, fennel seeds, chopped sage, salt and pepper on a large mixing bowl
  2. Using a 1″ cookie scoop, portion out the meat into balls, roll and put as many as you can on both baking sheets
  3. Bake for 15 minutes until meatballs begin to brown
  4. Remove meatballs from baking sheet and place into serving dish, chafing dish or crock pot (set to low or warm setting) and pour cran-blueberry sauce over until all are well coated.
  5. Garnish with whole sage leaves if desired.

If you are on Facebook and are interested in the things I may not devote an entire blog post to, recipes, food facts, nutritional information, photos and other things that make my mouth water, I have a page on Facebook you can visit too:  https://www.facebook.com/ThisGirlLovesHerFood

Disneyland Peanut Butter Cookies

Last week I shared the recipe for Debbie Fields (A.K.A. Mrs. Fields) Peanut Butter Cookies and promised to find the recipe for the amazing Peanut Butter Cookies sold at Disneyland when I could find it.

peanut-butter-chunk-cookiesThere are many imposters and “copycat” recipes out there that were close, but none that I could find that were exactly like the cookies I remembered.  I finally came across a blog that focuses solely on the foods made and sold by the Disney Resorts.  Here I found out that Disney chefs do not bake the cookies, full of chunks of smooth peanut butter, they are made by Selma’s Cookies and packaged for Disney, but they are so good, does it really matter?

A little more Internet research led to a cookie blog linked to the Disney food blog that had great pictures and instructions for recreating the Disneyland Peanut Butter Cookie (with the added bonus of chocolate chunks!).

The important thing to making these cookies is to understand that you cannot simply put peanut butter chips into the cookies and expect them to taste like the cookies from peanut-butter-chunksGoofy’s Kitchen!  You have to take the added step (first) of making the peanut butter fudge that gets broken into chunks and pressed into the rolled cookie dough just before placing on the cookie sheets for baking.  It makes the difference between a good cookie and a great one!

As Close As You Can Get To Disneyland Peanut Butter Chunk Cookies

Peanut Butter Chunks:
  • 1/4 cup + 2 TBLS Peanut Butter Chips (Reese’s)
  • 1/4 cup + 2 TBLS Creamy Peanut Butter
  • 1+ 1/2 TBLS Butter
Cookie Dough:
  • 2 sticks (8 oz) Unsalted Butter, room temperature
  • 1 cup tightly packed brown sugar — (8 oz)
  • 1 cup Granulated Ssugar — (8 oz)
  • 1 + 1/4 cups Chunky or Smooth Peanut Butter — (11 7/8 oz jar)
  • 1/2 tsp Baking Powder
  • 1/2 tsp Baking Soda
  • 1/2 tsp Salt
  • 2 Large Eggs
  • 1/2 tsp Vanilla
  • 2 + 2/3 cups All-Purpose Flour
  • 1 cup Semi-Sweet Chocolate Chunks
 Instructions
  1. Make the peanut butter chunks first. Mix the peanut butter chips, peanut butter and butter in a small bowl and microwave on high for 30 seconds. Stir until smooth. If chips aren’t melted, heat for another 30 seconds.
  2. Make a small 2×5(ish) mold with foil (see photo). Pour the peanut butter mixture into the mold and chill it for about half an hour or until firm. Unmold the peanut butter log and cut into chunks.
  3. Proceed with the cookie dough. Cream butter and both sugars with an electric mixer. Beat in peanut butter, then baking powder, baking soda, and salt. Add eggs one at a time, beating on a lower speed, then beat in vanilla. By hand or using lowest speed of mixer, Stir in the flour. When flour is mixed in, stir in chocolate chunks.
  4. Chill the dough for about an hour.
  5. Preheat oven to 350° F. Using slightly less than a quarter cup measure, scoop up balls of dough and arrange on cookie sheet a few inches apart. Stick peanut butter chunkscookie-dough-ball into the already-scooped dough.
  6. Bake for 12-14 minutes, until set and brown around the edges. Remove from oven and cool on pan for about 10 minutes to set. Remove from pan and set on a rack to finish cooling.
  7. Makes 24 big cookies

I cannot wait to make these!  Can you imagine taking two of these and putting a scoop of vanilla ice cream between them?  Yum!

If you are on Facebook and are interested in the things I may not devote an entire blog post to, recipes, food facts, nutritional information, photos and other things that make my mouth water, I have a page on Facebook you can visit too:  https://www.facebook.com/ThisGirlLovesHerFood

Mrs. Fields Peanut Butter Cookies

pbcookieI love peanut butter cookies, something about them feels more special than a chocolate chip cookie.  Just like a sugar cookie tells me it’s Christmas, peanut butter cookies feel like a cold winter night with a warm cup of cocoa.  My mom wasn’t big on cooking dinner, but she did bake.  Cookies were easy, and peanut butter cookies were my dad’s favorite, so they were one that she made once in a while.

I’m not in bakeries often, but when I do get enticed by their heavenly smell and break down and buy them, I’m usually disappointed.  I’m impatient and can never wait to get home, I rarely even make it to the car, before I’m unfolding that waxed bakery bag and taking a big bite of salty peanut butter goodness.  More often than not, they are either too dry, too doughy or too greasy and leave me sorry that I bought them.

There have been very few exceptions, but among my favorite peanut butter cookies are: Mrs. Fields, French’s Bakery (Costa Mesa, Irvine, Mission Viejo, and Orange, CA), and Disneyland.

Lucky for all of us, Debbie Fields shared her recipe for her peanut butter cookies on her blog in 2012.  A bonus for the Gluten-Free crowd, there is no flour in it!

Mrs. Fields Peanut Butter Cookies

mfpbcookies1 cup peanut butter, creamy or chunky
1 cup sugar
1 large egg
1 teaspoon vanilla
coarse salt or sugar, your choice

Preheat oven to 350°.  In a large mixing bowl, combine peanut butter and sugar. In a small bowl, lightly beat the egg, then add vanilla directly to it and stir. Add egg mixture to peanut butter mixture and stir until well combined. Roll dough into walnut-sized balls and place on a prepared cookie sheet. Using the tines of a fork, create a crosshatch pattern, flattening the dough about half the thickness. Sprinkle the top of each cookie with a pinch of coarse salt or sugar, depending on your tastes. Bake for 10 minutes, or until barely golden brown around the edges. Makes 30 cookies

HINT:  A good-quality, natural peanut butter adds even richer flavor, but  you may need to add more sugar. Taste dough to determine.

HINT:  Kick these cookies up another notch by dipping cooled cookies in melted semi-sweet chocolate. Allow to cool completely before serving.

I never realized that there was no flour in these, which makes them gluten-free, but also explains why they never taste dry or doughy to me.

Next I’ll see if I can hunt down recipes for my other favorites so I can do an unscientific side by side taste test with my family to see which ones they prefer.

If you are on Facebook and are interested in the things I may not devote an entire blog post to, recipes, food facts, nutritional information, photos and other things that make my mouth water, I have a page on Facebook you can visit too:  https://www.facebook.com/ThisGirlLovesHerFood

Crab Stuffed Mushrooms & Wine

New-turkeysWe all know that the turkey and sides are the stars of Thanksgiving, but there needs to be a little something to nibble on before the feast so people don’t knock each other over like ravenous fiends when the buffet is ready.

Inevitably I end up making too many snacks, but my excuse is that I never know if I’ll have a few people “helping out in the kitchen” for the hours leading up to dinner, or if the entire crowd will be at the house hanging out for drinks and watching football.

I like to assign Thanksgiving appetizers to someone else when I can and ask them to keepturkey-cheese-ball-8 them fairly simple: some type of tray with fruit, veggies, crackers and sliced cheese or a cheese ball.  This year I am not hosting, we get to be the guests, but I’ll be taking a few dishes to add to the spread.

My main goal was to find something that wouldn’t appeal to the kids so they’d be less likely to eat so much that they ruin their dinner.  I’d rather they eat fruit, if that’s there to snack on.  An added bonus: just by saying the word mushroom the kids will come nowhere near them, so their grubby little hands won’t be picking them up and down!

Crab Stuffed Mushroom Caps

  • ¼ teaspoon ground cayenne pepper
  • ¼ teaspoon onion powder
  • ¼ teaspoon ground black pepper
  • ¼ cup grated parmesan cheese
  • 1 – 8oz package softened cream cheese
  • 1 tablespoon minced garlic
  • 1 tablespoon olive oil
  • pinch of salt
  • 24 – 30 fresh whole white mushrooms
  • 1/8 cup finely chopped celery
  • 1 can lump crab meat
  • fresh arugula (if desired)
  • fresh rosemary (if desired)

Preheat oven to 375°F

  • Line a baking sheet with a silicone liner or parchment paper
  • Using a fine mesh colander or a regular colander lined with cheesecloth, break up the crab to make sure no shell remains and leave it to drain
  • Clean and dry mushrooms
  • Remove stems, trim rough edges, then chop stems and set aside
  • Place caps (empty cavity up) on the baking sheet
  • Heat oil in a small pan.  Stir in chopped stems, celery, garlic and a pinch of salt. Cook until moisture disappears.  Remove from heat
  • Stir in crab, cayenne pepper, onion powder, black pepper, parmesan cheese, and cream cheese.
  • Use a spoon to fill each of the mushroom caps and return them to baking sheet
  • Bake in pre-heated oven 20 minutes

crabstuffedmushroomsServe immediately on a platter lined with fresh arugula and sprigs of rosemary if desired.

Another great thing about this crab stuffed mushroom recipe is that it is easily matched with the wines you are already likely to be serving with your Thanksgiving feast:

  • Pinot Grigio
  • Champagne
  • Sauvignon Blanc
  • Soave
  • Pinot Noir

If you are on Facebook and are interested in the things I may not devote an entire blog post to, recipes, food facts, nutritional information, photos and other things that make my mouth water, I have a page on Facebook you can visit too:  https://www.facebook.com/ThisGirlLovesHerFood