Costs Going Up Wine Pours Shrinking!

Photo Credit: Brian Zak/NY Post

I came across this article from the New York Post and was struck by just how true it is here on the West Coast too! Are you feeling the same about higher prices & smaller wine pours where you are?

Article written by Beth Landman, “You’re Not crazy, wine pours are shrinking” appeared June 23, 2022 in the New York Post

When international investor Brian Hogan took an important client to a favorite Midtown restaurant last month, he hoped to impress him. His guest ordered a Chablis by the glass rather than the bottle, and the sommelier poured it with due deference.

But, when the usually mild-mannered client looked down at his glass, he was shocked by the minuscule size of the serving. He summoned the manager and asked him to bring over a measuring cup.

“He thought the pour was ridiculous and offensive,” Hogan said. “When he measured, it turned out to be only 4 ounces.” The manager quickly delivered more wine to the glass, along with a profuse apology.

Inflation has hit the bottle. All over the city, from taverns to fine restaurants, diners are doing double takes as they receive reduced pours of wine at increased prices. A standard bottle of wine contains 25.4 ounces — meaning a generous 6-ounce pour will yield four glasses, a standard 5-ounce glass will deliver five and a measly 4 ounces will eke out six. Diners say they’re increasingly being served paltry pours, and industry insiders confirm their suspicions.

“I worked for Danny Meyer and we always gave 6 ounces,” said a sommelier at a popular new downtown restaurant. “When I got here I was quickly corrected and instructed to pour only 5.”

A somm at another Manhattan hot spot confided that “During COVID, we were told to make sure we got five glasses out of a bottle, rather than the four we were used to getting.”

A spokesperson for Meyer’s Union Square Hospitality Group confirmed that his restaurants still pour 6 ounces. At Isabelle’s Osteria and Barbounia in the Flatiron, they’re also sticking to 6 ounces.

“All our wine costs went up … but we felt that customers will forgive you if you overcook their meat a bit, but will not forgive you if you skimp,” said Vladimir Kolotyan, a partner in both restaurants. “So we added one dollar to some of the glass prices and left some the same, but never touched the size.”

The stingy servings are creating awkward situations. 

An Upper West Side entertainment attorney had some explaining to do to his ex-wife after she saw a bill from his dinner with their young adult children. 

“She was disturbed by the number of wine glasses consumed, but I explained to her that we actually drank the same amount of alcohol we usually do; we just had to order more glasses,” said the man, who asked to remain anonymous for personal reasons.

Even those in the wine industry, while sympathetic to restaurant’s rising costs, are disturbed by the trend. 

“I’m willing to pay for quality and I feel shortchanged when I receive a small pour,’’ said Mark Fang, a 41-year-old wine blogger and certified sommelier who lives in Hell’s Kitchen. He recently dined at Marea and ordered an $18 glass of Grüner Veltliner that he estimated was a mere 4 ounces. 

“Normally I get only one glass of wine, but this time the pour was so small it didn’t last past the appetizer,” he said. “I like to enjoy wine with my entree, so I ordered a second glass … [in general] I know what bottles cost, and that hurts.”

“I’m blown away by how small the pours are.’’

Karen Harris

(A spokesperson for Marea’s Altamarea restaurant group said: “The standard operating procedure for pouring a glass of wine at Marea is 5 ounces. We do acknowledge that there is an occasional margin of error to take into account.”)

Karen Harris, 59, who lives on the Upper East Side and is an account executive for a wine importer and distributor, said that her entire portfolio has increased in price for the first time in four years. Still, she’s stunned by shrinking servings.

“I go to some places and think, ‘Are they serious?’” she said. “I’m blown away by how small the pours are.’’

Many restaurateurs insist that part of the problem is the trend towards using larger, better stemware that dwarfs the appearance of the wine.

A standard bottle of wine contains 25.4 ounces — meaning a generous 6-ounce pour will yield 4 glasses, a standard 5-ounce glass will deliver 5 and a measly 4 ounces will eke out 6. Above, a 6-ounce pour (left) and a 4-ounce pour.
Brian Zak/NY Post

Maximilian Riedel, CEO and president of glassware company Riedel, thinks COVID isolation is also to blame. “This is an issue of perception,’’ he told The Post. “For the past two years, we have all [been] helping ourselves to what’s in [our] cellars. Now that we are returning to in-person dining, a server’s measured pour likely appears more restrained.’’ To ensure servers hit their mark, Riedel glasses have a subtle indicator in the curve of the glass at what the company sees as the ideal pour: 5 ounces.

But some restaurateurs insist that 5 ounces isn’t enough for their demanding clientele. 

“I hear that in the city they are lowering servings and jacking up prices,’’ said Zach Erdem, owner of Southampton hot spots 75 Main and Blu Mar. “Here, if you give people 5 ounces, they will scream at you!’’

Are you on Facebook? You might be interested in the things I may not devote an entire blog post to: food news, recipes, food facts, nutritional information, photos and other things that make my mouth water. If so, visit my This Girl Loves To Eat community at: https://www.facebook.com/ThisGirlLovesHerFood

Advertisement

Long Live Langer’s Deli!

Langer’s Number 19 Pastrami Sandwich

This article appeared in today’s Los Angeles Times – Nicholas Goldberg says it more perfectly than I ever could, so enjoy his ode to 75 years of the institution known as Langer’s Deli!

They’ve been making the world’s best pastrami sandwiches for 75 years. Can they keep it up? BY NICHOLAS GOLDBERG | COLUMNIST JUN 20, 2022 | 3:00 AM LOS ANGELES TIMES

The long, slow decline of the Jewish delicatessen has been bemoaned and lamented for many years. In the early 1930s, there were more than 1,500 kosher delis and many more non-kosher ones in the five boroughs of New York alone, according to city records. In recent years, the estimate fell to 150 in all of North America. That’s why it is a cause for celebration that Langer’s delicatessen, the venerable pastrami emporium on 7th and Alvarado near MacArthur Park, marked another milestone birthday this weekend. The restaurant, which opened with space for 12 customers in June 1947, is now 75 years old. Langer’s is, of course, a Los Angeles institution. In 1991, Jonathan Gold wrote in The Times: “The fact is inescapable: Langer’s probably serves the best pastrami sandwich in America.” In 2002, Nora Ephron went farther, declaring unequivocally in the New Yorker that Langer’s made the finest hot pastrami sandwich in the world. She described it as “soft but crispy, tender but chewy, peppery but sour, smoky but tangy.” And, if I may be so bold, my recent lunch of matzo ball soup and hot pastrami on rye with sauerkraut confirmed — to my satisfaction, anyway — that those assessments still hold. Of course, if you don’t want pastrami, there are alternatives. You can have the corned beef (Mimi Sheraton called it “excellent” in a 42-year-old review that still hangs, fading now, in the restaurant’s window). Or blintzes, kasha varnishkes, latkes, a bowl of borscht or a knish with gravy. For dessert, noodle kugel. I guess you could also order the hamburger or even — don’t tell the ancestors, please — a ham and cheese sandwich. But that would be foolish. Ephron was snide about the decor. “It is decorated, although ‘decorated’ is probably not the word that applies, in tufted brown vinyl,” she wrote. That was 20 years ago, and that’s pretty much how it still looks today. She noted that Langer’s always seems to be just barely hanging on. That’s also still true. The sufferings of Jewish delis over the years have been legion, the challenges monumental: There’s the passing of the shtetl generation and its children. The assimilation of its grandchildren. The dispersal of the Jewish population from the cities to suburbs (and, in the case of Langer’s, from Westlake-MacArthur Park to the San Fernando Valley and the Westside). Rising rents. The climbing costs of ingredients. The tut-tutting of cardiologists everywhere, what with all the fat, carbohydrates and salt. More recently, the COVID closures. And now, a new burst of inflation. The price of a pastrami sandwich at Langer’s rose recently to $22, a number that even its owner, Norm Langer, concedes is meshuga. “Is half a pound of meat, two slices of rye bread and a pickle worth $22?” he asks. “I don’t know. But I’ve got to make ends meet.” When the restaurant first opened, a pastrami sandwich cost about 35 cents. When The Times mentioned the deli in 1973, the price had risen to $1.75. In 2002, it was $8.50. Langer is 77 years old. He says he has no plans to retire. “I get up in the morning, I’ve got to go somewhere,” he says. “Everybody needs a place to go.” The restaurant was opened by his father, Al Langer of Newark, N.J., who’d gotten his start in delis years earlier when his mother sent him to work to raise money to help pay for his $35 bar mitzvah. In 1947, Al was living in L.A., was recently out of the service and had saved $500. He borrowed a few thousand more. In those days, the Westlake-MacArthur Park neighborhood had a big, middle-class Jewish population. At one point the restaurant had so much business it stayed open nights until 3 a.m. Now it closes at 4 p.m. In the 1980s, The Times wrote endless stories about the troubles facing the deli because of the changing neighborhood, including one histrionic article about MacArthur Park headlined “Winos, Dopers, Crime Overrun City Landmark.” But Langer’s hung on. The restaurant got a needed boost in 1993 when Metro’s Red Line opened, with a subway station just a block and a half away. Crowds flocked in from downtown. “I saw 500 people lined up to get into Langer’s and I told Norm, ‘It was worth spending $1.2 billion to keep you in business,’ ” said then-County Supervisor Zev Yaroslavsky, a regular. In L.A. today the delis that still exist include Canter’s, which opened in 1931 in Boyle Heights and only later moved to its location on Fairfax. Also Art’s Deli, Nate ’n Al’s and Wexler’s. There’s Brent’s Deli. To name just a few. But they keep closing down. Izzie’s in Santa Monica shut its doors in May. Greenblatt’s in West Hollywood closed in 2021 after 95 years. New delis have opened, in some cases with modern, sustainable or health-conscious twists on the classic cuisine. Less shabby, less irascible, they’re gambling that deli food can be gentrified and rejuvenated. But pastrami, let’s face it, is an acquired taste. So are creamed herring, chicken liver, tongue, whitefish salad and other old country staples. The bagel may be firmly embedded in the American food pantheon, but traditional Ashkenazi deli fare of the sort that flourished in the years after the great Jewish immigration from Eastern Europe is unquestionably endangered. And with it a tangible link to the culinary past. A connection to the forefathers. A piece of the collective culture. The good news is that reports of its extinction have proved premature so far, as Langer’s demonstrates. So rather than rend my garments, I’ll make the most of it while I can (and hope my heart holds out).

Are you on Facebook? You might be interested in the things I may not devote an entire blog post to: food news, recipes, food facts, nutritional information, photos and other things that make my mouth water. If so, visit my This Girl Loves To Eat community at: https://www.facebook.com/ThisGirlLovesHerFood

I Guess Adult Pickles Are a Thing

Leave millions of people in isolation, with time to fill, an internet full of ideas + the ability to get anything you need to bring weird ideas to life shipped to you, and what do you get?

Apparently a whole lot of drunk people eating pickles! I’ve seen whiskey pickles, tequila pickles, Old Bay and vodka pickles, beer and pickles, apple infused vodka pickles, and even candied pickle pops made with vodka & Kool-Aid. I’m not a trendy, #TikTok kind of girl, but I’m up for a challenge, the boys are coming over for Father’s Day & I can’t wait to give this a try so I can see their faces when they take their first bites.

Drunken Pickles

2 C Small Pickles or Gherkins

1 C Pickle Juice

1 C Good Bourbon – I like Makers Mark

5 Sprigs of Dill

A Few Dashes of Hot Sauce – I like Frank’s Red Hot

If You like a little more kick, add a few shakes Red Pepper Flakes

4” Cocktail Skewers

  1. In a medium bowl, combine pickles with pickle juice, whiskey, dill and hot sauce. Refrigerate for at least an hour. I plan to leave them overnight.
  2. Drain and skewer pickles. Serve.

Recipe courtesy of Lena Abraham, Senior Food Editor, Delish Magazine, June 30, 2017; Photo credit: Chelsea Lupkin

Are you on Facebook? You might be interested in the things I may not devote an entire blog post to: food news, recipes, food facts, nutritional information, photos and other things that make my mouth water. If so, visit my This Girl Loves To Eat community at: https://www.facebook.com/ThisGirlLovesHerFood

Pressure Cooker Bourbon Short Ribs

It’s time to ditch the #Covid15, so back to cooking at home instead of Doordashing dinners I go!

These short ribs pressure cook to a fork tender, falling off the bone, delicious finish in under an hour and are great with a simple salad and cauliflower mash. I used ground Chipotle, but you can use any pepper spice you prefer. I prefer it smokier with the bourbon.

Bourbon Short Ribs

  • 2 1/2 Pounds Bone-in Short Ribs (About 6)
  • Salt & Pepper
  • Olive Oil
  • 1 Medium Onion, Chopped
  • 1/2 Cup Bourbon
  • 1 TBLS Paprika
  • 2 tsp Ground Cayenne, Adobo, or Chipotle (1 tsp if you want it milder)
  • 3 TBLS Granulated Sugar (you can use a sugar substitute if you’re strictly counting every carb)
  • 3 TBLS Balsamic Vinegar
  • 6 Cloves Garlic (Iused 1 TBLS jarred chopped garlic)
  • 3-4 Sprigs Fresh Thyme
  • 1 Can Beef Consommé
  • 1TBLS Cornstarch + 1 TBLS Cold Water mixed together

Cooking Directions:

  • Fill a large bowl or pot with cold water. Immerse the short ribs, and rinse the ribs in the cold water to wash off excess blood and bone dust.
  • Drain and pat dry the short ribs with paper towels. Generously sprinkle salt & pepper on all the ribs, on both sides.
  • Switch on the Instant Pot to the saute setting on high. When the instant pot is hot, pour in about 2 tbsp of oil. When the oil is hot, place about 3 – 4 short ribs in the instant pot to caramelize or to sear. It’s important not to overcrowd the bottom in order to get nice caramelization on your short ribs. Sear the short ribs on all sides, about 2 – 3 minutes per side. Place the caramelized short ribs on a plate.
  • Repeat with the rest of the short ribs.
  • Place the onion in the pot, and add the boubon. De-glaze the bottom of the instant pot to make sure that all of the caramelized bits on the bottom are mixed with the bourbon (de-glazing is an important step, so don’t skip it). Add the paprika, cayenne pepper, sugar, balsamic vinegar, garlic, and thyme.
  • Bring just to a boil, then turn off your instant pot.
  • Place the short ribs, fat side down, back in the instant pot.
  • Pour the consommé over the short ribs. Close the instant pot. Choose the manual pressure function and set it to high. Cook the short ribs for 45 minutes, followed by a 10 – 15 minute natural release.
  • Gently remove the short ribs on to bowl, and turn the saute function back on to thicken the liquid in the instant pot.
  • Dissolve the cornstarch in the water and add it to the sauce in the instant pot. Mix it in and bring it to a simmer until the liquid has thickened. Taste and season the liquid with more salt, pepper, or balsamic vinegar, if needed. Turm the Instant Pot off and put the short ribs back into the instant pot to coat with the sauce.

Serve over your cauliflower mash (I grilled some summer squash) with the sauce. #ThisGirlLovesToEat

Gluten Free Snickerdoodle Bread

Paleo-Snickerdoodle-Loaf (3)One of my favorite ingredients in #MyKetoKitchen is Bob’s Red Mill Paleo Baking Flour.  It thickens sauces and my favorite egg casserole and, being #KetoFriendly, it allows me to enjoy baked goods, pancakes, and waffles without sacrificing taste or loading up on dreaded carbs.  This recipe can be baked in the oven or using a bread machine that has a #QuickBread or #Cake baking cycle, like my #CuisinartConvectionBreadMaker does.  #ThisGirlLovesToEat

Gluten Free Snickerdoodle Bread

  • 3+1/2 Cups (322 g) Bob’s Red Mill Paleo Baking Flour
  • 2 TBLS Premium Vital Wheat Gluten
  • 5 TBLS Truvia
  • 1 TBLS Ground Cinnamon
  • 1 tsp Baking Soda
  • 1/2 tsp Salt
  • 3 Eggs
  • 1/3 Cup Whole or Almond Milk
  • 1/4 Cup Melted Butter or Coconut Oil
  • 1 tsp Vanilla
  • Aerosol Cooking Spray (Canola Oil)

Topping – Combine in a small dish and set aside

  • 1 TBLS Sugar
  • 1/2 tsp Ground Cinnamon

If Cooking in a loaf pan in the oven: Spray the pan with cooking spray and preheat the oven to 325° F.

If using your breadmaker:  Spray the cooking pan with the cooking spray and set the bread machine to the settings for a 1+1/2 pound loaf (at your desired degree of crust darkness) and Quick Bread/Cake setting.

In a medium bowl, combine your dry ingredients and whisk them together until well combined.  Set aside.  In a second bowl, combine the wet ingredients.

If cooking in the oven:  Add the dry mixture to the wet mixture and stir well to combine. Transfer batter to the prepared loaf pan and smooth evenly.  Sprinkle as much of the topping over the top of the loaf (I use less than half).  Bake until a toothpick inserted into the center of the loaf comes out clean, about 60 minutes.  Let cool in the pan, on a wire rack, then remove from pan and serve.

If using your breadmaker:  Put the wet ingredients in first, then add the dry ingredients.  Close the lid and press start.  After the dough has mixed for 2-3 minutes, using a rubber spatula, stir in any of the flour mixture that remains on the edges and underneath the loaf.  When the final mix is complete, remove the dough paddle, if desired, and reshape your loaf to fill in the hole in the middle.  Sprinkle however much of the topping you want on your loaf, close the lid and allow the baking cycle to complete.  When the cycle ends, check the doneness of your loaf by inserting a wooden skewer/toothpick into the middle.  If it comes out clean, you are good to go.  If not, you can add time manually, 5 minutes at a time, checking doneness midway through.  Let cool in the pan, on a wire rack, then remove from pan, slice into 10 slices then slice again in half for 20 pieces, and serve.

I like to keep this dense, flavorful bread in the refrigerator, in a sealed container and serve it with some cream cheese to add some fat (for my Keto followers).

Nutrition Information (Makes 20 Servings)

  • 89  Calories
  • 9g  Carbohydrates
  • 3g  Fat
  • 3g  Protein

Cheesy Poblano Chicken Bake

PoblanoChickenBrocBake
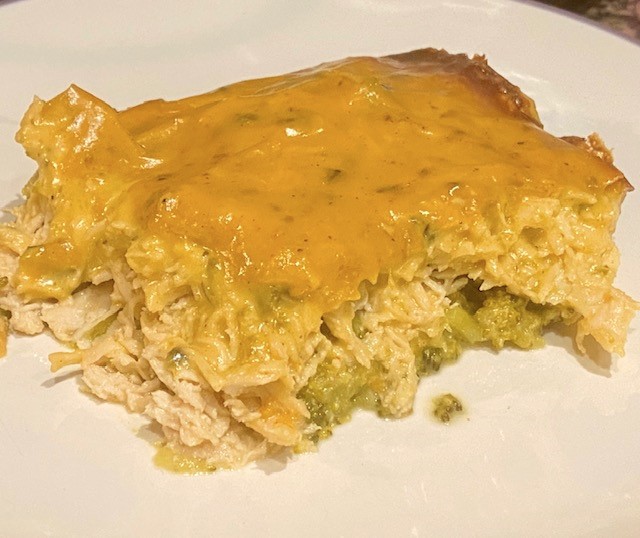
Playing around during #Keto meal prep this weekend, I came up with a high protein/low carb chicken and broccoli casserole that’s a great dinner with a salad or perfect for a grab-and-go lunch that can easily be reheated in the microwave at work!  #ThisGirlLovesToEat

Cheesy Poblano Chicken Bake

  • 1 Poblano Chili, seeded & finely chopped
  • 4 TBLS Butter, divided
  • 8 oz Fresh Broccoli Florets, trimmed
  • 1.75 lb (28 oz) Chicken Breast (uncooked and cut into appx 2 x 2 chunks)
  • 2 TBLS Bob’s Red Mill Paleo Baking Flour
  • 1/2 Cup Water
  • 1 Cup Half & Half
  • 6 oz Sharp Cheddar Cheese, shredded
  • 1/4 tsp Black Pepper
  • 1/4 tsp Salt
  • 1/4 tsp Garlic Powder

Preheat the oven to 350º F and spray the bottom of a 9 x 11 inch Pyrex baking dish with olive oil cooking spray.

In a microwave steamer, cook the raw broccoli on high power for 4 minutes.  Layer the cooked broccoli into the Pyrex baking dish.

Using the same steamer, cook the chicken in the microwave for 5 – 6 minutes, just until cooked thru.  Remove the chicken to your stand mixer with the paddle attachment and shred the chicken on low (about 2 minutes).  Layer the chicken on top of the  broccoli layer.

In a medium saucepan, combine 2 TBLS of the butter and the chopped Poblano pepper and saute until the peppers are soft and the butter has turned green (5-7 minutes).  Add the remaining 2 TBLS butter, salt, pepper and garlic powder, and, once melted, stir in the flour.  Cook while stirring constantly for about 2 minutes, over medium heat, until the mixture is bubbling and very well combined.

Add milk then water, and whisk until smooth, scraping roux out of the corners of the saucepan.  Increase heat to medium high, bring to a simmer, stirring constantly until the mixture thickens, 2 to 4 minutes.  Remove from heat and stir in the cheese until smooth.  Add the paprika.

Pour the cheese sauce over the top of the chicken layer and spread to the edges of the pan.

Bake 20-30 minutes, or until sauce is bubbling and the casserole is warm throughout.

Nutrition Information (6 Servings)

  • 350 Calories
  • 20 g Fat
  • 2 g Carbohydrates
  • 37 g Protein

Are you on Facebook? You might be interested in the things I may not devote an entire blog post to: food news, recipes, food facts, nutritional information, photos and other things that make my mouth water. If so, visit my This Girl Loves To Eat community at: https://www.facebook.com/ThisGirlLovesHerFood


What The F…?

This article from Epicurious.com needs no more introduction or explanation. #MindBlown

Leave the Peel on When You Use a Garlic Press

Not peeling garlic takes this gadget from unnecessary to unparalleled.

BY DAVID TAMARKIN

June 11, 2015

A good cook is an open-minded, curious cook. But when I saw my friend take out his garlic press, my face puckered into a judgemental scowl. I was throwing some serious shade.

“Don’t worry, don’t worry,” my friend said. “I know how to use it properly.”

Poor thing. He thought I was doubting his garlic press skills. Dude didn’t realize that I was hating on the mere presence—the idea! the existence!—of the press itself.

What my friend did next wiped the judgemental expression from my face.

First, he opened the press and inserted an unpeeled clove of garlic.

Photos by Chelsea Kyle, food styling by Katherine Sacks

Then he closed the press and squeezed on the handle, extracting golden, fragrant minced garlic.

“What’s your problem?” my friend asked. My expression had gone from shady to incredulous.

“The peel!” I said. “Where’s the peel?”

My friend opened the press. The peel, of course, was inside, emptied of garlic but barely torn. None of it, not even a speck, had gotten mixed up with the minced garlic on the cutting board.

That’s when my feelings about the garlic press changed. Prior to this moment, I’d seen the press as a clunky and unnecessary tool. If I was going to spend the time to peel a clove of garlic, I may as well take the extra 30 seconds to run my knife over it, right?

But now that I knew that you didn’t have to peel the garlic? This was a game changer. Not to mention a time saver. Visions of garlic mojo—not to mention Epi’s Food Editor Rhoda’s garlic oil—raced through my head. Mince 8 cloves of garlic? Make it 20. I don’t care. I have a garlic press!

Actually, no I don’t.

I pointed to my friend’s press. “Can I borrow that?”

That was weeks ago. I still haven’t returned it.

  • I, for one, will be finding an excuse to dig out my #GarlicPress today! #ThisGirlLovesToEat

Are you on Facebook? You might be interested in the things I may not devote an entire blog post to: food news, recipes, food facts, nutritional information, photos and other things that make my mouth water. If so, visit my This Girl Loves To Eat community at: https://www.facebook.com/ThisGirlLovesHerFood

Holiday Bites: Sugar Free Peanut Butter Cups

I am a Reese’s Mini Peanut Butter Cups, but they are Hell on the diet…these are Keto Friendly & give me a little less guilt.  #ThisGirlLovesToEat

Sugar Free Peanut Butter Cups

  • 9 oz Bag Lily’s 55% Cacao Sugar Free Chocolate Chips
  • 3/4 Cup No Sugar Added Peanut Butter
  • 2 TBLS Crisco Solid Shortening
  • 2 TBLS Butter

Melt together the chocolate chips and the shortening over low heat until smooth.  Using either a silicone mini muffin pan or a mini muffin pan lined with mini muffin liners, drizzle about half of the melted chocolate into each cup, making sure to drag or brush it up the sides of each.  Put pan into the freezer for 15 minutes.

Meanwhile, melt together the peanut butter and butter until smooth and remove from heat.  Take frozen chocolate cups from the freezer and divide the peanut butter into each cup then top with the remaining melted chocolate.

Place pan back into the freezer for at least 2 more hours then remove the chocolates from the muffin liners.  Store in a sealed container in the refrigerator.

Nutrition Information (Per 1 Peanut Butter Cup)

  • 66  Calories
  • 1.45 g  Fat
  • 4 g  Carbs
  • 1.3 g  Protein

Are you on Facebook? You might be interested in the things I may not devote an entire blog post to: food news, recipes, food facts, nutritional information, photos and other things that make my mouth water. If so, visit my This Girl Loves To Eat community at: https://www.facebook.com/ThisGirlLovesHerFood

Three Pepper Cacio de Pepe

Recipes like this are why it’s so damn hard to stay Keto. 😂😂😂 Food & Wine Magazine just keeps enticing me to #TheDarkSide!

Three Pepper Cacio e Pepe

  • 3 tablespoons extra-virgin olive oil
  • 1 teaspoon crushed pink peppercorns
  • 1/2 teaspoon coarsely ground Tellicherry pepper
  • 1/2 teaspoon ground Szechuan pepper
  • 12 ounces uncooked bronze-cut fusilli col buco pasta (such as Giusto Sapore) or bucatini pasta
  • 1 1/2 ounces pecorino Romano cheese, grated with a Microplane grater (about 1 cup), plus more for garnish
  • 1 1/2 ounces Parmigiano-Reggiano cheese, grated with a Microplane grater (about 1 cup)
  • 1 Cup reserved pasta cooking water

Are you on Facebook? You might be interested in the things I may not devote an entire blog post to: food news, recipes, food facts, nutritional information, photos and other things that make my mouth water. If so, visit my This Girl Loves To Eat community at: https://www.facebook.com/ThisGirlLovesHerFood

When is it OK to Eat Food With Mold On It?

In this season of food gifts and party leftovers, this article, previously published by My Recipes, is particularly important and worth sharing & re-sharing. #ThisGirlLovesToEat

“We’ve all let something languish in the fridge a bit longer than we realized. It’s not unreasonable to look at a single patch of mold on a strawberry and wonder if the whole lot has to be tossed. But what about a block of cheese with a quarter-sized fuzzy spot? Is that safe to trim and eat? Or does it have to go, too?

Fortunately, this handy guide from the U.S. Department of Agriculture can have the final say on what stays and what goes when you spot mold on your food.

4 Moldy Foods You Can Eat:

Hard salami or dry-cured country ham

It’s A-OK for hard salamis to have a thin white coating on the outside of the meat. This mold is put there on purpose: to produce flavor and protect the cured meat from bacteria. It’s safe to consume, as is any mold that grows on dry-cured country ham. Large slabs of the super salty pork are often used in restaurants as part decor, part conversation starter (and also a tangy topper to everything from pasta to avocado toast). If you buy one of these delicacies, don’t fear a little mold growth on the crust. Scrub it off (be sure to dry the ham well) before eating. 

Cheeses made with mold

The mold in blue, Gorgonzola, Stilton, Brie, and Camembert is to be expected. After all, these cheeses are injected with mold before they ripen—that’s why they’re so funky and delicious. But not all molds are made to eat, so you can’t assume all molds on cheese get the approval. Hard cheeses, like Gorgonzola and Stilton, aren’t harmed by a little extra mold. Cut the spot away—half an inch to one inch all the way around—and enjoy. Softer cheeses, like Brie and Camembert, have to go if you spot mold growing on them. The fingerlike organisms of mold can reach deep into these softer cheeses and may develop into toxic substances.

Hard cheeses

Even cheeses that aren’t made with mold veins are safe to eat if you spot a speck of mold growing on them. Cheddar, for example, just requires you to trim an inch around the moldy spot (some experts argue you only need a half-inch buffer; do what feels safest for you) and toss that before diving in. Be sure to use a clean knife, and keep the blade away from the mold to prevent cross-contamination. When you’re finished slicing for your sandwich or burger, be sure to rewrap the cheese in a fresh covering so you don’t reinfect with mold spores.

Firm fruits and vegetables

Tough vegetables and fruit, like carrots, potatoes, and turnips can take the mold in stride. The mold threads have a hard time penetrating deep into these dense plant foods. Trim off an inch around the mold, and eat or cook as you planned. Softer fruits and vegetables, like cherries, strawberries, and corn, should be tossed. Mold can easily spread to nearby areas, even if you can’t see the spores with your naked eye.

When can molds be toxic? 

All molds can cause allergic reactions and respiratory problems. That doesn’t mean they’re toxic. However, in the right conditions, some molds can turn into mycotoxins, poisonous substances that can make people physically sick. These substances are produced by certain molds that are most commonly found in grain and nut crops. However, they’ve also been known to show up in apples, grape juice, celery, and other fresh produce. That’s why, when in doubt, throw the moldy foods out.

Which moldy foods should I always toss? 

The USDA says these foods are no good when you spot mold. Their high moisture content or porous nature makes them prime for rapid mold development. Don’t risk getting sick just to finish up Tuesday night’s pot roast. Toss it, and fry up a grilled cheese instead.

Foods you should always toss:

  • Luncheon meats, bacon, and hot dogs
  • Cooked leftover meat and poultry
  • Cooked casseroles
  • Cooked grains and pasta
  • Soft cheeses, like cottage cheese, chevre, cream cheese, and Neufchatel
  • Yogurt and sour cream
  • Jams and jellies — Mycotoxins can spread in these foods easily, so it’s not enough to scoop out a mold part and keep going deeper into the jar.l
  • Soft fruits and vegetables — They’re porous, which means mold can spread rapidly, even if you can’t spot the spores.
  • Baked goods and bread
  • Peanut butter, legumes, and nuts — Any foods processed without preservatives are at a high risk of developing mold spores. Be extra cautious and keep them stored appropriately.”