Fit Fat Tuesday Feast

IMG_5098I love the comfort foods of winter but, because California gets a very short spell of cool weather, that means that I can’t just eat what I want and hide under sweatshirts and big sweaters…UG!  Case in point:  last week we had some of our lowest temperatures for late January/early February and this week it’s been in the high 80’s and low 90’s.  I am going to be back in spring clothes before too long, so I have to stick to my diet plan.

Just because I’m watching what I eat doesn’t mean I can’t enjoy Fat Tuesday, right?  By re-working one of my favorite Mardi Gras delights, I can (and did!) Laissez les bon temps roulez.

Let the Good Times Roll “California Style” Jambalaya

  • 1 – 12 oz Chub Jimmy Dean Reduced Fat Premium Pork Sausage
  • 2/3 pound Boneless Skinless Chicken Breast Diced
  • 12 oz – Raw (Peeled, Deveined & Tails Removed) Shrimp
  • 6 oz – Aidell’s Cajun Style Andouille Sausage
  • 1 – 14.5 oz Diced Fire Roasted Tomatoes
  • 2 Pkgs – Uncle Ben’s Ready Rice Natural Whole Grain Brown Rice (90 Second Microwave Packages)
  • 1 Red Bell Pepper – Chopped
  • 1 Green Bell Pepper – Chopped
  • 1 Bunch Green Onions
  • 2 TBLS Olive Oil
  • 2 Cloves Garlic (Peeled & Minced)
  • 2 TBLS Zatarain’s Cajun Spice Blend
  • Cayenne Pepper, Black Pepper To Taste

In a heavy duty skillet, preheated over medium-high heat, add 1 TBLS olive oil, the garlic, chopped onions, and chopped bell peppers.  Cook while stirring about 5 minutes.

Preheat a large heavy duty stock pot or stew pan over medium high heat.  Add 1 TBLS olive oil and the pork sausage to the pan.  Break up with a wooden spoon and cook until nearly done,  Add the diced chicken, sprinkle with the Cajun Spice, and continue cooking until chicken is nearly cooked through (4-5 minutes).  Slice the sausage into 1/4 to 1/2 inch slices and add to the pan.  Cut each peeled, deveined, tailed shrimp in half and add to the other meats in the pan.  Cook about 2 minutes.

Tear the packages to vent and microwave the Uncle Ben’s rice packets for 90 seconds each on high.

Add the sautéed vegetables to the cooked meat.  Stir in the canned tomatoes and bring all to a boil.  Reduce heat to medium-low and add the two packages of rice to the pan.

Stir to combine.  Add 1 TBLS ground black pepper and about 1/2 tsp cayenne pepper.

Serve with hot sauce of your choice, and, if you’re like me and love it California Style, add 1/4 of an avocado to the top of your bowl of steaming jambalaya.

Are you on Facebook?  You might be interested in the things I may not devote an entire blog post to: recipes, food facts, nutritional information, photos and other things that make my mouth water. I may not write a blog post every day, but there are daily updates to my This Girl Loves To Eat community at: https://www.facebook.com/ThisGirlLovesHerFood


Rainy Day Delight

It’s such a rare occasion in Orange County, California to have a cold, rainy, stormy day that I was excited to see a wet patio outside my window when I got up this morning.  WOO HOO!  I am SO getting the slow cooker out and making some chili!

white-chili

Not my usual rip-off of Mom’s XLNT Brick of Chili Con Carne based chili with ground beef, cubes of left over steak, canned crushed tomatoes and red beans.  Nope!  Today’s a White Bean Chicken Chili day.

It’s a ridiculously easy recipe and practically cooks itself.

Rainy Day White Bean Chicken Chili

  • 1 Can Diced Ortega Chilis (Mild or Hot – your choice)
  • 2 Boneless, Skinless Chicken Breasts – about 1 1/2 lbs (Frozen or Thawed)
  • 16 oz Chicken Broth
  • 1 – 16 oz Bag of Dry Great White Northern Beans
  • 2 tsp Dried Cilantro Flakes
  • 1 tsp Ground Black Pepper
  • 2 tsp Onion Powder
  • 1 tsp Devil’s Dust (or any Smoked Chili seasoning you use)
  • Sour Cream and Chopped Fresh Cilantro to serve (if desired)
  • 1 Ripe Avocado Chopped (if you have one)

In a large stock pot, 6 to 8 cups water on to boil.

Using a large colander, rinse and drain the white beans.  Pick out any icky ones and then add to the boiling water.  Boil the beans for about an hour then turn off the heat, cover and let stand for another hour.

While the beans are soaking get the other ingredients going in the slow cooker set on low heat.

  • Empty the can of diced green chilis (undrained) into the bottom of the slow cooker
  • Put the frozen chicken breasts on top of the chilis
  • Pour the chicken broth over the breasts
  • Dust the tops of the breasts with the spices (ending with the cilantro)

When the beans have finished soaking, empty them into a colander and then transfer them to the slow cooker.  Stir just enough to mix everything together and leave it the chili to cook for 6-8 hours on low heat.

About 4 hours into the cooking time, shred the chicken beasts with  forks and mix the chicken back into the chili.

When the cooking time has completed taste the chili, adjust the spices and serve with a dollop of sour cream and a sprinkling of fresh cilantro on top.  If you’re lucky enough to have a ripe avocado on hand, do yourself a “flavor” and chop it up to put on top of your bowl of chili!

You can speed this recipe up, making it one you can throw together in 10 minutes or less when you are leaving for work so it can cook all day, by substituting 3 cans of white beans from the grocery store.

I can’t wait for dinner time!

Are you on Facebook?  You might be interested in the things I may not devote an entire blog post to: recipes, food facts, nutritional information, photos and other things that make my mouth water. I may not write a blog post every day, but there are daily updates to my This Girl Loves To Eat community at: https://www.facebook.com/ThisGirlLovesHerFood

Bacon Roasted Cauliflower Chowder

dinnerreservationsI haven’t been to the grocery store this week and was at a loss as to what to make for dinner tonight.

The meat & cheese drawer gave me a pound of uncooked bacon fresh from the butcher, a wedge of parmesan cheese and another small chunk from a wedge of aged gouda-parmesan.

In the crisper was a bag of fresh sweet mini peppers, a head of cauliflower that was nearing extinction, half a red onion, some carrots, celery, a Rubbermaid container with some still viable sliced Portobello mushrooms and a few other items that found their way right into the compost bucket.

Not a lot to work with, but I’m a gamer (and thankfully my husband will try anything I make) so I trudged forward hoping for some inspiration.

A wrinkly but still salvageable Poblano chili was on the counter and inspiration for a nice warm soup struck.

Bacon & Roasted Cauliflower Chowder

  • ½ Cup Sliced Portobello Mushrooms
  • 6 Slices Bacon, cut into ½ inch pieces
  • ¼ Poblano Chili finely diced
  • ½ Red Onion diced
  • ¼ Cup diced Orange Sweet Bell Pepper
  • 1 Carrot chopped
  • 2 Ribs Celery chopped
  • 2 Cloves Garlic minced
  • 1 Medium Head Cauliflower
  • 4 Cups Beef Broth (4 Bullion Cubes in 4 Cups Boiling Water)
  • 1 – 5 ounce can Evaporated Milk
  • 2 Bay Leaves
  • Lawry’s Seasoned Pepper to taste (1 added about 2 tsp)
  • Reserved Rind of Parmesan or Parmesan-Gouda Cheese
  • Shredded Parmesan or Parmesan-Gouda Cheese (if desired)

Cut the cauliflower in thirds, trim off the stem, spritz with olive or coconut oil spray and roast 45 minutes at 400 degrees.

sweatvegetablesCook the bacon over medium high heat for 5 minutes. Add the diced Poblano chili and continue to cook until bacon is crisp but not too brown. Remove both from pan and drain on paper towel.

In the same pan add the onion, garlic, carrot, celery, and bell pepper.  Saute’ about 8 minutes over medium high heat.  Add the mushrooms and return the bacon and Poblano chili to the pan. Continue cooking another 10 minutes while bacon fat breaks down some more then switch heat to low.

addcauliflowerRoughly chop 1/3 of the roasted cauliflower into small pieces and add to the pan. Add the bay leaves and seasoned pepper, stir and cook on low about 5 minutes to allow the cauliflower to absorb the flavors of the bacon and other vegetables.

Put the remaining 2/3 of the cooled roasted cauliflower and 2 cups of the cooled broth into the Vitamix or Food Processor/Blender container and process on low until well combined. It will have plenty of texture, but if it’s not thin enough to easily pour, add a bit more of the reserved broth.

Increase heat to medium, then add the can of evaporated milk, a can of water and the contents of the Vitamix container to the pan. Stir well to incorporate. Stir in the remaining broth, the reserved cheese rinds (if you have any) and bring soup just to a boil. Return heat to low and simmer about 20 minutes.

soupRemove the bay leaves before serving.  Serve with toasted French bread chunks/croutons or crusty bread and butter.  Sprinkle chowder with shredded parmesan or parmesan-gouda cheese and chopped parsley if desired.

Are you on Facebook?  You might be interested in the things I may not devote an entire blog post to: recipes, food facts, nutritional information, photos and other things that make my mouth water. I may not write a blog post every day, but there are daily updates to my This Girl Loves To Eat community at: https://www.facebook.com/ThisGirlLovesHerFood

UG! I Cut My Avocado Too Soon

I have a 20 year old, beautiful and quite prolific avocado tree in my backyard.  It has survived being broken in half by a dog tie-out (Courtesy of our beloved Husky Whitney), uprooted when the swimming pool was being dug, and being eaten by the tree boring termites that took out it’s neighboring peach and plum trees.  It easily gives me more than 100 large, meaty, delicious avocados that stay good for me to eat and share with friends and family twice a year.

bacon-wrapped-fries-17-140x140January has come, Christmas “Shoeboxes of Love” have been distributed and I still have about 3 dozen on the tree.  I’ve been patiently watching for them to be ready to pick so I can finally try the recipe I pinned months ago for Bacon Wrapped Avocado Slices.  With Super Bowl just a week and a half away, I thought it was a perfect time to give it a try, so I pulled 6 off the tree.

I sent 2 home with my girlfriend and left the other 4 on the counter to slowly ripen.  The great part about picking them fresh is that I often have a good 2 weeks to let them become perfectly soft and ready to eat, unlike those at the store that have to be used as soon as you get them home.

If you don’t have ready-ripe store bought avocados to satisfy your craving, or the patience to wait that long, the following methods are rumored to be effective for ripening rock-hard avocados:

  • Put it in a brown paper bag overnight with a ripe banana or apple, which releases the ripening gas, ethylene (this is what I do)
  • Put it in a jar of rice
  • Bury it in flour
  • Wrap it in a piece of newspaper

3 remained yesterday and 1 was just reaching it’s perfect degree of softness.  My mouth watered anticipating a trial run of crisp salty bacon wrapped around velvety Haas Avocado dipped in a perfectly spiced fiesta ranch dip.  Then I got a massive migraine!

Off to bed I went so my husband was on his own for dinner.  He offered me a grilled cheese sandwich (one of my favorite things) but I was just not hungry.  I smelled his dinner cooking and was glad that he was self sufficient (at least last night).

I woke up this morning feeling a whole lot better and ventured into the kitchen to clean up the mess I knew would await, only to discover that HE ATE MY RIPE AVOCADO!

avocadoripe_guide

I cautiously felt the other two and, maybe it was my wishful thinking, but I determined that one of them was ready.  Into it I dove with my butcher’s knife only to hit rather firm flesh.  OH NO!  My avocado was ruined.

Instead of doing what I might have done in the past, i.e. throw the avocado out (GASP!), I went to my trusty friend, the internet in search of any way to save the prized green flesh!

A post on Hubpages.com may have just saved my cut too soon avocado after all!

If you have only opened, but not yet sliced the flesh and removed it from the shell, you can try to ripen the whole fruit:

  • Firmly fit the avocado halves back around the pit
  • Wrap the entire fruit with Saran Wrap, Masking Tape, Rubber Bands, Yarn, Twine, or anything that will hold the fruit firmly closed without allowing dust, bugs or moisture to get inside
  • Place fruit back on counter (do not refrigerate) and poke it gently every 12 hours until the flesh starts to give but doesn’t yet hold an indentation

An unripe, already sliced avocado can be prepared in ways that will cut the bitterness and hard texture so that it can still be enjoyed, albeit, not as much as if it were buttery and naturally softened, but nonetheless it can still be eaten.

  1. Make avocado patties by baking the cubed flesh 10-15 minutes at 300 degrees, until soft.  Mash and combine with panko, an egg and Cajun spice.  Spray a hot frying pan with olive or coconut oil spray and fry until brown on both sides.  Would be great with a fiesta ranch type dip.
  2. Make a creamy, cheesy hot avocado dip to serve with crusty bread or crackers.  Dice the avocado and place the cubes in a baking dish. Make a simple white sauce (béchamel), pour it over the avocado and sprinkle some grated cheese on top. Bake until golden and bubbly.
  3. Dip slices of the avocado in tempura batter and fry until crisp.

If you, like me, tend to share the foods you eat with your pets, you might have heard that avocados are poisonous to dogs and cats.  Avocado contains a molecule called persin that can cause illness or even death, but according to the Pet Poison Helpline, it is not poisonous for dogs or cats.  I’m really glad to know that because my dogs (1 Husky and 5 English Labs I’ve owned in the past 25 years) have always knocked the avocados (peaches, plums, citrus, tomatoes, berries and apricots) off the low branches or grabbed them off the ground and eaten them skin and all with no adverse reactions.  Thankfully I didn’t know that they were said to be harmful or I’d be worrying that they somehow harmed them.  Do be aware that the seeds do pose a choking risk and could cause a blockage in the digestive tract if swallowed whole, so it’s probably a good idea to keep the seeds away from them.

Are you on Facebook?  You might be interested in the things I may not devote an entire blog post to: recipes, food facts, nutritional information, photos and other things that make my mouth water. I may not write a blog post every day, but there are daily updates to my This Girl Loves To Eat community at:  https://www.facebook.com/ThisGirlLovesHerFood

Minty Truffles For Santa

treatsforsantaIf I had my way, every treat I make would be laced with some type of liquor to make the inevitable drama that comes with families and holidays tolerable.  Unfortunately others frown on only having treats out that aren’t kid friendly so I have to make some rated G. 😦

These satisfy the request for no booze (BOO) yet still have a grown up feel.  No one says I can’t leave a little nip of something to warm Santa up beside the plate 😉

Peppermint Crunch Truffles

  • 8 oz Evaporated Milk
  • 1 – 11 oz bag Dark Chocolate Chips (60% Cacao)
  • 1 10 oz bag Andes Peppermint Crunch Baking Pieces

In a heavy saucepan over medium heat, bring the evaporated milk just to a boil then remove from heat.

Separate out 1 cup of the peppermint crunch, chop finely and set aside.

In a large microwave safe glass measuring cup, cook the chocolate chips and peppermint pieces on high for 1 minute.  Remove and stir then slowly stir in the hot evaporated milk until well combined.

Cool in refrigerator for 1 hour.  Remove and allow to stand at room temperature about 5 minutes.

Using a melon baller or small spoon scoop mounds of the mixture, roll between hands to form a ball and roll to coat truffles in either:

  • The reserved chopped peppermint pieces
  • A 1 to 1 mixture of confectioner’s (powdered) sugar & unsweetened cocoa powder or
  • Sweetened coconut flakes

andestrufflesStore in refrigerator in tightly sealed container between layers of waxed paper until ready to serve.  Makes about 45 truffles.

Are you on Facebook?  You might be interested in the things I may not devote an entire blog post to:  recipes, food facts, nutritional information, photos and other things that make my mouth water. I may not write a blog post every day, but there are daily updates to my This Girl Loves To Eat community at:  https://www.facebook.com/ThisGirlLovesHerFood

An “Adults Only” Treat

boozeballsDespite what advertisers and children want us all to believe, Christmas isn’t just about making the kids happy… I believe that those who do all of the shopping, decorating, wrapping, cooking, cleaning, and prepping deserve to enjoy the holidays too, so I prepare a little something just for adult indulgence 😉

My co-workers, hairdresser, friends and family all wait for me to bring out the “special” plate of treats they know is intended just for them.  Their fancy name is Dark Chocolate Whisky Truffles but, to all who have tasted, they are simply referred to as Booze Balls!

Lisa’s Booze Balls

Combine ½ Cup Unsweetened Cocoa Powder and ½ Cup Powdered Sugar in a large Ziplock bag and set aside.

Melt 1 stick of Butter together with 1 bag (10 oz) Dark Chocolate Chips (I prefer Ghirardelli 60% Cacao) over low heat. When smooth remove from heat.

Crush enough Gingersnaps to make 1 Cup of crumbs and add to the melted chocolate and then add 3-4 Tablespoons of whatever Whisky you like – I have used Jack Daniels, Oban, Makers Mark, and Maker’s 46 (my personal favorite) and all were good.

Move the mixture to a bowl (preferably stainless steel), cover with foil and put in the refrigerator to cool for 45 minutes. If you are in a huge hurry – put in the freezer for about 25 minutes.

Line the biggest pan that will fit on a freezer shelf with waxed paper (I use a tart pan or 8 x 8 Pyrex)

Scoop out rounded spoonsful of the mixture and roughly ball then put in the lined pan

Freeze for an hour or so then roll the balls in your hands and drop the balls into the Ziplock bag of cocoa powder and powdered sugar mixture.

Shake off the excess and put the coated balls in a covered container and keep in the refrigerator. Bring to room temperature for the best flavor. Will keep for weeks in the refrigerator if your guests don’t lick the plate clean 😉

Are you on Facebook?  You might be interested in the things I may not devote an entire blog post to:  recipes, food facts, nutritional information, photos and other things that make my mouth water. I may not write a blog post every day, but there are daily updates to my This Girl Loves To Eat community at: https://www.facebook.com/ThisGirlLovesHerFood

Holiday Baking Hell

christmas-cookies2
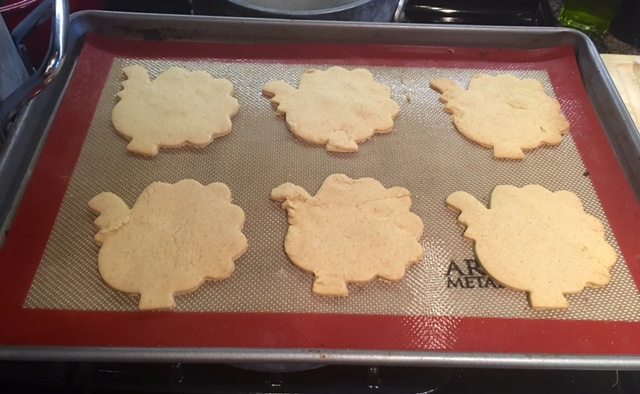
I coach youth basketball and love to bake for my boys, but unlike years past, everyone seems to have an allergy to one thing or another.  So, out went the email to the parents: please advise who is gluten intolerant, diabetic, lactose intolerant, allergic to eggs, nuts, chocolate or any other ingredient that might be in the treats I am preparing for our last practice before Christmas.

Amazingly not one boy on this team has an allergy so I am free to make some of my favorite treats to share this year!  Hallelujah!

First up:  Chewy Chocolate Toffee Almond Bars

  • 2 Sticks (1 Cup) Butter softened
  • 1/2 Cup Sugar
  • 2 Cups Flour (All Purpose Regular or Gluten Free)
  • 1 – 8 oz pkg Hershey’s Heath English Toffee Bits ‘O Brickle Bits
  • 3/4 Cup Light Corn Syrup
  • 1/2 – of an 11.5 oz bag Milk or Dark Chocolate Chips
  • 1 Cup Slice Almonds (divided)
  • 3/4 Cups Sweetened Flaked Coconut
  1. Preheat oven to 350 degrees.
  2. Grease sides and bottom of 13x9x2 Pyrex baking dish with butter.
  3. Beat butter & sugar until light and fluffy.  Gradually add in flour, beat until well blended.  Press evenly into bottom of greased baking dish.
  4. Bake 18-20 minutes until edges are lightly browned.
  5. Combine toffee bits and corn syrup in heavy pan.  Cook over medium heat, stirring constantly, about 10-12 minutes or until toffee melts.
  6. Stir in 1/2 cup of the almonds and 1/2 cup of the coconut.
  7. Spread toffee mixture to within 1/4 inch of the edges of the crust.
  8. Sprinkle the chocolate chips over the top, then the remaining almonds and coconut.  Tip: Mix the remaining 1/2 Cup Coconut & Almonds together and Sprinkle on Top
  9. Bake an additional 15 to 20 minutes or until bubbly.
  10. Move pan to wire rack & cut into about 36 bars when completely cool.

finishedtoffeebars


Are you on Facebook?  You might be interested in the things I may not devote an entire blog post to:  recipes, food facts, nutritional information, photos and other things that make my mouth water. I may not write a blog post every day, but there are daily updates to my This Girl Loves To Eat community at:  https://www.facebook.com/ThisGirlLovesHerFood

Leftovers Last Stand

As much as I love Thanksgiving and all of the comfort foods and carbs that bring on the need for a long nap and the fat pants, after about 3 days I get tired of the leftovers.

So far we’ve re-worked our Thanksgiving Leftovers into:

  • Day After Turkey Sandwiches filled with stuffing, cranberries, potatoes and gravy on decadent white bread
  • Turkey and Creamed Spinach Omelettes
  • Turkey Soup with leftover crudité vegetables, some chopped potato and whatever stock and store bought broth remains
  • White Bean Turkey Chili

greenmeatloafThe last of the Bacon Creamed Spinach, Creamed Corn, Green Bean Casserole and Gingersnap Sweet Potatoes will be serving as very colorful side dishes for tonight’s creation:

Green Meatloaf

In my KitchenAid Stand Mixer, with the dough hook attached, mix all ingredients until well incorporated.

Guy-Fieri-Salsa-Verdeorganicgrbeefhuntspanko


I don’t make a packed loaf, instead scooping and mounding the combined ingredients into a large loaf pan, smoothing the top into a loaf shape and then taking a rubber spatula and creating a little trough of space around the edges for the minimal amount of fat that will collect from the very lean beef.  I squirt about another 1/4 Cup of the Hunt’s Ketchup on top of the loaf and then slide it, uncovered, into a preheated 350 degree oven.

Cook for about an hour and twenty minutes.  I put a meat thermometer into the center of the loaf to make sure that I have passed the medium point and am nearing medium well.  The loaf continues to cook a bit when it comes out.

Let the loaf set for about 5 minutes to retain the juices inside when slicing.  The meatloaf is juicy, surprisingly light (not dense), flavorful and goes well with just about any side dishes you may have left.

Are you on Facebook?  You might be interested in the things I may not devote an entire blog post to:  recipes, food facts, nutritional information, photos and other things that make my mouth water. If so, visit my This Girl Loves To Eat community at:  https://www.facebook.com/ThisGirlLovesHerFood

Gluten Free Pumpkin Spice Cookies

turkeygfcookiesAs I was reviewing the recipes I’d be making for Thanksgiving weekend gatherings this year, I realized that someone likely to eat at least one meal at my house is gluten intolerant and wouldn’t be able to share the best part of dinner: dessert!  Luckily I had a recipe that was easily converted to gluten free, whew, crisis averted!

Gluten Free Pumpkin Spice Cookies

Mix together in a bowl and set aside:

  • 3 1/4 Cups All-Purpose Gluten Free Flour (I use Krusteaz)
  • 2 tsp Pumpkin Pie Spice
  • 1 tsp Baking Powder

In stand mixer cream until light and fluffy:

  • 2 Sticks (1 Cup) softened butter
  • 2/3 Cup Granulated Sugar
  • 1/3 Cup  Brown Sugar (Light or Dark)  then add
  • 1 Egg
  • 1/4 Cup Canned Pumpkin Puree

Preheat the oven to 350 degrees.

On low speed slowly add the dry ingredients until well incorporated and dough forms a ball.

Divide the dough in half and put into 2 large Ziplock bags.  Flatten to a large disk and put both into the refrigerator for at least 30 minutes.

Once dough has chilled place first disk on a lightly floured surface (MAKE SURE YOU USE THE GLUTEN FREE FLOUR), roll out to about 1/4″ and cut into Turkeys, Leaves, Footballs or any other fall shape.  Place on a cookie sheet with a silicone liner or parchment paper and then throw the pan in the freezer for a couple of minutes to help cookies keep their shape when you bake them.  Repeat process with what is left of first disk then the second disk until you have used all of the dough.

Bake for 9-12 minutes (until lightly browned on the bottoms and starting to brown on the tops) depending on your oven and the thickness of your cookies.  Remove cookies from the oven.  Allow to cool on pan about 1 minute then remove to wire racks to completely cool.  Do not leave on the pan too long or the cookies might start to lose their shape.

When completely cool ice with Royal Icing or pre-made cookie icing and enjoy.

Are you on Facebook?  You might be interested in the things I may not devote an entire blog post to:  recipes, food facts, nutritional information, photos and other things that make my mouth water. If so, visit my This Girl Loves To Eat community at:  https://www.facebook.com/ThisGirlLovesHerFood

Zin-ful Cranberries

cannedcranberriesMy family never ate any cranberry sauce that was homemade.  In the preparations for Thanksgiving, someone was always assigned the task of bringing two cans of jellied and one of whole berry cranberry sauce.  And you couldn’t try and pull a fast one by buying store brand.  It had to be Ocean Spray on Grandma’s Thanksgiving table!

When I began cooking Thanksgiving dinner for my own family I automatically followed the same routine until I became obsessed with the Food Network a few years back and made my first foray into making cranberry sauce from scratch.

For the first few years, I stuck with the basic “back of the package” recipe:

  • 1 Cup Water
  • 1 Cup Sugar
  • 1 – 12 oz bag of whole fresh cranberries

Boil sugar and water, add cranberries and cook 10 minutes over a slow boil until berries have popped, refrigerate until time to serve.  *If you wanted it jellied you strained out the berry solids and skins using a mesh strainer before refrigerating.

BORING!

cb3This year I put some time and creativity into the preparation and came up with a winner:

Zinful Cran-Blueberry Sauce

  • 1 & 1/3 Cups Granulated Sugar
  • 1 Cup Zinfandel Wine (Best Quality you can afford – if you wouldn’t drink it, don’t cook with it)
  • 1 – 12 oz Package Ocean Spray Fresh Whole Cranberries
  • 1 Cup Frozen Blueberries
  • 1 Whole Cinnamon Stick
  • 1/4 tsp Nutmeg
  • Orange or Tangerine Zest

Bring sugar, wine and cinnamon stick to a boil in a medium saucepan.  Add remaining ingredients and return to a boil, stirring constantly.  Reduce heat to low and simmer 15-20 minutes.  You may want to use a splatter shield to avoid splashing when cranberries pop. Remove and discard cinnamon stick.  Cool slightly then move sauce to serving dish.  Refrigerate at least 2 hours and serve cold.  Sauce will thicken up as it cools.  Garnish with a few cranberries, blueberries and curls of zest.

Tomorrow I am attacking the bird, the stuffing and the gravy!

Are you on Facebook?  You might be interested in the things I may not devote an entire blog post to:  recipes, food facts, nutritional information, photos and other things that make my mouth water. If so, visit my This Girl Loves To Eat community at:  https://www.facebook.com/ThisGirlLovesHerFood