Roasted Jalapeno Avocado Bacon Pie

Because Thursday is the slowest day at my “real job” I usually have time to fool around in the kitchen to try to create a new dish to serve for dinner.  This week was no different except that I needed to come up with something healthy because I am (BOO – HISSdieting i.e., not eating anything that even resembles Halloween candy or that I can pick up at a drive-thru window, have delivered to my front door, or comes out of a can or box.  No Bueno!

jabpieings Determined to stay on track, into the kitchen I went to make a healthy meal that would taste good, keep me full and make my digestion work hard (and burn calories) all night long.

aha-cartoonHappily I found some of my favorite spicy, salty, satisfying flavors there!  Bacon, fresh jalapenos, a forgotten Roma tomato (thankfully still firm), some ripe avocados from my backyard, green onions, eggs, and a wedge of aged gouda.  AHA Moment: I’d eat breakfast for dinner!

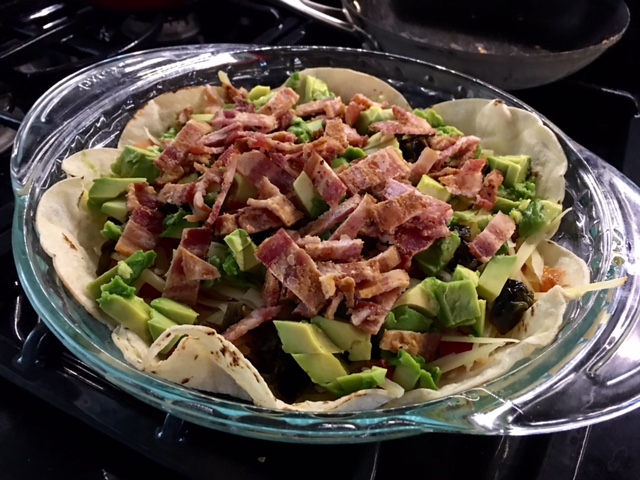
Roasted Jalapeno Avocado Bacon Tortilla Pie

  • 4 Large Eggs
  • 1 1/4 Cups Sour Cream
  • 4 Slices of Bacon (cooked crisp, drained, cooled and chopped)
  • 3 Green Onions
  • 1/2 of 1 Large Roma Tomato
  • 7 Corn Tortillas
  • 1 Medium Avocado
  • 1 Cup Shredded Aged Gouda Cheese
  • 1 Cup Shredded Parmesan Cheese
  • Olive Oil Spray
  • Freshly Ground Salt & Pepper

Preheat the oven to 350 degrees.  Lightly spray the bottom and sides of a 9.5″ Pyrex pie plate with the Olive Oil Spray.

In a small non-stick frying pan heat each of the tortillas until just lightly browned on both sides.  Lay one in the center on the bottom and then layer the rest around the pan overlapping to make sure there is a “crust like” coverage.

In the same pan roast the whole jalapenos until the skin bubbles and begins to blacken.  If you want a bit less spice, remove the seeds and stem first.  Combine both of the cheeses: sprinkle 1/4 of the cheese over the bottom of the tortilla crust.  When peppers are roasted, chop them and scatter over the first cheese layer.

Chop and quickly dry saute’ the whites only of the green onions (chop the greens and set aside) and the Roma tomato with a bit of salt & pepper.  Distribute the onion/tomato mixture over the jalapenos then cover with 1/2 of the remaining cheese.

Chop the avocado then layer it with the bacon over the second cheese layer.

Mix the 4 eggs and the sour cream until well combined and beginning to thicken.  Add cracked salt and pepper then pour carefully over the pie surface taking care not to overflow the edges of the exposed tortillas on the sides. Sprinkle remaining cheese over the top and put pie pan in the center of the pre-heated oven.  Bake 40-45 minutes, or until cheese begins to brown and a knife inserted into the center of the pie comes out with no egg mixture on it and center is cooked through.  Remove from the oven and allow to sit for 10-15 minutes before slicing into wedges to serve.  Top each wedge with the reserved chopped green onions.

jabpie2     jabpie3     jabpie4

To make this a complete meal serve with a salad of Romaine, the reserved 1/2 of the tomato, and any other fresh produce you’d like (I chop a green apple, some jicama, and add a shredded carrot) then dress lightly with olive oil, combined with salt, pepper and some lemon juice to keep it healthy.

Are you on Facebook?  You might be interested in the things I may not devote an entire blog post to:  recipes, food facts, nutritional information, photos and other things that make my mouth water. If so, visit my This Girl Loves To Eat community at:  https://www.facebook.com/ThisGirlLovesHerFood

Advertisement

Halloween Treats For the Gluten Intolerant Child

gfhalloweencandy

I always feel sorry for the kids who have dietary restrictions or allergies that keep them from the annual day when they are given permission to gorge on as much candy as their little hands can shove into their mouths.   There are only so many carnival mini toys, erasers, glow bracelets and stickers that one child can find exciting in their bags before the disappointment starts to set in and they lose the childhood joy of dressing up for Halloween.

Thankfully candy manufacturers care about their bottom line and have made a better effort to label their packages so that parents can safely let their gluten intolerant kids collect all the candy they can grab in a couple of hours in the neighborhood and, when it comes to sort it, they can even eat a lot of it now!

In an October 2015 article featured in About Health, Celiac Disease & Gluten Sensitivity Expert Jane Anderson compiled an updated list of candies that are safe for gluten intolerant kids (and their parents) to enjoy this Halloween:

  • M&M’s (all EXCEPT for pretzel-flavored M&M’s). Note that some special flavors have a risk of gluten cross-contamination because they’re made in facilities that also use gluten-containing ingredients — for example, in October 2015 the Pumpkin Spice M&Ms available in some stores are labeled “may contain traces of wheat”) NOTE: plain M&Ms (in any color) actually meet the more stringent standards for gluten-free certification, which require the products to contain less than 10 parts per million of gluten.
  • 3 Musketeers Bars (all flavors)
  • Milky Way Midnight Bar (not the original Milky Way Bar)
  • Milky Way Caramel Bar
  • Dove Chocolate products (all flavors EXCEPT for milk chocolate cinnamon graham/cookies and cream)
  • Snickers Bars (all flavors)
  • Munch Nut Bar (the customer service representative urges consumers to check the labels on this one)
  • Almond Joy (all)
  • Mounds (all)
  • Hershey’s Milk Chocolate Kisses
  • Hershey’s Filled Chocolate Kisses (only caramel and cherry cordial creme, NOT Hugs, Special Dark, Milk Chocolate with Almonds, or Cookies & Cream)
  • Hershey’s Nuggets (milk chocolate, milk chocolate with almonds, special dark chocolate with almonds, and extra creamy milk chocolate with toffee and almonds)
  • Hershey’s Milk Chocolate Bar, only in the 1.55 oz. size
  • Hershey’s Milk Chocolate with Almonds Bar, only in the 1.45 oz. size
  • Hershey’s Air Delight
  • Hershey’s Milk Duds
  • Heath Bars
  • Payday
  • Reese’s Peanut Butter Cups (all except for seasonal shaped items, such as Valentine’s hearts)
  • Reese’s Pieces (all except for Reese’s Pieces Eggs)
  • Rolo Caramels in Milk Chocolate (all except for Minis)
  • Skor
  • Skor Toffee Bar
  • York Peppermint Pattie (all except for York Pieces, York Minis and York Shapes)
  • Baby Ruth
  • Bit-O-Honey
  • Butterfinger Bar (original flavor only, NOT giant bar, Crisp, Stixx, Snakerz, Medallions, Jingles, Hearts or Pumpkins)
  • Nestle Milk Chocolate
  • Goobers
  • Nips (including both regular and sugar-free)
  • Oh Henry!
  • Raisinets (including Cherry, Cranberry, and Dark Chocolate flavors)
  • Sno-Caps
  • Wonka Pixy Sticks
  • LaffyTaffy (including LaffyTaffy Rope and FruitartsChews)
  • Wonka Lik-M-Aid Fun Dip
  • Smarties
  • Tootsie Roll (All products)

***DisclaimerBecause the same product can be produced and packaged in many different manufacturing facilities for the same company (creating the possibility of cross-contamination), always check the packaging and ingredients before consuming any candy, even if it does appear on this list

If you experience any reactions to products listed here, that display the GF symbol or statement on the packaging contact the manufacturers listed at the numbers on the linked PDF.

Are you on Facebook?  You might be interested in the things I may not devote an entire blog post to:  recipes, food facts, nutritional information, photos and other things that make my mouth water. If so, visit my This Girl Loves To Eat community at:  https://www.facebook.com/ThisGirlLovesHerFood

This Dinner Will Get You Thirsty This Thursday

IMG_4485[1]We missed taco Tuesday this week.

I was just too tired and sad from having to put my beloved lab to sleep Monday, to even think about cooking and getting my Mexican food fix.  The household is slowly recovering so I ventured out to the grocery store and then into the kitchen to throw something together tonight, that wasn’t takeout.  I came up with something tasty, filling and gluten free!

Chicken Stuffed Pasilla Peppers with Arborio Rice

  • 4 Large Pasilla (A.K.A. Poblano) Peppers
  • 1 Red Bell Pepper
  • 1 Orange Bell Pepper
  • 1 Yellow Bell Pepper
  • 2 Roasted Chicken Breasts
  • 6 Strips Crisp Cooked Bacon
  • 1 1/2 Cups Shredded Cheddar Cheese Blend (Cheddar/White Cheddar/Sharp Cheddar)
  • 2 Chopped Green Onions
  • 1/2 Cup Trader Giotti’s Arrabiata Sauce (found at Trader Joe’s stores)
  • 1/2 – 1 1/4 Cup Organic (Gluten Free) Chicken Broth
  • 1 Cup Arborio Rice
  • 3/4 Cup Sour Cream

I bought a nearly 6 pound whole young chicken and roasted it in a 375 degree oven for about 1 hour 45 minutes, took it out to rest and then removed the breasts and placed them in the Vitamix container.  Strain the drippings into a measuring cup and add enough chicken broth to equal 1 1/2 Cups.

In the same oven, while the chicken was cooking, I laid 6 strips of bacon on a cookie sheet and baked them for about 18 minutes, until they were crispy and browned but not yet burning.  Remove the bacon from the oven to drain and cool then cut it into pieces and add to the Vitamix container.

Once the chicken has finished cooking, increase the oven temperature to 400 degrees.

Wash and dry the Pasilla peppers then carefully cut the top off of all four, discarding the stem and seeds.  Take each of the peppers and cut a wide V shape on one side (from the top toward the solid bottom it’ll look like a V-neck shirt).  Place all 4 peppers on a cookie sheet.

Remove the stems and seeds from the bell peppers.  Cut in half and then into quarters until all pieces can lay flat on a cookie sheet.  Bake both sheets of peppers 20-25 minutes until the skins blister and start to blacken.  Remove the bell peppers from pan to cutting board to cool and then cut into small pieces and add to the Vitamix container.

Pulse the mixture until well combined.  Move mixture to a mixing bowl, add 3/4 cup shredded cheese, the chopped green onion and the Arrabiata sauce stirring to combine.

Fill each of the Pasilla peppers with the chicken mixture mounding each until they’re full.  Sprinkle the rest of the cheese over each of the peppers and bake in the 400 degree oven until the cheese is melted and starts to brown.

Rice:  In a medium saucepan with a lid, combine the reserved drippings/chicken broth, 1 TBLS butter or olive oil, and 1 Cup Arborio rice.  Cook over medium heat until it reaches a boil then put lid on, reduce heat to low and simmer for 20 minutes.  Remove pan from heat and allow to steam for 10 more minutes then fluff rice with a fork.

Sauce:  While the rice is cooking, simmer the reserved pieces of Pasilla pepper with about 3/4 cup chicken broth until liquid reduces by half and peppers are fork tender. Move peppers and broth to the cleaned Vitamix container and process until only a few small pieces remain.  Add 3/4 Cup sour cream to the Vitamix container and process until thoroughly combined and smooth.  Add salt and pepper to taste.

Serve:  Place rice in the center of the plate, lay one stuffed pepper on top of the rice and drizzle the sauce over the pepper.

If you are on Facebook and are interested in the things I may not devote an entire blog post to:  recipes, food facts, nutritional information, photos and other things that make my mouth water, I have a Facebook page you can visit too https://www.facebook.com/ThisGirlLovesHerFood

Cooking and Blogging in a Wrist Brace

cervicalnervesIt is amazing how much of your body is controlled by the nerves in the small part of your spine in your neck.

C5 – controls the Deltoids (the rounded part of the shoulder) and the Biceps (flexion of the elbow and rotation of the forearm);  C6 – controls the muscles that make up the wrist extensors and enable wrist extension and hyper extension and the movements that are tied to the Biceps (front of the upper arm);  C7 – controls the Triceps (muscles in the back of the upper arm that allow the elbow to straighten);  C8 – controls the hands

Either by hauling 40 lb bags of rocks to create a dry riverbed in the backyard, moving heavy plants and outdoor furniture around or moving furniture to clean places the housekeepers have been ignoring for months, I have managed to cause myself indescribable pain and numbness that has persisted for well over a week – thus my blogging absence. Typing puts my wrists in the wrong position and sends shooting pains up my arm & directly across my shoulders to my neck…

buffchikdipI threw a 16th birthday party for my friend’s son this weekend and the honoree requested chocolate cake (which French’s Bakery did a fabulous job on) and Buffalo Chicken Dip.

Who am I to turn a 16 year old boy down?

Only minimum movement was required, I didn’t have to do much stirring or carrying, and it only takes a few minutes to make, so I was able to grant his request!

Buffalo Chicken Dip

  • 2 Large Boneless / Skinless Chicken Breasts
  • 2/3 Cup Hidden Valley Original Ranch Dressing
  • 2/3 – 1 Cup (depending how spicy you like it) Frank’s Red Hot Sauce
  • 1 – 8 oz Block Cream Cheese
  • 1/2 Cup Shredded Cheese – Cheddar, Sharp Cheddar or my personal favorite: Aged Gouda
  • 1/4 Cup Crumbled Blue Cheese (I am not a fan, this is entirely optional)
  • 1/4 Cup Chopped Green Onion (optional but pretty)

Bring enough water to cover your chicken breasts to a boil.  I leave the breasts whole to preserve the moisture and cook them for 20-30 minutes.  When the chicken is done, I remove the breasts to the bowl of my stand mixer and using the paddle attachment, turn the mixer on to low then medium while the chicken shreds.

Put the whole block of cream cheese into the center of an 8 or 9 inch square Pyrex dish.  Pour the dressing and the hot sauce over the top of the cream cheese and microwave on high for 2 to 3 minutes.  Remove from the microwave and stir until well combined.

Add the shredded chicken to the dish and stir until all of the chicken is well coated.  Sprinkle the shredded cheese over the top and bake in a preheated 350 degree oven 20-30 minutes (until bubbling along the edges).

Remove from oven and top with the blue cheese crumbles and chopped green onions.

I serve with carrot chips, celery sticks and jicama sticks.  You could also use sturdy crackers (like Triscuit) or French bread chunks.

If it’s not going to be immediately inhaled, you can keep the dip warm in a small crock pot type warmer or, like I do, use your fondue pot to keep it bubbling hot.

To be honest, I forgot to take a picture, so yours (and mine) may come out looking different than the picture I found on the internet, but I’m sure it’ll look great!

If you are on Facebook and are interested in the things I may not devote an entire blog post to: recipes, food facts, nutritional information, photos and other things that make my mouth water, I have a Facebook page you can visit too https://www.facebook.com/ThisGirlLovesHerFood

Doc Says It Might Be Time To Cut Back a Bit

childdietI hate dieting!  Me without a hearty breakfast (think coffee, eggs, bacon, and some kind of bread), lunch, a snack around 4, and dinner + wine = a grumpy, hangry girl with a raging headache!

But I’ll be a good girl, at least as much as I can be, so my doctor gets happier with my blood tests and that stupid body composition machine she likes to torture me with every few months.

So, I grudgingly started today with a meal replacement shake prescribed by my doctor: Designs for Health PaleoMeal Plus Lean Body 14 Day Program.

There are some pluses to this choice:

  • It’s only available with a doctor referral
  • You get a significant discount off the regular $139 with a doctor referral
  • It’s made with Proserum, exceptional quality, native whey protein concentrate
  • Comes from cows that graze on pesticide-free, chemical-free natural grass pastures, and which are never given hormones, genetically modified organisms, or injected pathogens
  • The most important part, I get to eat between meals!

In addition, I know that I’m not making an effort to drink enough water, so 1 stocked up on liter bottles of Essentia 9.5% alkaline water.

Lunch was a really exciting smoothie concoction that I threw into the Vitamix:

  • 2-3 Cups Fresh Baby Spinach
  • 1 Large Ripe Nectarine – seed removed
  • 1 Naval Orange Peeled
  • 8 Medium – Large Frozen Strawberries
  • 6-8 Ice Cubes

I mixed the fruit & spinach together on 2-5 speed until blended then threw the ice cubes in and popped it up to 8 until the ice cubes were crushed up.  It was a very putrid shade of green but surprisingly sweet.

Big Bonus:  I got 5 of my fruit/vegetable servings out of the way in one fell swoop!

sugarbabiesTattling on myself:  While I was digging through the refrigerator I came across a bag of Sugar Babies.  The bag of Sugar Babies is no longer in the refrigerator…  Baby Steps.

If you are on Facebook and are interested in the things I may not devote an entire blog post to, recipes, food facts, nutritional information, photos and other things that make my mouth water, I have a page on Facebook you can visit too:  https://www.facebook.com/ThisGirlLovesHerFood

Tailgating on Thursday Night Sucks!

uscwthursAny true college football fan knows that spending all day Saturday tailgating is as much a part of the experience as the game is.

Whoever decided to add Friday night games (the traditional high school game night), then compounded that mistake by adding Thursday night games to the schedule, took away a lot of the fun of hanging with old and new friends and getting hyped up on game day.  That marketing “genius” should go down in the football hall of shame.

HELLO! People work and a 6:00 PM weekday/workday kickoff in a downtown location like USC in Los Angeles makes for a much shorter, less fun pre-game experience – not to mention the traffic nightmares that face people who can’t get off early meaning seats look empty on the national TV broadcast.

Even worse, in a non-college town (unlike most of the towns around colleges in the South) game day is just another day in the week when it’s not a Saturday.  The stadium isn’t as full as it would be on a weekend (especially one that holds 90,000 + when sold out) and, no matter how good or bad the team is doing, more and more people are skipping the game and/or giving away their Thursday night game tickets.  The excuses are varied yet all some version of the same: unable to face the traffic, hate the rush to get there, and need to get up too early for work the next day.  I am part of the working world, we are more than an hour from the stadium on a good day, but we only get 6-7 home games a year, so we’re blazing ahead!

Weeks like this are great opportunities to cut down the usual prep time, combine ready made foods in grocery stores with easy snacks, save setup and eliminate the need to cook on site, so we can enjoy our shortened time together!

IMG_4227[1]Needless to say it won’t be like our Week 1 Lobster boil, but I’ve huddled with our fellow tailgaters and we’ve come up with a total no-cook pre-game plan:

  • 2 Buckets of Grocery-Deli Fried Chicken
  • Deli Potato Salad
  • King’s Hawaiian Rolls
  • BBQ Sauce (for making chicken sandwiches on the rolls)
  • Chips & Sour Cream Onion Dip (OK we will have to add the envelope to the container)
  • Bakery Chocolate Chip Cookies and various no-cook, grab & go snacks
  • Beer/Wine/Cocktails & plenty of Water for re-hydrating

If you are on Facebook and are interested in the things I may not devote an entire blog post to, recipes, food facts, nutritional information, photos and other things that make my mouth water, I have a page on Facebook you can visit too:  https://www.facebook.com/ThisGirlLovesHerFood


Red Bean Chicken Chipotle Chili

It’s the first week of October and, after a few “cool” days in the low 80’s, it’s headed back up into the triple digits in perpetually sunny Southern California.

I’m not complaining at all, except that I do have serious weather envy about this time of year when the leaves are turning and there’s a chill in the mornings and evenings.  The forecasters “promise” that we will be seeing rain and cooler temperatures “soon” but I’m not holding my breath.

To get out of the never-ending summer blah’s I will just crank the thermostat down to 70 degrees, put on a light sweater, pull out the slow cooker and throw together something that just might fool the family into thinking it’s really fall!

Red Bean Chicken Chipotle Chili

  • 1 – 16 oz pkg Dry Red Kidney Beans
  • 1/2 – 8.11 oz jar La Costena Diced Chipotle Peppers in Sauce
  • 2 – 14.5 oz cans Diced Tomatoes with Onion
  • 1/2 – 12 oz bag Fresh Spinach
  • 3 – Large Carrots Peeled & Cut into Chunks
  • 1 TBLS Olive Oil
  • 2 Cloves Garlic Chopped
  • 1 TBLS Chili Powder
  • 2 tsp Ground Cumin
  • Fresh Ground Salt & Pepper
  • 1 1/2 lbs Boneless Skinless Chicken Breasts
  • 3/4 lb Chicken-Spinach Sausage (Or any other flavored fresh chicken sausage you prefer)

Rinse and pick the red beans in a strainer.  In a medium saucepan put the beans and about 1/2 the pan of water over medium high heat until it just reaches a boil.  If you are preparing the beans and soaking the night before, remove from heat, cover and set pan aside.  If you are “quick soaking” the beans, reduce heat to low, cover and simmer for about 2 hours.

Cut raw chicken breast into 3/4″ to 1″ chunks and sausage into 1/2″ slices.  Spray a medium skillet with olive oil spray and brown the chicken and sausage over medium-high heat.  It’s not necessary to cook the chicken through, it will finish in the slow cooker.

Place the carrots and 1/2 cup water in a 2 quart microwave safe bowl and microwave on high 2 1/2 to 3 minutes.  Carrots should be fork tender but not mushy.  Adjust time for the strength of your microwave.

In food processor/Vitamix container add undrained tomatoes, the carrots, chipotle peppers with sauce, the fresh spinach, olive oil, garlic, chili powder, and cumin.  Process until well blended but not entirely smooth.  Taste the sauce add a few grinds of salt & pepper and adjust the rest of the spices as necessary.

Put beans, chicken and sausage into your slow cooker then pour the sauce over the top, making sure you scrape as much as possible from the container.  Stir until just combined.  Cook on low for 6 hours.

I love this recipe because I get to hide vegetables in the sauce and it can be as healthy as you want it to be.  I like to add some fresh avocado chunks and a bit of cheese to the top of mine and serve it with crusty bread and a salad for a hearty dinner that easily feeds 8 and packs 40g of protein in each serving.

If you are on Facebook and are interested in the things I may not devote an entire blog post to, recipes, food facts, nutritional information, photos and other things that make my mouth water, I have a page on Facebook you can visit too:  https://www.facebook.com/ThisGirlLovesHerFood

Tomorrow’s Post:  Tailgating on Thursday Nights Sucks!

Meatless Monday

IMG_4404[1]I love to shop at Trader Joe’s!

Their produce is always fresh, they have great weekly specials and have a really unique, well priced wine and liquor department without having to fight with a giant grocery store atmosphere.

While browsing the aisles today I was inspired to create something quick and healthy for dinner tonight and didn’t want to ruin the workout I had just suffered through by making something that would make me feel bloated and bad about myself.

There were so many bright orange pumpkins displayed around the store that I thought something based on the same fall flavor would be great.  A few more minutes in the produce department and I came up with an idea that didn’t seem very hard at all.

 No Fuss Spinach Butternut Squash Lasagna

  • 1 – 12 oz package Trader Joe’s Cut Butternut Squash (In the fresh produce department)
  • 3/4 – 12 oz package Trader Joe’s Fresh Leaf Spinach
  • 9 – Sheets Trader Joe’s No Boil Lasagna Noodles
  • 1 – 16 oz container Trader Joe’s Part Skim Ricotta Cheese
  • 1 – 16 oz pkg Trader Joe’s Mozzarella Cheese
  • 1/4 – Wedge Trader Joe’s Parmesan Gouda Cheese
  • 1/4 Cup Skim Milk
  • 2 Cloves Garlic finely chopped
  • Fresh Basil (About 6 large leaves)
  • Nutmeg, Oregano, Salt, Pepper and Paprika to taste

Cook the butternut squash, in it’s package with a corner cut off, in the microwave for 6 minutes.

Shred the mozzarella cheese and grate 1/4 to 1/3 of the wedge of the gouda-parmesan wedge into two separate bowls and set aside.

In Food Processor (I used my Vitamix) combine the squash, milk, garlic, nutmeg, salt and 1/2 the container of ricotta cheese.  Process until just smooth.  Do not over process.  If too thick add a little more milk.  Taste and adjust the spices then set aside.

In a medium mixing bowl combine the spinach, the other half container of ricotta cheese, 1/2 of the mozzarella cheese, the chopped garlic, and some salt and pepper.  Stir until the spinach is well coated.

In a lasagna pan (or 9 x 12 Pyrex pan) drizzle some olive oil then layer as follows:

  1.  1/3 of the squash mixture, a single layer of the unboiled lasagna noodles (I used 2 whole and 1 split to fill the layer), then a layer of the spinach mixture;
  2. 1/3 of the squash mixture, a single layer of the no boil lasagna noodles, then a layer of the spinach mixture;
  3. Final 1/3 of the squash mixture, a single layer of the no boil lasagna noodles, then the rest of the spinach mixture;
  4. Top the lasagna with the rest of the mozzarella cheese, the grated parmesan-gouda cheese, and then sprinkle with oregano, paprika and the chopped fresh basil.

Bake in a 375 degree oven for 45 minutes, or until the top is just browned.  Remove from the oven and let stand 5-10 minutes so the cheese sets.  Cut into 8 pieces and serve with a green salad for a healthy meal.  My husband also added some Frank’s Red Hot to spice his up.  It was a great change of pace and there was enough left over for a couple of lunches this week!

If you are on Facebook and are interested in the things I may not devote an entire blog post to, recipes, food facts, nutritional information, photos and other things that make my mouth water, I have a page on Facebook you can visit too:  https://www.facebook.com/ThisGirlLovesHerFood

Tomorrow’s post:  Slow Cooked Red Bean Chicken Chipotle Chili

Bananas Foster Bread

ripebananasI was looking at 4 very sad – very ripe bananas while cleaning up my counter this morning and knew this was likely the last day they’d be good for anything more than freezing for smoothies.  I still feel crummy and wasn’t really in the mood to bake, but I went online in search of something easy, outside the ordinary banana bread, to do with them.

Like I knew they would, Food Network came to my rescue:

Damaris Phillps’s Bananas Foster Bread

  • 4 Medium ripe bananas mashed
  • 2 Eggs
  • 1 Cup sugar
  • 1/2 Cup coconut oil, melted
  • 3 TBLS plain yogurt
  • 1 tsp rum extract (I used a tsp of Captain Morgan Spiced Rum)
  • 1 tsp Vanilla
  • 2 Cups All-purpose flour
  • 1 tsp baking powder
  • 1/4 tsp salt
  • 1/4 Cup (1/2 stick) unsalted butter
  • 1/2 Cup dark brown sugar
  • 1/4 Cup spiced rum (Captain Morgan is my favorite)
  • 1 tsp orange zest

Preheat the oven to 350 degrees F. Spray a 9-by-4-inch loaf pan with cooking spray.

Combine the bananas, eggs, sugar, coconut oil, yogurt, and rum and vanilla extracts in a bowl.

In another, larger bowl, whisk together the flour, baking powder and salt.

Make a well in the center of the dry ingredients. Pour the wet ingredients into the dry ingredients and stir until the flour is incorporated and batter is smooth. Pour the batter into the prepared loaf pan and bake until golden brown and a skewer inserted into the center of the loaf comes out clean, about 1 hour. Remove from the oven and set aside while you make the glaze.

Melt the butter in a saucepan over medium heat. Add the brown sugar and 1/2 cup water and stir. Cook until the sugar dissolves, and then continue cooking another 3 to 5 minutes over low heat until the mixture bubbles around the edges. Turn off the heat and carefully (in case it flames) stir in the rum and the orange zest.

Slowly pour half of the glaze over the banana bread, allowing it to seep into all the surfaces. Wait until the glaze has been absorbed, about 30 minutes, and then turn the loaf out of the pan.

Slice and serve with vanilla ice cream, if using, and the remaining glaze.

bananasfosterbreadThis was easy to put together and made the house smell amazing while it was baking!

If you are on Facebook and are interested in the things I may not devote an entire blog post to, recipes, food facts, nutritional information, photos and other things that make my mouth water, I have a page on Facebook you can visit too:  https://www.facebook.com/ThisGirlLovesHerFood

Just Like My Mom Used to Make

macaroniandcheesI’ve been feeling very under the weather for nearly a week and haven’t felt much like eating, let alone cooking.

As we all can probably agree, aside from ice cream, hot tea, and warm chocolate chip cookies (made by someone else of course – I’m sick!), nothing makes a person feel better faster than comfort food like Mom used to make.  Now if my Mom were only here to make it for me…

Some of my favorite comfort foods are:

  • Macaroni and Cheese – My Mom wasn’t particularly talented in the kitchen, but she could make a mean box of Kraft Macaroni and Cheese.  Once they came out with the “Kraft Deluxe” with the (then) tiny cans of premade cheese sauce in them, she didn’t even have to add the milk and butter.  Her idea of perfection!  I shared her love of the Kraft Deluxe until about 5 years ago when the sauce (now in a foil pouch) got a little thinner and tasted less “cheesy.”  When I don’t take the time to make my own homemade macaroni and cheese from scratch, I have gone back to stocking the cupboard with the old school, original Kraft Macaroni and Cheese in the blue box with the powdered cheese.
  • Tuna Sandwich on White Bread – My Grandpa Bob set the standard for tuna preparation in our family.  He would buy tuna in oil (likely a lot of the reason he had quadruple bypass surgery in his 50’s), drain it and mix it together with meticulously chopped onions, a ton of mayonnaise (which has never been my favorite, in fact I rarely use it), and he’d pile it on plain white bread (something most people, myself included, rarely eat anymore), slice it in half, and make as many as would fit in his tan and red plaid “picnic” bag with a plastic sandwich box and thermos of “adult” refreshments.  If he was making sandwiches for us kids to eat on the beach at Lake Gregory in Crestline he would leave the onions out and there would be a thermos of lemonade for us to drink.
  • Grilled Cheese on Sourdough and Tomato Soup:  Down and dirty made with 2 pieces of heavily buttered (none of that icky margarine spread for this girl!) thick cut sourdough bread and at least 3 pieces of Kraft Singles American Cheese (no other brand makes it into my shopping cart).  Fried until brown and crispy and served along side a bowl of Campbell’s Tomato Soup made with milk (never water) and with a pat of butter floating on top.  Add a bowl of buttered popcorn to this and I’m pretty darn good.
  • Mashed Potatoes – Reminder, my Mom didn’t cook much from scratch, so it should be no big surprise that I grew up on Hungry Jack potatoes from the box if we were eating mashed potatoes at home.  My grandma, however, made the creamy, buttery mashed russet potatoes I dream about when I am too sick to keep much down and just want to feel better.  Nothing beats a few peeled, boiled potatoes mashed (with chunks – I love the chunks)  with a ton of butter and milk.  I prefer to make them like my Grandma Skip did, but I use half & half or even whipping cream if I have it on hand.

While these are my quick-fix, “Go-To” comfort foods, if my Mom was still here she’d tell me to make some of my favorite of all: Her, “Guaranteed to make me feel better, tuna noodle casserole.”

When I mention how much I love tuna noodle casserole to most people, their faces screw up and usually I get a negative reaction. Their Moms’ versions of tuna noodle casserole must have had some icky ingredients like cornflakes, ritz crackers, bread crumbs and even peas.  They may think it’s gross, but my Mom’s stripped down, no-frills version is the best I’ve ever eaten.

tunanoodlecasseroleMy Mom’s, Guaranteed to Make Me Feel Better, Tuna Noodle Casserole

Boil, noodles according to package instructions, and drain in a colander.  I prefer American Beauty noodles because they seem to stand up to the sauce without going limp if any remains to re-heat the next day.  Also, because their tuna is guaranteed Dolphin safe, wild caught, gluten free and readily available, I prefer Chicken of the Sea Chunk Light Tuna.

Open and drain the tuna in a colander.  Empty the Cream of Celery soup into a large saucepan.  Fill the empty soup can first with milk then with mayonnaise, adding both to the pan with the soup.  Add the drained tuna, salt and pepper to taste, and stir over low heat until hot but not boiling.

Empty the noodles into a large mixing bowl or the same pan you cooked them in and pour the hot sauce over the noodles, making sure to use a rubber spatula to get all of the sauce out of the pan.  Use the same spatula to combine the noodles and sauce until well mixed.  You can serve it immediately, but I find that if you let it cool slightly the sauce thickens up.

My husband thinks I am gross, but, if there is any casserole left in the refrigerator the next day, I have been known to eat it cold.  It’s like a tuna sandwich on noodles if you think about it, which qualifies twice on my list of comfort foods. 🙂

If you are on Facebook and are interested in the things I may not devote an entire blog post to, recipes, food facts, nutritional information, photos and other things that make my mouth water, I have a page on Facebook you can visit too:  https://www.facebook.com/ThisGirlLovesHerFood