Bacon Roasted Cauliflower Chowder

dinnerreservationsI haven’t been to the grocery store this week and was at a loss as to what to make for dinner tonight.

The meat & cheese drawer gave me a pound of uncooked bacon fresh from the butcher, a wedge of parmesan cheese and another small chunk from a wedge of aged gouda-parmesan.

In the crisper was a bag of fresh sweet mini peppers, a head of cauliflower that was nearing extinction, half a red onion, some carrots, celery, a Rubbermaid container with some still viable sliced Portobello mushrooms and a few other items that found their way right into the compost bucket.

Not a lot to work with, but I’m a gamer (and thankfully my husband will try anything I make) so I trudged forward hoping for some inspiration.

A wrinkly but still salvageable Poblano chili was on the counter and inspiration for a nice warm soup struck.

Bacon & Roasted Cauliflower Chowder

  • ½ Cup Sliced Portobello Mushrooms
  • 6 Slices Bacon, cut into ½ inch pieces
  • ¼ Poblano Chili finely diced
  • ½ Red Onion diced
  • ¼ Cup diced Orange Sweet Bell Pepper
  • 1 Carrot chopped
  • 2 Ribs Celery chopped
  • 2 Cloves Garlic minced
  • 1 Medium Head Cauliflower
  • 4 Cups Beef Broth (4 Bullion Cubes in 4 Cups Boiling Water)
  • 1 – 5 ounce can Evaporated Milk
  • 2 Bay Leaves
  • Lawry’s Seasoned Pepper to taste (1 added about 2 tsp)
  • Reserved Rind of Parmesan or Parmesan-Gouda Cheese
  • Shredded Parmesan or Parmesan-Gouda Cheese (if desired)

Cut the cauliflower in thirds, trim off the stem, spritz with olive or coconut oil spray and roast 45 minutes at 400 degrees.

sweatvegetablesCook the bacon over medium high heat for 5 minutes. Add the diced Poblano chili and continue to cook until bacon is crisp but not too brown. Remove both from pan and drain on paper towel.

In the same pan add the onion, garlic, carrot, celery, and bell pepper.  Saute’ about 8 minutes over medium high heat.  Add the mushrooms and return the bacon and Poblano chili to the pan. Continue cooking another 10 minutes while bacon fat breaks down some more then switch heat to low.

addcauliflowerRoughly chop 1/3 of the roasted cauliflower into small pieces and add to the pan. Add the bay leaves and seasoned pepper, stir and cook on low about 5 minutes to allow the cauliflower to absorb the flavors of the bacon and other vegetables.

Put the remaining 2/3 of the cooled roasted cauliflower and 2 cups of the cooled broth into the Vitamix or Food Processor/Blender container and process on low until well combined. It will have plenty of texture, but if it’s not thin enough to easily pour, add a bit more of the reserved broth.

Increase heat to medium, then add the can of evaporated milk, a can of water and the contents of the Vitamix container to the pan. Stir well to incorporate. Stir in the remaining broth, the reserved cheese rinds (if you have any) and bring soup just to a boil. Return heat to low and simmer about 20 minutes.

soupRemove the bay leaves before serving.  Serve with toasted French bread chunks/croutons or crusty bread and butter.  Sprinkle chowder with shredded parmesan or parmesan-gouda cheese and chopped parsley if desired.

Are you on Facebook?  You might be interested in the things I may not devote an entire blog post to: recipes, food facts, nutritional information, photos and other things that make my mouth water. I may not write a blog post every day, but there are daily updates to my This Girl Loves To Eat community at: https://www.facebook.com/ThisGirlLovesHerFood

Minty Truffles For Santa

treatsforsantaIf I had my way, every treat I make would be laced with some type of liquor to make the inevitable drama that comes with families and holidays tolerable.  Unfortunately others frown on only having treats out that aren’t kid friendly so I have to make some rated G. 😦

These satisfy the request for no booze (BOO) yet still have a grown up feel.  No one says I can’t leave a little nip of something to warm Santa up beside the plate 😉

Peppermint Crunch Truffles

  • 8 oz Evaporated Milk
  • 1 – 11 oz bag Dark Chocolate Chips (60% Cacao)
  • 1 10 oz bag Andes Peppermint Crunch Baking Pieces

In a heavy saucepan over medium heat, bring the evaporated milk just to a boil then remove from heat.

Separate out 1 cup of the peppermint crunch, chop finely and set aside.

In a large microwave safe glass measuring cup, cook the chocolate chips and peppermint pieces on high for 1 minute.  Remove and stir then slowly stir in the hot evaporated milk until well combined.

Cool in refrigerator for 1 hour.  Remove and allow to stand at room temperature about 5 minutes.

Using a melon baller or small spoon scoop mounds of the mixture, roll between hands to form a ball and roll to coat truffles in either:

  • The reserved chopped peppermint pieces
  • A 1 to 1 mixture of confectioner’s (powdered) sugar & unsweetened cocoa powder or
  • Sweetened coconut flakes

andestrufflesStore in refrigerator in tightly sealed container between layers of waxed paper until ready to serve.  Makes about 45 truffles.

Are you on Facebook?  You might be interested in the things I may not devote an entire blog post to:  recipes, food facts, nutritional information, photos and other things that make my mouth water. I may not write a blog post every day, but there are daily updates to my This Girl Loves To Eat community at:  https://www.facebook.com/ThisGirlLovesHerFood

Holiday Baking Hell

christmas-cookies2
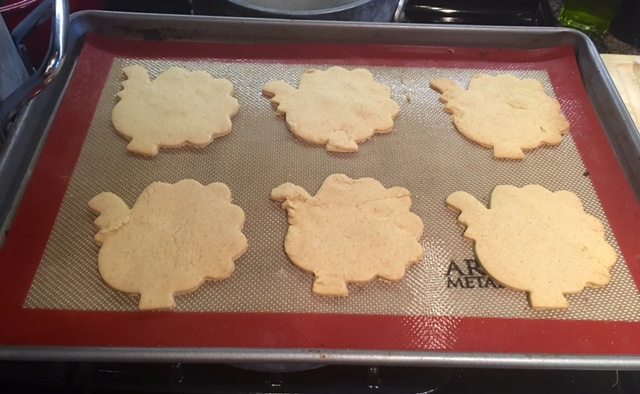
I coach youth basketball and love to bake for my boys, but unlike years past, everyone seems to have an allergy to one thing or another.  So, out went the email to the parents: please advise who is gluten intolerant, diabetic, lactose intolerant, allergic to eggs, nuts, chocolate or any other ingredient that might be in the treats I am preparing for our last practice before Christmas.

Amazingly not one boy on this team has an allergy so I am free to make some of my favorite treats to share this year!  Hallelujah!

First up:  Chewy Chocolate Toffee Almond Bars

  • 2 Sticks (1 Cup) Butter softened
  • 1/2 Cup Sugar
  • 2 Cups Flour (All Purpose Regular or Gluten Free)
  • 1 – 8 oz pkg Hershey’s Heath English Toffee Bits ‘O Brickle Bits
  • 3/4 Cup Light Corn Syrup
  • 1/2 – of an 11.5 oz bag Milk or Dark Chocolate Chips
  • 1 Cup Slice Almonds (divided)
  • 3/4 Cups Sweetened Flaked Coconut
  1. Preheat oven to 350 degrees.
  2. Grease sides and bottom of 13x9x2 Pyrex baking dish with butter.
  3. Beat butter & sugar until light and fluffy.  Gradually add in flour, beat until well blended.  Press evenly into bottom of greased baking dish.
  4. Bake 18-20 minutes until edges are lightly browned.
  5. Combine toffee bits and corn syrup in heavy pan.  Cook over medium heat, stirring constantly, about 10-12 minutes or until toffee melts.
  6. Stir in 1/2 cup of the almonds and 1/2 cup of the coconut.
  7. Spread toffee mixture to within 1/4 inch of the edges of the crust.
  8. Sprinkle the chocolate chips over the top, then the remaining almonds and coconut.  Tip: Mix the remaining 1/2 Cup Coconut & Almonds together and Sprinkle on Top
  9. Bake an additional 15 to 20 minutes or until bubbly.
  10. Move pan to wire rack & cut into about 36 bars when completely cool.

finishedtoffeebars


Are you on Facebook?  You might be interested in the things I may not devote an entire blog post to:  recipes, food facts, nutritional information, photos and other things that make my mouth water. I may not write a blog post every day, but there are daily updates to my This Girl Loves To Eat community at:  https://www.facebook.com/ThisGirlLovesHerFood

Gluten Free Pumpkin Spice Cookies

turkeygfcookiesAs I was reviewing the recipes I’d be making for Thanksgiving weekend gatherings this year, I realized that someone likely to eat at least one meal at my house is gluten intolerant and wouldn’t be able to share the best part of dinner: dessert!  Luckily I had a recipe that was easily converted to gluten free, whew, crisis averted!

Gluten Free Pumpkin Spice Cookies

Mix together in a bowl and set aside:

  • 3 1/4 Cups All-Purpose Gluten Free Flour (I use Krusteaz)
  • 2 tsp Pumpkin Pie Spice
  • 1 tsp Baking Powder

In stand mixer cream until light and fluffy:

  • 2 Sticks (1 Cup) softened butter
  • 2/3 Cup Granulated Sugar
  • 1/3 Cup  Brown Sugar (Light or Dark)  then add
  • 1 Egg
  • 1/4 Cup Canned Pumpkin Puree

Preheat the oven to 350 degrees.

On low speed slowly add the dry ingredients until well incorporated and dough forms a ball.

Divide the dough in half and put into 2 large Ziplock bags.  Flatten to a large disk and put both into the refrigerator for at least 30 minutes.

Once dough has chilled place first disk on a lightly floured surface (MAKE SURE YOU USE THE GLUTEN FREE FLOUR), roll out to about 1/4″ and cut into Turkeys, Leaves, Footballs or any other fall shape.  Place on a cookie sheet with a silicone liner or parchment paper and then throw the pan in the freezer for a couple of minutes to help cookies keep their shape when you bake them.  Repeat process with what is left of first disk then the second disk until you have used all of the dough.

Bake for 9-12 minutes (until lightly browned on the bottoms and starting to brown on the tops) depending on your oven and the thickness of your cookies.  Remove cookies from the oven.  Allow to cool on pan about 1 minute then remove to wire racks to completely cool.  Do not leave on the pan too long or the cookies might start to lose their shape.

When completely cool ice with Royal Icing or pre-made cookie icing and enjoy.

Are you on Facebook?  You might be interested in the things I may not devote an entire blog post to:  recipes, food facts, nutritional information, photos and other things that make my mouth water. If so, visit my This Girl Loves To Eat community at:  https://www.facebook.com/ThisGirlLovesHerFood

Zin-ful Cranberries

cannedcranberriesMy family never ate any cranberry sauce that was homemade.  In the preparations for Thanksgiving, someone was always assigned the task of bringing two cans of jellied and one of whole berry cranberry sauce.  And you couldn’t try and pull a fast one by buying store brand.  It had to be Ocean Spray on Grandma’s Thanksgiving table!

When I began cooking Thanksgiving dinner for my own family I automatically followed the same routine until I became obsessed with the Food Network a few years back and made my first foray into making cranberry sauce from scratch.

For the first few years, I stuck with the basic “back of the package” recipe:

  • 1 Cup Water
  • 1 Cup Sugar
  • 1 – 12 oz bag of whole fresh cranberries

Boil sugar and water, add cranberries and cook 10 minutes over a slow boil until berries have popped, refrigerate until time to serve.  *If you wanted it jellied you strained out the berry solids and skins using a mesh strainer before refrigerating.

BORING!

cb3This year I put some time and creativity into the preparation and came up with a winner:

Zinful Cran-Blueberry Sauce

  • 1 & 1/3 Cups Granulated Sugar
  • 1 Cup Zinfandel Wine (Best Quality you can afford – if you wouldn’t drink it, don’t cook with it)
  • 1 – 12 oz Package Ocean Spray Fresh Whole Cranberries
  • 1 Cup Frozen Blueberries
  • 1 Whole Cinnamon Stick
  • 1/4 tsp Nutmeg
  • Orange or Tangerine Zest

Bring sugar, wine and cinnamon stick to a boil in a medium saucepan.  Add remaining ingredients and return to a boil, stirring constantly.  Reduce heat to low and simmer 15-20 minutes.  You may want to use a splatter shield to avoid splashing when cranberries pop. Remove and discard cinnamon stick.  Cool slightly then move sauce to serving dish.  Refrigerate at least 2 hours and serve cold.  Sauce will thicken up as it cools.  Garnish with a few cranberries, blueberries and curls of zest.

Tomorrow I am attacking the bird, the stuffing and the gravy!

Are you on Facebook?  You might be interested in the things I may not devote an entire blog post to:  recipes, food facts, nutritional information, photos and other things that make my mouth water. If so, visit my This Girl Loves To Eat community at:  https://www.facebook.com/ThisGirlLovesHerFood

Apple Roasted Frenched Pork Chops

Although I love a piece of thick crispy bacon and can’t get enough Honeybaked ham, I am not a huge fan of pork chops.

It could be that my mom only served them one of two ways:

  • In the crockpot swimming in cream of mushroom soup or
  • In the oven, which meant they were usually overcooked and dried out “Shake and Bake” style.

My brother-in-law cooks a pork loin in a cream lime sauce that everyone else raves about.  I don’t know why, because he’s a great cook, but it’s never really appealed to me.  My husband and son love Shake and Bake and the pork chops have to be paper thin.  Nope, not for me!

So, in an effort to give pork another try, I’m experimenting on a rather expensive (for pork) preparation of the loin chop: Frenched double cut pork chop.

frenchporkchopsApple Roasted Frenched Pork Chops

Heat a large skillet (one that has a lid) with about 2 TBLS Olive Oil over a high flame.  Liberally salt and pepper both sides and the fatty edge (I prefer freshly ground for both and I use sea salt) of 2 French Cut inch to inch and a half double cut bone in pork chops (I get mine at Trader Joe’s).  When the oil is hot, sear the chops on both sides and on the fatty edge for 2-3 minutes per area.

Remove the chops from the pan and lower the heat to Medium.  Add 1 thinly sliced small granny smith apple (peel on), about 1/2 Cup thinly sliced and separated sweet yellow onion, and 4-6 bulbs pre-roasted and cooled garlic to the pan. Cook about 3 minutes, until garlic is thoroughly incorporated (use a fork to break up the bulbs), onions are opaque and apples begin to soften.  Add about 1 Cup apple juice, apple cider or white wine (if you wouldn’t drink it, don’t cook with it!) and stir up the brown pieces while deglazing the pan cook 2 minutes.  Reduce the heat to low.  Add 1 Cup low-sodium chicken broth to the pan and simmer for 2 more minutes.

Return the pork chops to the pan, reduce heat to low, cover and simmer for 20-22 minutes depending on the thickness of your chops.  Turn the chops over at about 10 minutes.

Remove the chops from the pan and add 1/4 to 1/3 cup of heavy cream and a generous amount of freshly cracked pepper to the pan.  Increase heat to medium and cook for 3-4 minutes stirring continuously to scrape up browned bits and thicken the sauce.  Evenly distribute the apple, onion and sauce over the chops and serve immediately

I serve these atop a bed of mashed potatoes or with yesterday’s recipe: Roasted Garlic Cheesy Cauliflower and a crisp green salad.

Are you on Facebook?  You might be interested in the things I may not devote an entire blog post to:  recipes, food facts, nutritional information, photos and other things that make my mouth water. If so, visit my This Girl Loves To Eat community at:  https://www.facebook.com/ThisGirlLovesHerFood

Roasted Garlic Cheesy Cauliflower

roastedgarliccheesycauliflowerI bought a couple of heads of cauliflower at the farmer’s market, but wasn’t excited to serve it steamed with cheese, as make-believe rice, wannabe mashed potatoes, or even spiced up and roasted whole.

A trip to Trader Joe’s later, I had some inspiration for a main dish casserole I could serve with a salad.  Later this week it will be a great side dish for smoked sausage or, if I’m feeling inspired, Roasted Frenched Pork Chops.

If you don’t eat, or don’t like pork products, you can easily substitute shredded chicken (grocery store rotisserie or home prepared) for the ham and either leave the bacon out or substitute turkey bacon.  Another option is to cut leftover steak or prime rib into cubes as a substitute for the ham and leave in the bacon.  If you are vegetarian you can leave the meat out completely and add more bell pepper (red, yellow, orange or green). It’s a recipe that’s easy to get creative with.

Roasted Garlic Cheesy Cauliflower

  • 2 Heads of Cauliflower
  • 2 Cups Shredded Pepper Jack Cheese
  • 8 oz Cream Cheese
  • 2 Cups Shredded Aged Gouda (or Trader Joe’s Gouda/Parmesan Blend) Cheese
  • 4 TBLS Butter
  • 1 Green Bell Pepper Diced
  • 3 Chopped Green Onions
  • 6 Slices Cooked Bacon
  • 2 Cups Diced Cooked Ham
  • 1 Clove Garlic, Roasted
  • 3 Shallots, Roasted
  • Freshly Ground Pepper
  • About 1 TBLS Olive Oil
  • 2 TBLS Gluten Free Flour
  • 3/4 cup heavy cream or 1/2 & 1/2 

Preheat oven to 350 degrees.  Grease a 9 x 13 Pyrex baking dish and set aside.

roastedgarlicPeel away the papery skin and cut off the top of the garlic clove.  Place inside a square of foil, drizzle with olive oil, close up the foil package, and place in a shallow pan in the oven.  Do the same for the shallots.  Bake 30-40 minutes and remove from oven.  Set aside for a few minutes then open up foil pouch to let cool.

Break apart cauliflower heads, discard the stem and steam in a steamer in a large pot until tender but not mushy (about 20 minutes per head – you may have to do it in 2 batches).  Transfer cauliflower to Vitamix Container or Food Processor and pulse until florets break apart but do not pulverize.  Remove the cauliflower and put into a large mixing bowl.  Add diced bell pepper, ham, half of the chopped green onions, and half of the crumbled bacon.  Toss to combine.

In heavy saucepan squeeze the roasted garlic and shallots out of their skins and add 3 TBLS butter.  Cook over medium heat until butter melts.  Using a fork or an immersion blender stir/blend until the garlic and shallots are crushed and well combined.  Add a generous amount of pepper, the cream (or 1/2 & 1/2) and bring just to a boil.  Combine the last 1 TBLS of butter (melted) with 2 TBLS of the Gluten Free flour (all purpose if GF isn’t a concern for you) and blend or whisk into the mixture in the pan until the mixture begins to thicken.  Add the cream cheese then 1 Cup of the pepper jack and 1 Cup of the gouda, stirring constantly until melted.  It may not be a flowing sauce, but resemble a big melted blob – that’s ok.  Remove from heat and pour into the cauliflower mixture in a large bowl.  Use a large rubber spatula to stir together until well mixed.

Spread into prepared 9 x 13 pan, sprinkle remaining bacon, green onion and cheeses over the top, cover loosely with foil and bake for 30 minutes; remove foil and continue to bake until cheese is brown and bubbly.  Remove from oven and let cool 5-10 minutes. I serve with a bottle of Frank’s Red Hot for those who like more spice.

Are you on Facebook?  You might be interested in the things I may not devote an entire blog post to:  recipes, food facts, nutritional information, photos and other things that make my mouth water. If so, visit my This Girl Loves To Eat community at:  https://www.facebook.com/ThisGirlLovesHerFood

Guilt-Free Skinny Coleslaw

chicken-ready-to-go-in-the-oven1I’m just getting ready to throw a whole chicken into the oven for tonight’s dinner.  I’m going to serve it atop a pile of fresh spinach sautéed in a splash of olive oil and some minced garlic and alongside one of my favorite recipe creations: Skinny Coleslaw.

I can eat it by itself as a healthy mid-day snack, pile it inside a wrap with leftover chicken, serve it alongside grilled bratwursts, and, if I decide to spoil/treat my family, it’s even great piled inside a pastrami or corned beef sandwich.  The longer the leftovers are in the refrigerator the better it tastes, so if you can make it a day ahead you are really going to taste all of the flavors at their best.  Nutrition information per 1/2 cup serving of this homemade pleasure makes it something that I can eat all week and feel no guilt about at all!

Calories:  75   Fat & Cholesterol: 0    Sodium:  15mg    Protein:  1g    Carbohydrates:  13g     Fiber:  2g    Sugar:  8.5g

skinnycoleslaw

Salad:  ½ Head Medium Red Cabbage; ¼ Head Large Green Cabbage; 1 Can Crushed Pineapple Un-drained; 2 Large Granny Smith Apples Grated; 3 Medium Carrots Peeled & Grated

Dressing:  3 TBLS Light Olive Oil; 1/3 Cup Honey; ½ Cup Apple Cider Vinegar; ½ tsp Dry Mustard; ½ tsp Celery Seed; ½ tsp Garlic Powder; ½ tsp Freshly Ground Pepper; ½ tsp Cracked Sea Salt

  1. Chop the Cabbage, Grate the Carrots & Apples into bowl with a lid.  Add the can of Crushed Pineapple & the Celery Seed and toss to combine.  Cover and refrigerate.
  2. In a small saucepan, combine the Oil, Honey, Vinegar, Mustard, Garlic Powder, Salt & Pepper.  Over medium heat bring to a boil then reduce heat and simmer for 3 minutes stirring occasionally.
  3. Remove sauce from pan, put into a shallow bowl and put into the refrigerator to cool (about 30 minutes).
  4. Once dressing is cooled, combine with the cabbage mixture and toss to combine.  Cover and return to the refrigerator to chill until serving.

This salad is Gluten and Paleo friendly and won’t break your diet if you’re just watching calorie and sugar intake.  Yum

Are you on Facebook?  You might be interested in the things I may not devote an entire blog post to:  recipes, food facts, nutritional information, photos and other things that make my mouth water. If so, visit my This Girl Loves To Eat community at:  https://www.facebook.com/ThisGirlLovesHerFood

Roasted Jalapeno Avocado Bacon Pie

Because Thursday is the slowest day at my “real job” I usually have time to fool around in the kitchen to try to create a new dish to serve for dinner.  This week was no different except that I needed to come up with something healthy because I am (BOO – HISSdieting i.e., not eating anything that even resembles Halloween candy or that I can pick up at a drive-thru window, have delivered to my front door, or comes out of a can or box.  No Bueno!

jabpieings Determined to stay on track, into the kitchen I went to make a healthy meal that would taste good, keep me full and make my digestion work hard (and burn calories) all night long.

aha-cartoonHappily I found some of my favorite spicy, salty, satisfying flavors there!  Bacon, fresh jalapenos, a forgotten Roma tomato (thankfully still firm), some ripe avocados from my backyard, green onions, eggs, and a wedge of aged gouda.  AHA Moment: I’d eat breakfast for dinner!

Roasted Jalapeno Avocado Bacon Tortilla Pie

  • 4 Large Eggs
  • 1 1/4 Cups Sour Cream
  • 4 Slices of Bacon (cooked crisp, drained, cooled and chopped)
  • 3 Green Onions
  • 1/2 of 1 Large Roma Tomato
  • 7 Corn Tortillas
  • 1 Medium Avocado
  • 1 Cup Shredded Aged Gouda Cheese
  • 1 Cup Shredded Parmesan Cheese
  • Olive Oil Spray
  • Freshly Ground Salt & Pepper

Preheat the oven to 350 degrees.  Lightly spray the bottom and sides of a 9.5″ Pyrex pie plate with the Olive Oil Spray.

In a small non-stick frying pan heat each of the tortillas until just lightly browned on both sides.  Lay one in the center on the bottom and then layer the rest around the pan overlapping to make sure there is a “crust like” coverage.

In the same pan roast the whole jalapenos until the skin bubbles and begins to blacken.  If you want a bit less spice, remove the seeds and stem first.  Combine both of the cheeses: sprinkle 1/4 of the cheese over the bottom of the tortilla crust.  When peppers are roasted, chop them and scatter over the first cheese layer.

Chop and quickly dry saute’ the whites only of the green onions (chop the greens and set aside) and the Roma tomato with a bit of salt & pepper.  Distribute the onion/tomato mixture over the jalapenos then cover with 1/2 of the remaining cheese.

Chop the avocado then layer it with the bacon over the second cheese layer.

Mix the 4 eggs and the sour cream until well combined and beginning to thicken.  Add cracked salt and pepper then pour carefully over the pie surface taking care not to overflow the edges of the exposed tortillas on the sides. Sprinkle remaining cheese over the top and put pie pan in the center of the pre-heated oven.  Bake 40-45 minutes, or until cheese begins to brown and a knife inserted into the center of the pie comes out with no egg mixture on it and center is cooked through.  Remove from the oven and allow to sit for 10-15 minutes before slicing into wedges to serve.  Top each wedge with the reserved chopped green onions.

jabpie2     jabpie3     jabpie4

To make this a complete meal serve with a salad of Romaine, the reserved 1/2 of the tomato, and any other fresh produce you’d like (I chop a green apple, some jicama, and add a shredded carrot) then dress lightly with olive oil, combined with salt, pepper and some lemon juice to keep it healthy.

Are you on Facebook?  You might be interested in the things I may not devote an entire blog post to:  recipes, food facts, nutritional information, photos and other things that make my mouth water. If so, visit my This Girl Loves To Eat community at:  https://www.facebook.com/ThisGirlLovesHerFood

Halloween Treats For the Gluten Intolerant Child

gfhalloweencandy

I always feel sorry for the kids who have dietary restrictions or allergies that keep them from the annual day when they are given permission to gorge on as much candy as their little hands can shove into their mouths.   There are only so many carnival mini toys, erasers, glow bracelets and stickers that one child can find exciting in their bags before the disappointment starts to set in and they lose the childhood joy of dressing up for Halloween.

Thankfully candy manufacturers care about their bottom line and have made a better effort to label their packages so that parents can safely let their gluten intolerant kids collect all the candy they can grab in a couple of hours in the neighborhood and, when it comes to sort it, they can even eat a lot of it now!

In an October 2015 article featured in About Health, Celiac Disease & Gluten Sensitivity Expert Jane Anderson compiled an updated list of candies that are safe for gluten intolerant kids (and their parents) to enjoy this Halloween:

  • M&M’s (all EXCEPT for pretzel-flavored M&M’s). Note that some special flavors have a risk of gluten cross-contamination because they’re made in facilities that also use gluten-containing ingredients — for example, in October 2015 the Pumpkin Spice M&Ms available in some stores are labeled “may contain traces of wheat”) NOTE: plain M&Ms (in any color) actually meet the more stringent standards for gluten-free certification, which require the products to contain less than 10 parts per million of gluten.
  • 3 Musketeers Bars (all flavors)
  • Milky Way Midnight Bar (not the original Milky Way Bar)
  • Milky Way Caramel Bar
  • Dove Chocolate products (all flavors EXCEPT for milk chocolate cinnamon graham/cookies and cream)
  • Snickers Bars (all flavors)
  • Munch Nut Bar (the customer service representative urges consumers to check the labels on this one)
  • Almond Joy (all)
  • Mounds (all)
  • Hershey’s Milk Chocolate Kisses
  • Hershey’s Filled Chocolate Kisses (only caramel and cherry cordial creme, NOT Hugs, Special Dark, Milk Chocolate with Almonds, or Cookies & Cream)
  • Hershey’s Nuggets (milk chocolate, milk chocolate with almonds, special dark chocolate with almonds, and extra creamy milk chocolate with toffee and almonds)
  • Hershey’s Milk Chocolate Bar, only in the 1.55 oz. size
  • Hershey’s Milk Chocolate with Almonds Bar, only in the 1.45 oz. size
  • Hershey’s Air Delight
  • Hershey’s Milk Duds
  • Heath Bars
  • Payday
  • Reese’s Peanut Butter Cups (all except for seasonal shaped items, such as Valentine’s hearts)
  • Reese’s Pieces (all except for Reese’s Pieces Eggs)
  • Rolo Caramels in Milk Chocolate (all except for Minis)
  • Skor
  • Skor Toffee Bar
  • York Peppermint Pattie (all except for York Pieces, York Minis and York Shapes)
  • Baby Ruth
  • Bit-O-Honey
  • Butterfinger Bar (original flavor only, NOT giant bar, Crisp, Stixx, Snakerz, Medallions, Jingles, Hearts or Pumpkins)
  • Nestle Milk Chocolate
  • Goobers
  • Nips (including both regular and sugar-free)
  • Oh Henry!
  • Raisinets (including Cherry, Cranberry, and Dark Chocolate flavors)
  • Sno-Caps
  • Wonka Pixy Sticks
  • LaffyTaffy (including LaffyTaffy Rope and FruitartsChews)
  • Wonka Lik-M-Aid Fun Dip
  • Smarties
  • Tootsie Roll (All products)

***DisclaimerBecause the same product can be produced and packaged in many different manufacturing facilities for the same company (creating the possibility of cross-contamination), always check the packaging and ingredients before consuming any candy, even if it does appear on this list

If you experience any reactions to products listed here, that display the GF symbol or statement on the packaging contact the manufacturers listed at the numbers on the linked PDF.

Are you on Facebook?  You might be interested in the things I may not devote an entire blog post to:  recipes, food facts, nutritional information, photos and other things that make my mouth water. If so, visit my This Girl Loves To Eat community at:  https://www.facebook.com/ThisGirlLovesHerFood