Fired-Up Mac & Cheese

kraft_macaroni__cheese_2011I grew up on Kraft Macaroni and Cheese.  The blue box with the skinny little noodles that Mom combined with a 1/4 cup of “Oleo” as she called margarine (she NEVER used butter) and 1/4 cup of low-fat milk was a crowd pleaser to my sister, brother and I.  Later she would splurge on the more expensive box of “Kraft Deluxe Macaroni and Cheese” with it’s tiny can of cheese sauce in it, but, to my taste, you still can’t beat the skinny blue box.

Thankfully, as I grew so too did my palate.  I rarely pass up a macaroni and cheese on any menu and have developed a couple of favorite styles:  Lobster macaroni and cheese, if it has large claw chunks (and not just minced remnants), is my favorite, followed by a good white cheddar shells and cheese prepared with a hint of truffle oil and just a few exotic mushrooms.

spicyspiralmacncheeseWhen I’m cooking Macaroni and Cheese, I like it to have enough flavor, that if I served nothing else beside it, except maybe a tossed green salad, it could stand alone as a “Meatless Monday” main dish.  You won’t need a fire extinguisher nearby for this spirited macaroni and cheese, but you certainly won’t fall asleep while you’re eating it either.

Lisa’s Fired-Up Mac & Cheese

  • 1 – 16oz Box Cellentani Pasta (I use Barilla)
  • 8 TBLS Butter / Divided
  • 1/2 Cup Flour
  • 3 1/4 Cups Whole Milk
  • 1 tsp Dry Mustard
  • 3/4 tsp Salt
  • 1/2 tsp White Pepper
  • 3 Tsp Chili Powder
  • 1/4 Cup Hot Pepper Sauce (I prefer Frank’s Red Hot)
  • 1 1/2 Cups + 1/4 Cup (for sprinkling on top) Shredded Pepper Jack Cheese
  • 2 + 1/4 Cup (for sprinkling on top) Cups Shredded Sharp Cheddar Cheese
  • 3/4 Cup Grated Parmesan Cheese
  • 2/3 Cup Panko

Before you start, I have a couple of tips.

  1. If you can’t find shredded Pepper Jack or Sharp Cheddar you can always use the packaged slices and tear them up.  Generally the 8 ounce package should equal about 1 1/2 Cups.  Use your own judgement.  I usually err on the side of too much cheese in that type of situation and gauge it based upon the thickness of my sauce.  You can always thin (God Forbid) a bit with milk if you think it’s too thick.
  2. You can use any macaroni type noodle you prefer (elbow, shell, spiral) but I prefer the Cellentani because it combines the features of a slightly larger elbow with a spiral and then throws in some textured grooves so you get as much of the sauce grabbing to it as possible in each bite.

Directions:

  • Preheat oven to 350°F
  • Prepare 2 – 13 x 9 Pyrex baking dishes (I use the deepest ones I have), or 1 deep dish throw away baking pan, by buttering the sides and bottoms – then set aside while you prepare the ingredients.
  • In a large stock pot, boil your pasta according to package directions. Drain, rinse and pour into largest mixing bowl you have.  Set aside.
  • In a large sauce pan over medium heat melt 4 TBLS butter.  Whisk in the flour and cook about a minute while constantly whisking then begin stirring in the milk about a 1/2 cup at a time until it’s well combined.
  • Stir in the spices and 1/4 Cup of the hot sauce.  Bring to a gentle boil, stirring constantly for 1 minute.
  • Remove from heat and stir in cheeses (not the cheese reserved for the top) until melted and smooth.
  • In a small pan melt the remaining 4 TBLS butter and stir in the bread crumbs.
  • Combine the remaining cheeses together.
  • Pour the sauce over the macaroni and, using a large rubber spatula, stir until all of the pasta is well coated.
  • Divide the pasta between the 2 prepared pans
  • Sprinkle 1/2 of the remaining cheese mixture over the top of each and put the pans, uncovered into the oven.
  • Bake for 30-45 minutes, or until the cheese sauce is bubbling and beginning to brown on top.
  • Slide the baking dishes out of the oven and set the oven temperature to broil
  •  Divide the panko mixture between the two pans and return to the oven
  • Watch the pans carefully and remove from the oven as soon as your crumbs begin browning.

Make sure you’ve got a bottle of hot sauce out for anyone who wants to spice it up even more!  Serve your macaroni and cheese with a salad as a dinner on it’s own, alongside burgers, steaks, or inside a great steak/brisket/tri-tip sandwich!

If you are on Facebook and are interested in the things I may not devote an entire blog post to, recipes, food facts, nutritional information, photos and other things that make my mouth water, I have a page on Facebook you can visit too:  https://www.facebook.com/ThisGirlLovesHerFood


Pressure Cooker “BBQ” Brisket

bbqbriskmacncheeseburgInspired by this picture of a decadent BBQ Brisket Macaroni & Cheese Burger, tweeted out yesterday by @FoodPorn, which, while it looks like an orgasm in food form, few of us could actually take down in a single seating, I went to the internet to find the recipe so I could surprise my husband with this culinary monstrosity.

But, lo and behold, there was no credit for the photo, and no linked recipe.  What’s a Food-a-holic to do?  Careful deconstruction of the photo and reconstruction using my favorite recipes for the parts, of course!

So, obviously there is a pile of gorgeous, juicy BBQ’d Brisket piled on top of what looks like a lightly toasted brioche bun.  I see some beautiful, but not overly gooey macaroni and cheese and a hint of coleslaw spilling out the side, but what I am not seeing is a burger patty.  Hmmm.

After carefully considering my options I went to my recipe file to start on the main ingredient:  the BBQ Brisket.  Because I am still essentially confined to my bed or a recliner with my leg elevated from my surgery 10 days ago, manning the BBQ is out of the question, so plan B is immediately enacted: Pull the pressure cooker out of the cupboard!

Lucky for me (and hopefully for you!), Emeril Lagasse has recipes adapted for using the pressure cooker on his website, and brisket happens to be one of them!

Emeril’s Fastest BBQ Brisket

  • 4 1/2 pounds beef brisket, trimmed and quartered
  • 3 tablespoons Worcestershire sauce
  • 1 tablespoon sweet paprika
  • 1 tablespoon dry mustard
  • 1 teaspoon chili powder
  • 4 tablespoons olive oil
  • 2 teaspoons salt
  • 1 medium yellow onion, diced
  • 6 cloves garlic, sliced
  • One 12-ounce bottle lager beer
  • 1 cup your favorite barbecue sauce
  • 1/4 cup light brown sugar
  • Brioche or slider buns for serving
  • your favorite coleslaw for serving (we’ll be using my recipe for coleslaw: Lisa’s Kicked Up Memphis Coleslaw)
  • Place the brisket in a large bowl, add the Worcestershire sauce, paprika, mustard, chili powder, and 2 tablespoons of the olive oil, and toss. Let the brisket marinate for 30 minutes at room temperature.
  • When ready to cook, season the beef with the salt.
  • Set a 6-quart pressure cooker to the “browning” program. When it is hot, add the remaining 2 tablespoons olive oil and brown the beef in batches. As it is browned, transfer the beef to a baking sheet and set aside.
  • When all the brisket is browned, add the onion and garlic to the pressure cooker and cook for 6 minutes, or until the onion is soft and slightly translucent. Return the beef to the pressure cooker and add the beer, barbecue sauce, and brown sugar. Close and lock the lid, and set to “high pressure” for 1 1/2 hours.
  • Open the pressure release valve, allow the steam to escape, and carefully unlock and open the lid. Transfer the beef to a baking sheet, and when it is cool enough to handle, thinly slice it across the grain.
  • Set the pressure cooker to the “simmer” program. Return the beef and any accumulated juices to the cooker and cook for 15 to 20 minutes.
  • Serve the brisket on slider buns, topped with the coleslaw.
  • The brisket can be stored in an airtight container in the refrigerator for up to 3 days or frozen for up to 3 months.

If you are going to also add macaroni and cheese, as in the photo above and like I am, I will be using my recipe for Fired-Up Mac & Cheese.

If you are on Facebook and are interested in the things I may not devote an entire blog post to, recipes, food facts, nutritional information, photos and other things that make my mouth water, I have a page on Facebook you can visit too:  https://www.facebook.com/ThisGirlLovesHerFood


Zero Effort Chicken For Dinner

Between the humidity coming up from a storm in Mexico and the temperature gauge hovering around the century mark, cooking is the last thing I want to do, but with my surgery date now 10 days away, I know that I will be making very few meals for the family due to movement restrictions, so I’m doing the deed today. 😉

The pressure cooker is definitely a cook’s friend on days like this!  With this recipe you get a bonus of 2 recipes in one!  The chicken, plus a bonus flavorful chicken stock that I am using as the base for my cabbage soup.  Yum!

chicken-on-cutting-boardChicken is the universal meat from which can spring any meal.  My Mom’s go-to was the Zacky Farm’s Cut up Whole Fryer, seems like a good place to start, so that’s where I’ll start.  I’ll make it early today and then the mood I’m in about an hour before dinnertime will determine how it ends up being served.

Zero Effort Pressure Cooker Chicken + Yummy Chicken Stock

  • 1 – 3 1/2 to 4 1/2 lb fryer chicken (cut up)
  • 2 TBLS Olive Oil
  • Zatarain’s Cajun Spice Mixture (Seasoned Salt)
  • 1/2 Medium Yellow Onion
  • 1 – Large Poblano Pepper
  • 5 Cloves Garlic

It should only take you 5 minutes to get all of the ingredients into the pressure cooker.  After that it’s pretty much set it and forget it!

  1. Set your pressure cooker to the “Brown” setting.
  2. Pour the Olive Oil into the pressure cooker pan
  3. Cut the pepper in half, remove the seeds and veins, then cut into about 1″ chunks and place into pan
  4. Peel and chop the onion into roughly 1″ chunks and add to pan
  5. Peel the garlic and add to pan
  6. Sprinkle the Zatarain’s seasoning on both sides of the chicken
  7. Place each piece of the chicken, skin side down (or on edge so skin is in contact with the sides of the pan) into the pan on top of the vegetables
  8. Allow the chicken to brown, undisturbed for about 20 minutes, then close the lid of the pressure cooker and set to cook under pressure for 30 minutes
  9. When cooking cycle has ended, allow the pressure to return to normal naturally

At the end of the keep warm cycle, release the lid and remove the chicken from the cooker to a large bowl.  It should be falling off the bones.  I take the time to remove the bones, skin and cartilage at this point and use a fork to do a gentle separation of the meat.

Leave the remaining vegetables and garlic in the pan with the meat drippings.  Skim ant visible fat and allow to cool.

If you aren’t using it immediately in another recipe, move the cooled Yummy Chicken Stock to a sealable container and refrigerate (up to 5 days) or freeze until ready to use.

Are you on Facebook?  You might be interested in the things I may not devote an entire blog post to: recipes, food facts, nutritional information, photos and other things that make my mouth water. I may not write a blog post every day, but there are daily updates to my This Girl Loves To Eat community at: https://www.facebook.com/ThisGirlLovesHerFood

Some Beef Should Be Cooked Longer

Grilling_Steaks_(with_border)I saw an interesting article on www.epicurious.com, one of my favorite recipe and food information sites, this morning and it raised some points I hadn’t thought of before concerning the degree of wellness that’s best for each cut of meat.

When we go out for a steak dinner my husband is an automatic medium-rare guy and I’m a firm believer that my meat shouldn’t walk itself to the table or be so bloody that it’s still cold inside, so my go-to temperature request is medium.

Greg Denton and Gabrielle Quiñónez Denton, owners of Ox Restaurant in Portland, OR, give great reasons for venturing beyond medium-rare (130° F) on these specific cuts:

  • With tougher cuts like hangar, tri-tip, flank, flap steak, and skirt steak, “you need to allow time for the fibers to relax.” Any steak on which you can see the grain of the meat running down its length is at its optimal level of tenderness and juiciness when cooked to medium (140°F).
  • For short ribs, cook to medium to medium-well (140ºF to 150ºF) because “the connective tissues and marbling need time to render, so they’re best grilled over low heat for a long period of time.” This cut, which is often braised, has a lot of fat, so it can stand up to the higher level of doneness. Plus, Gabrielle says, “the tendons get crispy and satisfyingly chewy,” when cooked this way.

For purposes of safety and less chance of getting any type of food borne illness, the USDA (United States Department of Agriculture) recommends steaks and roasts be cooked to 145°F (medium) and then rested for at least 3 minutes. The USDA also recommends that ground beef should be cooked to a minimum 160°F (well done) and that temperatures should be checked with a thermometer.  Don’t rely solely on color as some meats don’t change a whole lot.

I would imagine the people at Certified Angus Beef  would be the ultimate experts on the ideal degree of wellness for beef.  They recommend:

  1. Inserting your thermometer through the side of your meat, with the tip in the center of the cut, not touching any bone or fat.
  2. Removing steaks and burgers from the heat when the thermometer registers 5°F lower than the desired doneness, and roasts 5-10°F lower, as the temperature will continue to rise while resting.

I see where I am screwing up!  I often overcook my husband’s steaks because I do rely on the color and/or wait for the thermometer to reach the exact wellness mark.  I’m changing my ways today. 😉

Are you on Facebook?  You might be interested in the things I may not devote an entire blog post to: recipes, food facts, nutritional information, photos and other things that make my mouth water. I may not write a blog post every day, but there are daily updates to my This Girl Loves To Eat community at: https://www.facebook.com/ThisGirlLovesHerFood


Baked Chicken in Creamy Poblano Sauce

poblanochicken

I’ve fallen in love with Amazon Fresh.  Not just because I can be lazy and not go into the grocery store, although that keeps me from making impulse buys which is a definite plus, but also because the quality of the produce allows me to be creative when I cook on the weeknights.  Not only is the produce generally larger than what I am seeing in my local grocery store, but it stays fresh longer, and I’m paying less money per pound.  Win, Win, Win!

I hadn’t decided what to do with the chicken breasts I thawed this morning then remembered that two large Poblano chilies have been in the crisper for just over a week –  in my eyes they are begging to be made a couple!  Throw some rice into the pressure cooker and we have a trio!

Baked Chicken in Creamy Poblano Sauce with Mexican Rice

  • 2 Poblano Chilis
  • 1/2 Yellow Onion
  • 2 TBLS Olive Oil
  • 3 Cloves Garlic
  • 3-4 Boneless Skinless Chicken Breasts
  • 1 – 8oz Package Cream Cheese
  • 2 TBLS Dried Cilantro
  • 1 Can Evaporated Milk
  • Juice of 1/2 a Lime
  • 2 TBLS Flour
  • 4 TBLS Butter
  • 1/4 Cup Milk
  • Salt & Pepper to Taste
  • Preheat oven to 425 degrees (F)
  • Cut the poblano peppers in half, stem & seed, then slice thinly with a Mandoline
  • Cut the cleaned and skinned half white onion into thin slices on the Mandoline
  • Peel the garlic
  • Place these above items in a baking dish and drizzle with olive oil, turn to coat completely
  • Place in the oven and roast for approx 20 minutes
  • In the meantime cut your chicken breast halves with the breast flat on the cutting board use your knife to cut parallel to the board to divide it into two equal pieces
  • Salt and pepper the chicken on both sides
  • Remove the roasted veggies from the oven & lower the temperature to 350 degrees
  • Place the roasted veggies, cilantro, salt and evaporated milk in a blender
  • Puree the mixture
  • Saute’ the chicken breast pieces in the 2 TBLS oil for about 2 minutes per side until they have a little color on them
  • Remove the chicken to the baking dish you used to roast the veggies
  • In the same pan you used for the chicken, over medium heat, melt the butter
  • When the butter is melted add the flour and stir for a minute until fully incorporated and brown bits are scraped up
  • Add the poblano puree to the sauce pan and stir
  • Add the 1/4 up Milk to the pan and stir
  • Add the Cream Cheese to the sauce pan and stir constantly for a couple of minutes until fully incorporated – it will be thick
  • Remove from the heat an add the juice of the half lime, stir to incorporate
  • Pour the Poblano Cream Sauce over the chicken
  • Bake in the oven for 15 minutes until the chicken is cooked through

Serve with your favorite version of Mexican or Spanish rice and a salad or sliced and roasted zucchini squash.

Are you on Facebook?  You might be interested in the things I may not devote an entire blog post to: recipes, food facts, nutritional information, photos and other things that make my mouth water. I may not write a blog post every day, but there are daily updates to my This Girl Loves To Eat community at: https://www.facebook.com/ThisGirlLovesHerFood

Decadent Sunday Dinner

FullSizeRenderEvery once in a while I get a craving I just can’t shake for a thick, juicy steak and a moist, tender lobster.  Thankfully we are in an area where there are Asian markets with whole live Maine lobster in a tank, ready to be steamed for me on the spot, that are surprisingly affordable ($9.99/lb!).

Yesterday I got the craving while shopping in Costco (On a Sunday! What was I thinking?) and I just couldn’t face the weekend crowd we were sure to encounter if we trekked to the Ranch 99 Market.  I knew I had a pair of thick filet mignon steaks in the freezer and Costco had previously frozen Canadian lobster tails that looked meaty enough to satisfy my craving, so I decided to give them a try.

Knowing timing would be my biggest hurdle to making sure everything would be ready and warm at the same time, I set my cooking schedule for a true 30 minute meal:

FullSizeRender_35:30 – Get the steaks started.  I turned the burner to medium-high and pre-heated my favorite pan in my kitchen arsenal, my cherry Le Cruset Square grill pan, then added a spray of olive oil spray, seasoned the steaks with Zatarain’s Creole Seasoning, then put them on the sizzling pan to cook.  Assuming your filet mignon steaks are at least 1 inch thick, turn steaks over after 8 minutes (for medium rare), 10 minutes (for medium/medium well), or 12-13 minutes (for well done).  When you have turned cook the steaks for the same amount of time for your desired degree of wellness and, when there is about 2 minutes left in your cooking time, put a pat of cold butter on top of the steak.

In a pan with a lid, put in 1 inch of water and a steamer insert then bring to a boil.  When water reaches a boil, place the lobster tails inside the steamer insert, cover, reduce heat to low-medium and steam for 8 minutes.  While the lobster tails are steaming, in a small pan (or a ramekin in the microwave) melt a half cube of butter to dip the lobster in.

Open a bag of frozen C&W (A.K.A. Birdseye) whole petite green beans, pour into a covered 2 quart dish and set the microwave for 6-7 minutes on high power.

FullSizeRender_2This timing will have all of your parts done at the same time so that you can quickly plate and serve your dinner at 6:00.  I opened a bottle of  Eberle Rare & Reserve 2012 The Ravelin red wine blend to serve alongside.  The wine was a perfect complement to the boldly spiced steak.  Bon Appetit’.

Are you on Facebook?  You might be interested in the things I may not devote an entire blog post to: recipes, food facts, nutritional information, photos and other things that make my mouth water. I may not write a blog post every day, but there are daily updates to my This Girl Loves To Eat community at: https://www.facebook.com/ThisGirlLovesHerFood

Pot Roast That’s Truly Drool Worthy

potroast2My Mom made an ok pot roast, but it was never a meal I looked forward to or asked her to make.  In fact, if I called home and heard pot roast was for dinner I’d stay at school late for a Del Taco run with the Walnut High School Cayuse Yearbook crew.

She’d grab a 7 bone (blade cut) roast at the grocery store, heat some vegetable oil in a skillet, coat each side of the meat in flour, salt & pepper, then brown it over high heat. After that she’d fill the pan up about halfway with water, reduce the heat to medium-ish, put the lid on and let it braise for about 2 hours.  When it came time to serve it there would be boxed mashed potatoes (my Mom didn’t do peel/boil/mash), and peas or corn.  My Dad used to smother it in ketchup.  Not sure what that said about her pot roast, but in my eyes, if you’re hiding the meat under ketchup it’s a waste of the 2 hours she took to cook it.

huntsI never want to see a meal I have taken the time and effort to prepare covered in ketchup (unless it’s meat loaf or a hamburger…), so I’ve changed Mom’s prep a bit and come up with a pot roast that doesn’t make my husband suggest we eat out instead.

Drool Worthy Pot Roast

  • 3 to 3 1/2 pounds Boneless Chuck Roast (Because they will trim the excessive fat, I prefer to get it from the butcher case instead of grabbing a pre-packaged roast from the meat aisle)
  • 1 can (14.5 oz) Fire Roasted Diced Tomatoes (Tonight I used Hunt’s)
  • 6 Carrots peeled, and cut in half
  • 8-10 Small Red or White Potatoes
  • 1 large Onion, peeled and sliced thinly
  • 2 TBLS Olive Oil
  • 3 Bay Leaves
  • Any Garlic/Onion Spice Blend you prefer (I used Dangold Gourmet Collection Garlic & Onion Spice Blend)
  • Freshly Ground Black Pepper
  • 1 Cup Beef Broth
  • 1 TBLS Corn Starch dissolved in cold water (about 3 TBLS)
  • 3/4 Cup Bold Red Wine (Like a dark blend or Zinfandel – tonight I used Gnarly Head Authentic Black)
  • 3 TBLS Vanilla Extract
  • 2 TBLS Worcestershire Sauce
  • 3-4 TBLS Prepared Horseradish
  1. Set the pressure cooker to the Brown setting.
  2. Add the Olive Oil and brown the Roast for about 5 minutes per side.
  3. Remove the meat to a large bowl.
  4. Add the onions and cook until translucent (about 5 minutes).
  5. Add the Beef Broth, Vanilla, Wine, Worcestershire Sauce, Tomatoes, and the dry seasonings to the pressure cooker pan and stir until the mixture starts to bubble.
  6. Add the Bay Leaf and Carrots to the pan.
  7. Return the Roast and all of the juices to the pan.
  8. Spread the Horseradish on the exposed side of the Roast.
  9. Close the pressure cooker, lock and set to the highest setting (248° on mine)
  10. Once the pressure cooker reaches the cooking temperature, cook for 1 hour.
  11. When cooking is complete unplug the pressure cooker and allow it to come back to normal pressure (about 10 minutes).
  12. Open the pressure cooker, remove the Roast, Carrots, Potatoes, and Bay leaves.
  13. Turn the pressure cooker back on to the Brown setting.
  14. Stir in the corn starch mixture until it begins to boil and thicken.
  15. Cut the Roast into chunks and serve in a bowl with the carrots and potatoes (smash them with a fork) covered in the gravy.  If you have some French bread to dip in the sauce, serve that too!

I potroast3didn’t have any potatoes on hand, so we ate ours with some steamed Brussels Sprouts and a can of Bush’s Bourbon and Brown Sugar Grillin’ Beans.  The roast came out tender, moist and flavorful and my husband really enjoyed sopping up the gravy/sauce with the chunks of French bread!

Are you on Facebook?  You might be interested in the things I may not devote an entire blog post to: recipes, food facts, nutritional information, photos and other things that make my mouth water. I may not write a blog post every day, but there are daily updates to my This Girl Loves To Eat community at: https://www.facebook.com/ThisGirlLovesHerFood


The Fridge Isn’t the Best Place to Keep Bacon

This article comes courtesy of Business Insider .

My motto is, “If it’s not broke, don’t fix it.”  Well, that and, “If the Baby/Puppy/Parent (lol) is sleeping, DON’T WAKE IT!” Rebecca Harrington of Tech Insider got this one exactly right, so enjoy this great little piece on how to preserve that delicacy which makes just about everyone (sorry to those who don’t eat swine) happy, bacon!

baconrolls
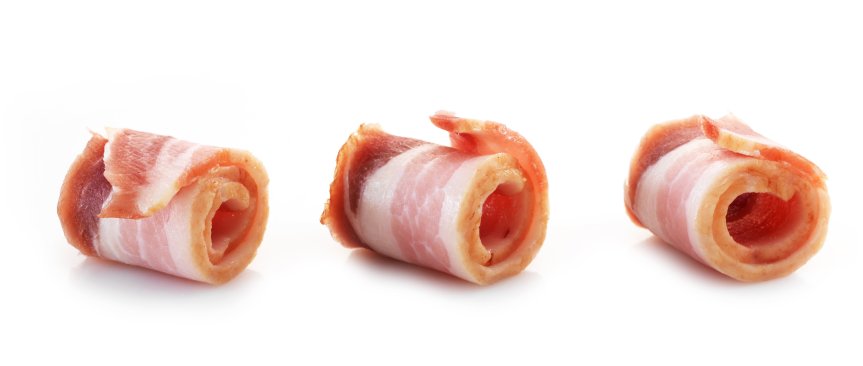
I’ve always stored bacon in the fridge. It’s what my mom and dad did.

But by the time I get to the end of the package, that bacon isn’t very fresh anymore.

Turns out there’s a better way.

America’s Test Kitchen chef and food science expert Dan Souza told Tech Insider that the freezer is actually a better place to keep bacon.

“It can help it last longer without going rancid,” Souza says.

Rancidity is what happens when fats start to break down, giving foods an unpleasant taste or smell.

That’s why the freezer is a great place for all kinds of fatty foods, Souza says, from butter to chicken stock.

“It’s dark and cold in there,” he told Tech Insider. “So it slows down rancidity, which is a problem with really fatty things.”

To keep your glorious bacon from going rancid before you can eat it all, it’s best to stick it in the freezer.

But if you freeze it as one big chunk, you’ll never be able to tear a single slice off. Souza says to roll it up and bag it so it doesn’t get stuck together.

Read the original article on Tech Insider. Copyright 2016.

Are you on Facebook?  You might be interested in the things I may not devote an entire blog post to: recipes, food facts, nutritional information, photos and other things that make my mouth water. I may not write a blog post every day, but there are daily updates to my This Girl Loves To Eat community at: https://www.facebook.com/ThisGirlLovesHerFood

You Can’t Hate On This

I’ve spent the past 5 days traveling cross country and back for a college graduation.  I loved the trip, but hated the flight schedule and one of the airlines in particular (I’m talking about you Allegiant Air).  How in the world does an airline have a plane that departs a 24 hour city (Las Vegas) at 6 AM filled with seats that don’t recline?? MAJOR FAIL!  The cost of a one way flight from Las Vegas to Oklahoma City was great ($103 each with the stupid $15 carry on bag fee, $6.59 credit card processing fee, and the various taxes and fees) but the lack of reclining seats for a 3 hour flight is a deal breaker!

Having finally gotten back late Monday afternoon, with a cough, sore throat and ears that ached, all I wanted was a fuss free meal, some cough medicine, and to sleep in my own bed.

Thinking back to when you were a kid, what meal resulted in no complaints ever?

If you were me, that complaint free plate featured a perfectly crisped grilled cheese sandwich.  If my Mom wanted to make me really happy she’d serve it alongside a bowl of Campbell’s Tomato Soup she’d doctored up with milk, butter and freshly popped popcorn floating in it.

That’s my idea of heaven!

Knowing the schedule of the flights I’d booked, the likelihood of tornado delays (big thanks to Jim Cantore at The Weather Channel), and that I would be eating huge meals & drinking a lot of wine over the weekend,  I had prepped my kitchen ahead of our trip with the essentials.

My perfect grilled cheese

  • Thick Cut Sourdough Bread – My first choice is Francisco Sourdough
  • Butter – ONLY real butter, no margarine or anything else
  • Cheese – If I am in a hurry it can only be Kraft American Singles, but if I have the luxury of time, I like to slice thick chunks off of a block of Sharp Cheddar Cheese
  1. Preheat a skillet over medium heat on your stove
  2. Butter one side each, of two pieces of sourdough bread
  3. Place first piece, butter side down, into the pan
  4. Layer either the American or Sharp Cheddar cheese (don’t skimp) on the piece in the pan
  5. Place the second piece of bread, butter side up, on top of the cheese
  6. Cook until you no longer see bubbles around the edges of the bread and a quick peek verifies that you have a crispy, well browned, bottom piece
  7. Using a spatula, flip the sandwich over onto the uncooked side and cook as directed in step 6
  8. Once cooking is complete slide the sandwich out of the pan and onto a plate.
  9. Slice down the middle and enjoy the gooey goodness.

Yeah, that (and a glass of ice cold milk) makes this girl happy!

Are you on Facebook?  You might be interested in the things I may not devote an entire blog post to: recipes, food facts, nutritional information, photos and other things that make my mouth water. I may not write a blog post every day, but there are daily updates to my This Girl Loves To Eat community at: https://www.facebook.com/ThisGirlLovesHerFood


What’s Up With Matcha?

teaceremonyMatcha tea is nothing new.  By the 9th Century, the custom of drinking tea, first for medicinal, and then for pleasurable reasons, was practiced throughout China. Buddhist influenced Chinese author Lu Yu wrote The Classic of Tea, a treatise on tea focusing on the Zen-Chan school of cultivation and preparation.  Zen Buddhist Monks drank Matcha tea to remain calm and alert during long hours of meditation.  His ideas would have a strong influence in the development of the Japanese tea ceremony as it is still practiced today.

The Japanese tea ceremony involves “sabi” and “wabi” principles.

  • Wabi represents the inner, or spiritual, experiences of human lives: quiet or sober refinement, or subdued taste “characterized by humility, restraint, simplicity, naturalism, profundity, imperfection, and asymmetry” and “emphasizes simple, unadorned objects and architectural space, and celebrates the mellow beauty that time and care impart to materials.”
  • Sabi represents the outer, or material side of life. Originally, it meant “worn,” “weathered,” or “decayed.” Particularly among the nobility, understanding emptiness was considered the most effective means to spiritual awakening, while embracing imperfection was honored as a healthy reminder to cherish our unpolished selves, here and now, just as we are – the first step to “satori” or enlightenment.

Between 2013 and 2014 there was a 253% increase in sales of drinks containing Matcha, but I can’t help but wonder why?  It’s not like people were all of the sudden sitting down to celebrate the traditional Japanese ceremony every time that they drank it, it was (and continues to be) sold diluted, mixed with flavors and preservatives and pre-bottled for drinking on the run.

So why all of the Matcha Hype?

groundmatchaMatcha is a tea rich in catechin polyphenols (the most important of which is EGCG – epigallo-catechin gallate) compounds with high antioxidant activity, that also contains trace minerals and vitamins (A, B-complex, C, E, and K).

Matcha tea has a significant amount of dietary fiber and practically no calories. With its abundance of these vitamins and compounds, it is also said to:

  • Protect against many kinds of cancer;
  • Can slow or halt growth of cancer cells;
  • Protect against cardiovascular disease;
  • Slow the aging process;
  • Boost metabolism;
  • Reduce LDL “bad” cholesterol;
  • Stabilize blood sugar levels;
  • Help reduce high blood pressure; and
  • Boost resistance to many toxins.

This still doesn’t explain to me how something commercially bottled, and (let’s be honest here) containing a much lesser quality and quantity of the desired Matcha tea powder is flying off the shelves…

Body Builders, heath and fitness gurus and those who practice meditation rituals all swear that Matcha is essential to reaching their peak potential because:

  • Japanese tea leaves (those used to produce Matcha powder) grow in the shade to increase chlorophyll content. These chlorophyll-rich leaves are then handpicked, steamed, dried and ground into a fine green powder;
  • Chlorophyll is purported to detoxify the body of toxins, heavy metals, poisons, dioxins and hormone disrupters;
  • Matcha contains three times the caffeine as coffee but without the jittery buzz, instead inducing  an “alert calm” due to it’s naturally derived l-theanine, which relaxes without drowsiness;
  • One cup of Matcha green tea has as many antioxidants as 10 cups of regular tea
  • A 2003 University of Colorado study confirmed that drinking 1 cup of matcha green tea has 137 times the amount of antioxidant EGCG compared to a conventional cup of green tea;
  • Matcha green tea possesses antioxidant levels 6.2 times that of goji berries, 7 times that of dark chocolate, 17 times that of wild blueberries and 60.5 times that of spinach;
  • Matcha, when combined with meditation, contributes to the health and weight loss benefits – reduces cortisol (a stress hormone that drive appetite and increases belly fat), lowers inflammation (tied to premature aging and disease), curbs impulsive eating, lowers blood pressure, and boosts self-esteem;
  • Matcha green tea contains up to 5 times more L-theanine than conventional green tea and increases Alpha wave activity in the brain.  Stress is known to induce the brain’s Beta wave activity, leading to a more agitated state. Alpha wave activity can relieve stress, promote relaxation and even lower blood pressure;
  • Consuming green tea increases thermogenesis (the body’s rate of burning calories) from 8-10% to 35-43% of daily energy expenditure;
  • Exercising immediately after drinking Matcha green tea resulted in 25% more fat burning during exercise

Bodybuilding.com shakes their pom-poms for Matcha in their own unique way: “If you’re not drinking Matcha green tea yet, you’re behind the times! Get with the program and try this metabolism-enhancing, stress-reducing, immune-boosting, cholesterol-lowering, teenage-mutant-ninja cancer fighter!”

Health Magazine warns that the taste of Matcha is strong, sometimes described as grassy or spinach-like. This explains why it is often watered down and/or sweetened, and even added to foods to improve it’s taste.  To avoid the grassy taste do not add Matcha green tea powder to boiling water.  Boil the water and let it sit for 5 minutes before adding the tea.

So, I’m convinced enough by the purported benefits to give this a try.  One area in particular that appeals to me is that I have difficulty sleeping at night and it could be due to my consumption of green tea, but not the Matcha variety.

Quality is important if you want the reported results, and quality doesn’t come cheap.  High quality, fresh, pure Matcha is expensive. A low price tag can be a red flag for a poor quality product, and, as with anything that is touted as the newest trend, it can be overdone, so ingest it in moderation.

Are you on Facebook?  You might be interested in the things I may not devote an entire blog post to: recipes, food facts, nutritional information, photos and other things that make my mouth water. I may not write a blog post every day, but there are daily updates to my This Girl Loves To Eat community at: https://www.facebook.com/ThisGirlLovesHerFood