
Pot Roast That’s Truly Drool Worthy

potroast2My Mom made an ok pot roast, but it was never a meal I looked forward to or asked her to make.  In fact, if I called home and heard pot roast was for dinner I’d stay at school late for a Del Taco run with the Walnut High School Cayuse Yearbook crew.

She’d grab a 7 bone (blade cut) roast at the grocery store, heat some vegetable oil in a skillet, coat each side of the meat in flour, salt & pepper, then brown it over high heat. After that she’d fill the pan up about halfway with water, reduce the heat to medium-ish, put the lid on and let it braise for about 2 hours.  When it came time to serve it there would be boxed mashed potatoes (my Mom didn’t do peel/boil/mash), and peas or corn.  My Dad used to smother it in ketchup.  Not sure what that said about her pot roast, but in my eyes, if you’re hiding the meat under ketchup it’s a waste of the 2 hours she took to cook it.

huntsI never want to see a meal I have taken the time and effort to prepare covered in ketchup (unless it’s meat loaf or a hamburger…), so I’ve changed Mom’s prep a bit and come up with a pot roast that doesn’t make my husband suggest we eat out instead.

Drool Worthy Pot Roast

  • 3 to 3 1/2 pounds Boneless Chuck Roast (Because they will trim the excessive fat, I prefer to get it from the butcher case instead of grabbing a pre-packaged roast from the meat aisle)
  • 1 can (14.5 oz) Fire Roasted Diced Tomatoes (Tonight I used Hunt’s)
  • 6 Carrots peeled, and cut in half
  • 8-10 Small Red or White Potatoes
  • 1 large Onion, peeled and sliced thinly
  • 2 TBLS Olive Oil
  • 3 Bay Leaves
  • Any Garlic/Onion Spice Blend you prefer (I used Dangold Gourmet Collection Garlic & Onion Spice Blend)
  • Freshly Ground Black Pepper
  • 1 Cup Beef Broth
  • 1 TBLS Corn Starch dissolved in cold water (about 3 TBLS)
  • 3/4 Cup Bold Red Wine (Like a dark blend or Zinfandel – tonight I used Gnarly Head Authentic Black)
  • 3 TBLS Vanilla Extract
  • 2 TBLS Worcestershire Sauce
  • 3-4 TBLS Prepared Horseradish
  1. Set the pressure cooker to the Brown setting.
  2. Add the Olive Oil and brown the Roast for about 5 minutes per side.
  3. Remove the meat to a large bowl.
  4. Add the onions and cook until translucent (about 5 minutes).
  5. Add the Beef Broth, Vanilla, Wine, Worcestershire Sauce, Tomatoes, and the dry seasonings to the pressure cooker pan and stir until the mixture starts to bubble.
  6. Add the Bay Leaf and Carrots to the pan.
  7. Return the Roast and all of the juices to the pan.
  8. Spread the Horseradish on the exposed side of the Roast.
  9. Close the pressure cooker, lock and set to the highest setting (248° on mine)
  10. Once the pressure cooker reaches the cooking temperature, cook for 1 hour.
  11. When cooking is complete unplug the pressure cooker and allow it to come back to normal pressure (about 10 minutes).
  12. Open the pressure cooker, remove the Roast, Carrots, Potatoes, and Bay leaves.
  13. Turn the pressure cooker back on to the Brown setting.
  14. Stir in the corn starch mixture until it begins to boil and thicken.
  15. Cut the Roast into chunks and serve in a bowl with the carrots and potatoes (smash them with a fork) covered in the gravy.  If you have some French bread to dip in the sauce, serve that too!

I potroast3didn’t have any potatoes on hand, so we ate ours with some steamed Brussels Sprouts and a can of Bush’s Bourbon and Brown Sugar Grillin’ Beans.  The roast came out tender, moist and flavorful and my husband really enjoyed sopping up the gravy/sauce with the chunks of French bread!

Are you on Facebook?  You might be interested in the things I may not devote an entire blog post to: recipes, food facts, nutritional information, photos and other things that make my mouth water. I may not write a blog post every day, but there are daily updates to my This Girl Loves To Eat community at: https://www.facebook.com/ThisGirlLovesHerFood


The Fridge Isn’t the Best Place to Keep Bacon

This article comes courtesy of Business Insider .

My motto is, “If it’s not broke, don’t fix it.”  Well, that and, “If the Baby/Puppy/Parent (lol) is sleeping, DON’T WAKE IT!” Rebecca Harrington of Tech Insider got this one exactly right, so enjoy this great little piece on how to preserve that delicacy which makes just about everyone (sorry to those who don’t eat swine) happy, bacon!

baconrollsI’ve always stored bacon in the fridge. It’s what my mom and dad did.

But by the time I get to the end of the package, that bacon isn’t very fresh anymore.

Turns out there’s a better way.

America’s Test Kitchen chef and food science expert Dan Souza told Tech Insider that the freezer is actually a better place to keep bacon.

“It can help it last longer without going rancid,” Souza says.

Rancidity is what happens when fats start to break down, giving foods an unpleasant taste or smell.

That’s why the freezer is a great place for all kinds of fatty foods, Souza says, from butter to chicken stock.

“It’s dark and cold in there,” he told Tech Insider. “So it slows down rancidity, which is a problem with really fatty things.”

To keep your glorious bacon from going rancid before you can eat it all, it’s best to stick it in the freezer.

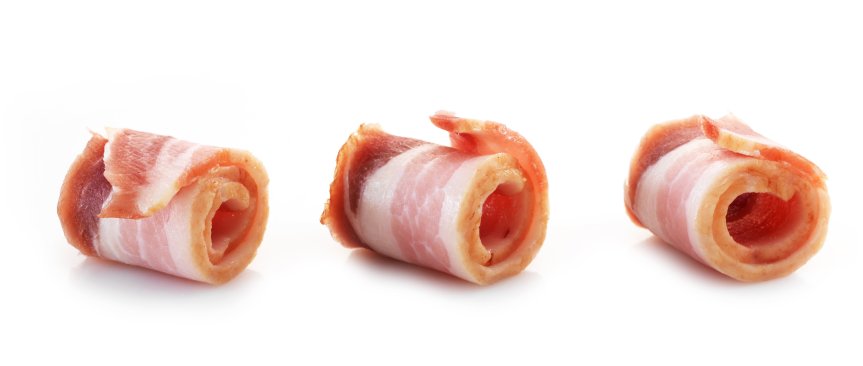
But if you freeze it as one big chunk, you’ll never be able to tear a single slice off. Souza says to roll it up and bag it so it doesn’t get stuck together.

Read the original article on Tech Insider. Copyright 2016.

Are you on Facebook?  You might be interested in the things I may not devote an entire blog post to: recipes, food facts, nutritional information, photos and other things that make my mouth water. I may not write a blog post every day, but there are daily updates to my This Girl Loves To Eat community at: https://www.facebook.com/ThisGirlLovesHerFood
You Can’t Hate On This

I’ve spent the past 5 days traveling cross country and back for a college graduation.  I loved the trip, but hated the flight schedule and one of the airlines in particular (I’m talking about you Allegiant Air).  How in the world does an airline have a plane that departs a 24 hour city (Las Vegas) at 6 AM filled with seats that don’t recline?? MAJOR FAIL!  The cost of a one way flight from Las Vegas to Oklahoma City was great ($103 each with the stupid $15 carry on bag fee, $6.59 credit card processing fee, and the various taxes and fees) but the lack of reclining seats for a 3 hour flight is a deal breaker!

Having finally gotten back late Monday afternoon, with a cough, sore throat and ears that ached, all I wanted was a fuss free meal, some cough medicine, and to sleep in my own bed.

Thinking back to when you were a kid, what meal resulted in no complaints ever?

If you were me, that complaint free plate featured a perfectly crisped grilled cheese sandwich.  If my Mom wanted to make me really happy she’d serve it alongside a bowl of Campbell’s Tomato Soup she’d doctored up with milk, butter and freshly popped popcorn floating in it.

That’s my idea of heaven!

Knowing the schedule of the flights I’d booked, the likelihood of tornado delays (big thanks to Jim Cantore at The Weather Channel), and that I would be eating huge meals & drinking a lot of wine over the weekend,  I had prepped my kitchen ahead of our trip with the essentials.

My perfect grilled cheese

  • Thick Cut Sourdough Bread – My first choice is Francisco Sourdough
  • Butter – ONLY real butter, no margarine or anything else
  • Cheese – If I am in a hurry it can only be Kraft American Singles, but if I have the luxury of time, I like to slice thick chunks off of a block of Sharp Cheddar Cheese
  1. Preheat a skillet over medium heat on your stove
  2. Butter one side each, of two pieces of sourdough bread
  3. Place first piece, butter side down, into the pan
  4. Layer either the American or Sharp Cheddar cheese (don’t skimp) on the piece in the pan
  5. Place the second piece of bread, butter side up, on top of the cheese
  6. Cook until you no longer see bubbles around the edges of the bread and a quick peek verifies that you have a crispy, well browned, bottom piece
  7. Using a spatula, flip the sandwich over onto the uncooked side and cook as directed in step 6
  8. Once cooking is complete slide the sandwich out of the pan and onto a plate.
  9. Slice down the middle and enjoy the gooey goodness.

Yeah, that (and a glass of ice cold milk) makes this girl happy!

Are you on Facebook?  You might be interested in the things I may not devote an entire blog post to: recipes, food facts, nutritional information, photos and other things that make my mouth water. I may not write a blog post every day, but there are daily updates to my This Girl Loves To Eat community at: https://www.facebook.com/ThisGirlLovesHerFood


Steak & No Bake Baked Potatoes

It’s a hot, lazy Wednesday evening and I’m not in the mood to cook.

I’m looking for something to make for dinner that:

  1. Won’t take a lot of time;
  2. Will satisfy post-basketball practice hunger;
  3. Won’t heat up the house more than the 89° day did already;
  4. Won’t make a huge mess in the kitchen; and
  5. Won’t interrupt my Girls Drinking Wine time

A quick review of items on hand resulted in a hearty dinner that satisfied my family and, bonus, took minimal effort on my part so I could enjoy a rare mid-week treat of girl time!

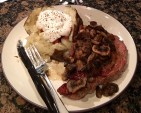
steakandpotatoesI pulled out my handy (practically hands off) go-to kitchen saviors, my T-Fal Electric Pressure Cooker & cast iron skillet and dinner was well on it’s way to being made.

Baked Potatoes & Boneless Rib-Eye Steaks with Garlic Mushrooms

First, get the potatoes started:

  1. Wash 2 Large Baking Potatoes
  2. Put rack and 1 cup of water into the pressure cooker pan
  3. Place potatoes on rack
  4. Brush Potatoes with a touch of olive oil & sprinkle with sea salt
  5. Close and lock pressure cooker, set to cook on high
  6. Once pressure cooker reaches temperature, cook potatoes for 20 minute
  7. When cooking time is done, unplug machine and leave closed until your steaks are done

While the potatoes are cooking:

  1. Heat the cast iron skillet over medium-high heat;
  2. Place 6 slices of bacon in the pan and cook for about 4 minutes per side (give or take) until crispy but not over browned;
  3. Remove the bacon to a paper towel lined plate to drain.
  4. Salt and pepper 2 Boneless Ribeye Steaks on both sides & put in hot skillet;
  5. Add about 1 cup of sliced mushrooms, 1/2 tsp onion powder, 1 tsp garlic salt & pepper to the pan;
  6. Cook the steaks to desired degree of doneness while also stirring the mushrooms while they cook.  My husband likes his medium rare, so I cook them roughly 4 minutes per side at medium-high heat.

When the steaks are ready:

  • Turn off heat and immediately remove steaks from the pan;
  • Place steaks on a serving plate and mound 1/2 of the mushrooms on each;
  • Release the remaining pressure in the pressure cooker;
  • Place potatoes beside the steaks on plates;
  • Cut the potatoes open, butter generously, crumble 1/2 the bacon inside each potato and top with sour cream, salt & pepper.

Are you on Facebook?  You might be interested in the things I may not devote an entire blog post to: recipes, food facts, nutritional information, photos and other things that make my mouth water. I may not write a blog post every day, but there are daily updates to my This Girl Loves To Eat community at: https://www.facebook.com/ThisGirlLovesHerFood

Lightened Without Losing Taste!

finishedcasseroleI woke up this morning to raindrops and remembered that my Mom used to make us Tuna Noodle Casserole on rainy days.  That started a mad craving but I wasn’t sure I had everything to make it.  UG!

After surveying the cupboards and refrigerator, and preparing the emergency replacement for one of my main sauce ingredients from yesterday’s blog post, I was good to go and well on my way to satisfying my craving with the unintended bonus of lightening the recipe and making the soup gluten free, so I didn’t feel quite so guilty having seconds.  Yes!

Mom’s Lightened T.N.C.

  • 1 – 12 to 16 oz package Extra Wide Egg Noodles (Gluten Free if desired)
  • Scratch Condensed Cream of Celery Soup (follow link)
  • 3/4 Cup Milk
  • 4 – 2.6 oz Single Serve Pouches Starkist Low-Sodium Chunk Light Tuna in Water
  • 1 Cup Mayonnaise
  1. Prepare the noodles per package instructions
  2. Drain most of the water off in a colander
  3. Return noodles to the pan
  4. Warm the soup (if not already warm) over low heat
  5. Add the milk, contents of the tuna pouches, and mayonnaise and stir until combined
  6. Bring to a boil then remove from heat
  7. Using a heat proof rubber spatula, pour contents of soup pan over the noodles and gently fold it into the noodles.

Can be eaten hot or, as I prefer it, cold from the refrigerator!

Are you on Facebook?  You might be interested in the things I may not devote an entire blog post to: recipes, food facts, nutritional information, photos and other things that make my mouth water. I may not write a blog post every day, but there are daily updates to my This Girl Loves To Eat community at: https://www.facebook.com/ThisGirlLovesHerFood

AARGH! I Forgot ___ at the Store!

We’ve all done it.  Started a recipe thinking we had everything we needed only to get to a critical stage and found out we are missing a key ingredient.  A string of curse words later, after checking with the “go-to” neighbor, we are begging our kids who drive or our spouses to run to the store for what we desperately need to save our cooking creation.

I found a couple of resources online for the most common substitutions (thank you Kraft Foods & Life Hacker!):

Today I ran into an even tougher situation.  I had no Condensed Cream of Celery Soup to make the comfort food I was having a big craving for: my Mom’s Tuna Noodle Casserole.  But I had no one to bail me out!  No one was home next door, my son has moved a state away (to avoid the emergency runs to the store??? hmmm… ) and my husband was still at work and nowhere near to coming home.  FML!

Time to create a fix from what I had in the cupboard…First things first, I needed a creamy, thick base for the soup.  Milk & Cornstarch would take care of that.  The rest should be a piece of cake, right?  Just some seasonings and the main ingredient, chopped celery.

Scratch Condensed Cream of Celery Soup

  • 1 cup cold milk
  • 2 Tbsp cornstarch
  • 3/4 C chopped celery
  • 2 TBLS olive oil
  • 1 1/2 Tbsp butter
  • 1 chicken bouillon cube
  • ⅛ tsp black pepper
  • ¼ tsp onion powder
  • ¼ tsp garlic powder
  • 1 tsp Salt-Free Seasoning (Mrs. Dash type) I use McCormick Perfect Pinch Original All Purpose
  1. In a small pan, saute’ olive oil and the celery for 2 minutes over medium-high heat.
  2. Reduce heat to low and add the bouillon cube (crushed), pepper, onion powder, garlic powder, and all-purpose seasoning.  Stir to combine and let it continue cooking until you complete the next step.
  3. In a small saucepan, over medium heat, combine the cold milk and the cornstarch.
  4. Bring to a boil, whisking constantly then whisk in the butter it melts and the sauce begins to thicken
  5. Immediately add the celery mixture.to the sauce and cook another 30 seconds.
  6. Remove from heat and set aside to cool until you need it for your recipe.

It took 10 minutes start to finish, made just a bit more than a 10.75 ounce can from the store, had no preservatives, no added salt and was lower in fat and calories because I used 2% milk to make it.  Win-Win!

Are you on Facebook?  You might be interested in the things I may not devote an entire blog post to: recipes, food facts, nutritional information, photos and other things that make my mouth water. I may not write a blog post every day, but there are daily updates to my This Girl Loves To Eat community at: https://www.facebook.com/ThisGirlLovesHerFood

This Sauce Has Balls

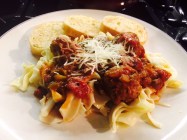
saucehasballsMy husband, although his Mother was 100% Italian, doesn’t care for much sauce on his pasta.  I, on the other hand, love a thick meaty sauce, no matter what style noodle (even gluten free) we are eating.

I’m in the mood for spaghetti which means sauce that’s nice and meaty, with extra spicy balls for good measure.  Just the way I like it.  😉

Hearty Pasta Sauce with Balls

  • 1 lb  Fresh Ground Pork Sausage
  • 1 lb  Fresh Ground Sirloin (90/10 or 85/15)
  • 1 1/2 TBLS Salt-Free Garlic & Herb Blend Seasoning (Mrs Dash or McCormick Perfect Pinch)
  • 1 tsp Ground Black Pepper
  • 2 tsp Dried Oregano
  • 2 tsp Crushed Red Pepper Flakes
  • 1 TBLS Garlic Powder
  • 1/4 Cup Grated Parmesan Romano Cheese
  • 1 TBLS Olive Oil
  1. In stand mixer, combine the pork and beef.
  2. Add the spices and cheese and mix until well combined.
  3. Pre-heat 1 TBLS Olive Oil in the pressure cooker pan. Set the machine to the Brown.
  4. Remove 1/2 of the meat mixture from the bowl and place in pressure cooker pan set to Brown.  Cook with the lid open, stirring to break the meat up, for 5-7 minutes then remove and drain off the fat.
  5. Replace pan on pressure cooker base and set to the Brown setting.
  6. Add the following to the pan, in order:
  • 1 TBLS Olive Oil
  • 3 Stalks Celery, finely diced
  • 1/2 Medium Onion, chopped
  • 1 Green Bell Pepper, chopped
  • 2 Cloves Garlic, chopped
  • 1 tsp Dried Oregano
  • 1 tsp Salt
  • 1 tsp Black Pepper
  1. When pressure cooker returns to temperature, cook for 6-8 minutes until vegetables are soft and onions are translucent.
  2. While vegetables are cooking, add 1 egg to the reserved half of the uncooked meat.  Form inch to inch and a half balls and set aside.
  3. Add 1 Can (6 oz) Tomato Paste to the vegetables, stirring until combined.
  4. Add 2 Cans (14.5 each) Diced Fire Roasted Tomatoes (with the juice) and stir well.
  5. Return the cooked meat to the pan.
  6. Add 1 Cup Good Red Wine (If you wouldn’t drink it, don’t cook with it!)
  7. Stir and add the meatballs to the pan.
  8. Close the pressure cooker, set to high and cook the sauce for the full 10 minute cycle.
  9. Let the pressure return naturally then serve over cooked pasta with garlic bread.

Are you on Facebook?  You might be interested in the things I may not devote an entire blog post to: recipes, food facts, nutritional information, photos and other things that make my mouth water. I may not write a blog post every day, but there are daily updates to my This Girl Loves To Eat community at: https://www.facebook.com/ThisGirlLovesHerFood

Creamy Poblano Chicken Soup

chickenpoblanosoupAfter another Southern California winter week with temperatures over 80 degrees, I was looking for any excuse to make soup.  Today the Santa Ana Winds blew in and dropped the temperature to a “Brisk” 69 degrees so I rushed to get the pressure cooker and Vitamix working so I could enjoy my favorite cool night meal:

Creamy Poblano Chicken Soup

  • 2 Roasted Poblano Peppers
  • 1 Roasted Sweet Potato (or Yam)
  • 1 Roasted Small Yellow Onion
  • 1 TBLS Olive Oil
  • 32 oz Chicken Stock (I use Emeril’s)
  • 4-5 Cloves Garlic Finely Chopped
  • 8 oz Cream Cheese (Room Temperature)
  • 1 lb diced chicken breast
  • 2 Cups Shredded Colby & Monterey Jack Cheese
  • Freshly Ground Sea Salt & Pepper to taste
  1. Roast the sweet potato in the pressure cooker for 15 minutes on high.  Remove and set aside.
  2. Using the Brown function on the pressure cooker, roast the Poblano peppers, the quartered onion and the garlic in the olive oil for 10 minutes after the cooker comes up to temperature.  Remove from pan when done.
  3. Add the chicken to the pressure cooker pan and again set it to the Brown function.  Cook the chicken for about 10 minutes, or until just cooked through.
  4. Remove the seeds and stems from the peppers.
  5. Add peppers, onion, sweet potato, garlic, 1 Cup of the broth, and cream cheese to the Vitamix container.  Process on low to medium speed until well combined and smooth.
  6. Add the chicken to the Vitamix container and process on the low setting until chicken shreds and is no longer in chunks.
  7. Pour contents of Vitamix container back into the pressure cooker pan.  Add remaining 3 cups of stock, the shredded cheese.  Stir until well combined.  Taste and adjust the seasoning if desired.
  8. Close the lid of the pressure cooker and select the Stew/Soup function.  After the machine reaches cooking temperature, cook for 10 minutes.
  9. When cooking is complete, release pressure, stir and serve soup while hot.

Serve with buttered toasted sourdough croutons, a dollop of sour cream and sliced avocado if desired.

**Vegetarian Option:  Don’t add the chicken if you would like to serve this as a side or keep it meat-free.

Are you on Facebook?  You might be interested in the things I may not devote an entire blog post to: recipes, food facts, nutritional information, photos and other things that make my mouth water. I may not write a blog post every day, but there are daily updates to my This Girl Loves To Eat community at: https://www.facebook.com/ThisGirlLovesHerFood

Meatless Monday Treat

It was a rough weekend.

First we had a two day basketball tournament that started early both days, meaning no sleeping in for me, and then we had a party we needed to go to Saturday night that turned into the proverbial shit show:

lamborghini_aventador_lp_720_yellow-800x600While standing around watching the rest of the party goers drinking themselves into oblivion and admiring the host’s new bright yellow half million dollar Lamborghini Aventador, the host, who’s a very tall, very large man, lost his tenuous hold on his balance and began sliding down the rear fender with only me (I’m not a big girl) between him and the hard concrete floor & wall.  I did my best to break his fall without breaking myself but he ended up landing on me in a very awkward position and, in the fiasco of the fall, I threw my red wine all over the back end of his gorgeous car.  In my defense, I kept him from hitting his head on the floor or the wall so there was that…LOL

Suffice it to say that I was in some pain and thus, in no mood to make dinner Sunday night.  I was very glad to remember that we had a leftover pizza in the refrigerator to reheat.  Tonight, due to the second day of pain being even worse, from my neck all the way down my right side, I wasn’t anxious to roll out a gourmet dinner either.  Thank God my husband is pretty easy to feed.

shishito1I can usually dress up a grilled cheese sandwich in a way to satisfy him and tonight was no different.  Real butter, a loaf of sourdough, some bacon that was already cooked & chilling in the meat drawer combined with some pepper jack cheese and we had a winner.  I didn’t want to just let him eat the Cheetos he favors with it, and he didn’t want any of the leftover coleslaw from the other night, so I threw together another quick side he loves:

Blistered Shishito Peppers

  1. Heat 1 TBLS olive oil in a large frying pan over medium-high heat.
  2. Add 1 pkg of fresh Shishito peppers to the hot oil and cook, tossing them every minute or so, for 5 minutes or until the skins are blackened and blistered.
  3. Remove from heat and serve immediately.

shishito2Trader Joe’s sells Shishito peppers pre-bagged, you can get them at your local Asian grocery store (they are beloved in Japan), or your grocery store may have them in your produce section.

Shishito peppers are generally mild, but it seems like one in every batch will light you up! 😉

Are you on Facebook?  You might be interested in the things I may not devote an entire blog post to: recipes, food facts, nutritional information, photos and other things that make my mouth water. I may not write a blog post every day, but there are daily updates to my This Girl Loves To Eat community at: https://www.facebook.com/ThisGirlLovesHerFood


My Top 5 Bloody Marys

bloodymarybasicsThere are few things that are more satisfying on a lazy Sunday morning than a great Bloody Mary.  But, as we who enjoy them can agree, not all Bloody Marys are created equal.

Personally I like mine to not be so spicy as to rip my throat off as I swallow, or sting it so bad that I can’t enjoy more than the first sip or two.  I like a lot of flavor and really enjoy the presentation of a pretty AND tasty drink.

I also enjoy a little variety.  My favorites have featured chunks of crab amongst crisp, tall vegetables; entire lobster claws; thick strips of crispy bacon; antipasto on a skewer (tomato/mozzarella/basil/salami);  and crispy, fresh vegetables to munch while sipping a perfectly spiced drink.

My Top 5 Bloody Marys:

  1. The Crab House on Pier 39 – San Francisco, CA
  2. Lobster Me at The Palazzo in The Venetian – Las Vegas, NV
  3. Paul Martin’s – Irvine, CA
  4. Olive Garden – Santa Ana, CA (Mainplace Mall)
  5. The Signal Lounge – Orange, CA

After stumbling across a picture of a giant fried WHOLE CHICKEN hanging out of a giant Bloody Mary I decided that I need a list of places to visit just for my favorite Sunday morning cocktail!

Although I’ve been to Milwaukee before, somehow I managed to miss Sobelman’s Pub & Grill and their menu of “Beast” Bloody Marys.

My mouth waters thinking about their 80+ oz concoctions that are meant to be shared by at least 4 people.

chickenfried

The Chicken Fried:  $50 and topped with a whole fried 4 pound chicken from Ray’s Butcher Shop in Greenfield.  That is one intimidating presentation!  It’s a drink for a cause though!  During the last 4 months of 2014, for every Chicken Fried sold, the owners of Sobelman’s donated $5 to Milwaukee’s Hunger Task Force.

abc_heeseburger_bloodymary_jp_121212_msCheeseburger Bloody Mary:  Features a scallion, a stalk of celery, a colby cheese wedge, a Polish sausage, a pickled mushroom, onion & brussel sprout, a pickle & olive, a shrimp, cherry tomato & lemon wedge, a spear of asparagus and a bacon cheeseburger slider.

2012-08-30-bacon-thumbAnother Bloody Mary that is definitely on the “Must Try List” is this 32 ounce monster from The Nook in AtlantaThe Bloody Best:  8 oz. of Absolut Peppar vodka mixed with a special Bloody Mary mix, garnished with pepperoncinis, jalapenos, Tater Tots, steak, a slice of toast, a hard-boiled egg and you drink it through a straw made of meat!

The list is in its infancy and recommendations from enthusiastic Bloody Mary adventurers are welcomed.

On the flip side, I know that there are those who only partake to quiet the ache in their head and swirling of their bellies after a night of over indulgence, to that end, Smirnoff shares their basic recipe for a pitcher of basic Bloody Marys:

  • 9 oz Smirnoff No. 21 Vodka
  • Tomato juice
  • 1 Lime juiced
  • 1 Lemon juiced
  • 4 tsp Hot sauce
  • 2 tbs Horseradish
  • 1 tbs Worcestershire sauce
  • 1 tsp Celery salt
  • 1 tsp Black pepper
  • ½ tsp Salt
  • 1 tsp Smoked paprika
  • 1 Lime wedge

Blend all ingredients except vodka. Pour into pitcher. Rub lemon or lime wedge around the rim of highball glasses and then roll glass in celery salt and add ice cubes. Fill glass 1/3 with vodka & top off with Bloody Mary mix. Serves 10.

Time for this girl to head to bed so I can wake up and create something somewhere in the middle of these to sip tomorrow!

Are you on Facebook?  You might be interested in the things I may not devote an entire blog post to: recipes, food facts, nutritional information, photos and other things that make my mouth water. I may not write a blog post every day, but there are daily updates to my This Girl Loves To Eat community at: https://www.facebook.com/ThisGirlLovesHerFood