
Fit Fat Tuesday Feast

IMG_5098I love the comfort foods of winter but, because California gets a very short spell of cool weather, that means that I can’t just eat what I want and hide under sweatshirts and big sweaters…UG!  Case in point:  last week we had some of our lowest temperatures for late January/early February and this week it’s been in the high 80’s and low 90’s.  I am going to be back in spring clothes before too long, so I have to stick to my diet plan.

Just because I’m watching what I eat doesn’t mean I can’t enjoy Fat Tuesday, right?  By re-working one of my favorite Mardi Gras delights, I can (and did!) Laissez les bon temps roulez.

Let the Good Times Roll “California Style” Jambalaya

  • 1 – 12 oz Chub Jimmy Dean Reduced Fat Premium Pork Sausage
  • 2/3 pound Boneless Skinless Chicken Breast Diced
  • 12 oz – Raw (Peeled, Deveined & Tails Removed) Shrimp
  • 6 oz – Aidell’s Cajun Style Andouille Sausage
  • 1 – 14.5 oz Diced Fire Roasted Tomatoes
  • 2 Pkgs – Uncle Ben’s Ready Rice Natural Whole Grain Brown Rice (90 Second Microwave Packages)
  • 1 Red Bell Pepper – Chopped
  • 1 Green Bell Pepper – Chopped
  • 1 Bunch Green Onions
  • 2 TBLS Olive Oil
  • 2 Cloves Garlic (Peeled & Minced)
  • 2 TBLS Zatarain’s Cajun Spice Blend
  • Cayenne Pepper, Black Pepper To Taste

In a heavy duty skillet, preheated over medium-high heat, add 1 TBLS olive oil, the garlic, chopped onions, and chopped bell peppers.  Cook while stirring about 5 minutes.

Preheat a large heavy duty stock pot or stew pan over medium high heat.  Add 1 TBLS olive oil and the pork sausage to the pan.  Break up with a wooden spoon and cook until nearly done,  Add the diced chicken, sprinkle with the Cajun Spice, and continue cooking until chicken is nearly cooked through (4-5 minutes).  Slice the sausage into 1/4 to 1/2 inch slices and add to the pan.  Cut each peeled, deveined, tailed shrimp in half and add to the other meats in the pan.  Cook about 2 minutes.

Tear the packages to vent and microwave the Uncle Ben’s rice packets for 90 seconds each on high.

Add the sautéed vegetables to the cooked meat.  Stir in the canned tomatoes and bring all to a boil.  Reduce heat to medium-low and add the two packages of rice to the pan.

Stir to combine.  Add 1 TBLS ground black pepper and about 1/2 tsp cayenne pepper.

Serve with hot sauce of your choice, and, if you’re like me and love it California Style, add 1/4 of an avocado to the top of your bowl of steaming jambalaya.

Are you on Facebook?  You might be interested in the things I may not devote an entire blog post to: recipes, food facts, nutritional information, photos and other things that make my mouth water. I may not write a blog post every day, but there are daily updates to my This Girl Loves To Eat community at: https://www.facebook.com/ThisGirlLovesHerFood


Rainy Day Delight

It’s such a rare occasion in Orange County, California to have a cold, rainy, stormy day that I was excited to see a wet patio outside my window when I got up this morning.  WOO HOO!  I am SO getting the slow cooker out and making some chili!

white-chili

Not my usual rip-off of Mom’s XLNT Brick of Chili Con Carne based chili with ground beef, cubes of left over steak, canned crushed tomatoes and red beans.  Nope!  Today’s a White Bean Chicken Chili day.

It’s a ridiculously easy recipe and practically cooks itself.

Rainy Day White Bean Chicken Chili

  • 1 Can Diced Ortega Chilis (Mild or Hot – your choice)
  • 2 Boneless, Skinless Chicken Breasts – about 1 1/2 lbs (Frozen or Thawed)
  • 16 oz Chicken Broth
  • 1 – 16 oz Bag of Dry Great White Northern Beans
  • 2 tsp Dried Cilantro Flakes
  • 1 tsp Ground Black Pepper
  • 2 tsp Onion Powder
  • 1 tsp Devil’s Dust (or any Smoked Chili seasoning you use)
  • Sour Cream and Chopped Fresh Cilantro to serve (if desired)
  • 1 Ripe Avocado Chopped (if you have one)

In a large stock pot, 6 to 8 cups water on to boil.

Using a large colander, rinse and drain the white beans.  Pick out any icky ones and then add to the boiling water.  Boil the beans for about an hour then turn off the heat, cover and let stand for another hour.

While the beans are soaking get the other ingredients going in the slow cooker set on low heat.

  • Empty the can of diced green chilis (undrained) into the bottom of the slow cooker
  • Put the frozen chicken breasts on top of the chilis
  • Pour the chicken broth over the breasts
  • Dust the tops of the breasts with the spices (ending with the cilantro)

When the beans have finished soaking, empty them into a colander and then transfer them to the slow cooker.  Stir just enough to mix everything together and leave it the chili to cook for 6-8 hours on low heat.

About 4 hours into the cooking time, shred the chicken beasts with  forks and mix the chicken back into the chili.

When the cooking time has completed taste the chili, adjust the spices and serve with a dollop of sour cream and a sprinkling of fresh cilantro on top.  If you’re lucky enough to have a ripe avocado on hand, do yourself a “flavor” and chop it up to put on top of your bowl of chili!

You can speed this recipe up, making it one you can throw together in 10 minutes or less when you are leaving for work so it can cook all day, by substituting 3 cans of white beans from the grocery store.

I can’t wait for dinner time!

Are you on Facebook?  You might be interested in the things I may not devote an entire blog post to: recipes, food facts, nutritional information, photos and other things that make my mouth water. I may not write a blog post every day, but there are daily updates to my This Girl Loves To Eat community at: https://www.facebook.com/ThisGirlLovesHerFood

It’s A Comfort Food Kind Of Day

dietfoodjuliachild

I try to balance being somewhat diet conscious with being creative in the kitchen like I did with the dinner I made last night: Bacon & Roasted Cauliflower Chowder.  It was hearty, satisfying, and had a lot of flavor, but, with the exception of the fat & sodium from the bacon, was super healthy!  I even kept my husband from his requested bread/bagel chips/ crackers alongside by baking up some thin crispy sweet potato chips while the soup was cooking.  I satisfied his need for something starchy but didn’t add unnecessary carbs or calories!  Win-Win!

That said, I have been known (alright, it happens a lot) to totally justify throwing all thoughts of the diet out the window when I eat at restaurants and indulge in luscious dishes I am not quite skilled enough (or brave enough) to try to re-create at home.

It’s hardest of all to be diet conscious when I’m feeling tired, stressed or sick and just want comforting, basic, no frills food like my Mom, Grandma and Alabama Aunts used to make.

Today is one of those comfort days.  I have been battling bronchitis for more than 3 weeks and all I wanted was a no hassle simple bowl of oatmeal for breakfast.  I dug through the cupboards and found a variety of options:

  • Gluten Free Oats (on hand for my gluten intolerant girlfriend);
  • Whole Rolled Oats (unopened and I don’t even remember buying them);
  • Quaker Quick 1 Minute Oats in the Cardboard Cylinder (for making cookies);
  • Quaker Old Fashioned Oats; and
  • A single microwave packet of Nutrisystem Oats  ( my husband’s) YUCK and NO THANKS!

I have no interest in the over-processed, artificially sweetened and flavored, chopped into dust oats from a skinny envelope!  I wasn’t in the mood for the time involved in cooking the whole rolled oats, skipped the cookie & gluten free ingredients and that left me only one viable option:

oatmealThe stomach filling, hunger suppressing, creamy goodness and comfort of the white haired man on the round cardboard package of Quaker Old Fashioned Oats!

I had always assumed that the pre-packaged diet foods that come in those expensive, very restrictive diets was healthy.  Boy was I in for a surprise!  Have you ever looked at the back of one of those boxes of instant oatmeal in the envelope?

For 150 Calories, in a package of Maple Brown Sugar Instant Oatmeal, you also get:

  • 35.4 g Carbs (3 g Fiber)
  • 7 g Sugar
  • 1.5 g Fat
  • 4 g Protein
  • 140 mg Sodium

In order to make their oatmeal, you have to prepare it with 1/2 cup of fat free milk which adds an additional:

  • 40 Calories (190 Calories total)
  • 65 mg Sodium (205 mg Sodium total)
  • 6 g Carbs (41.4 g Carbs total)
  • 6 g Sugar (13 g Sugar total)
  • 4 g Protein (A bonus for 8 g Protein total)

Compare that to what you get from a bigger (what they call “Heart Healthy” on the label) portion (still only 150 Calories) of Quaker Old Fashioned Oats that you spice up yourself with about 1/8 tsp Real Vanilla Extract and 1/4 tsp Cinnamon:

  • 27.6 g Carbs (4 g Fiber)
  • 1 g Sugar
  • 3 g Fat
  • 5 g Protein
  • 0 mg Sodium

By taking 1 more minute in the microwave or a whole 3 more minutes to prepare in a pan on the stove you do lose the 3 extra g of Protein that using milk in the prep of the packaged oats adds, but you add 1 g of additional filling Fiber and save yourself from ingesting:

  • 40 additional calories (that can be spent towards a glass of wine later)
  • 205 mg Sodium
  • 12 g Sugar

The preparation is really simple. 

The fastest way is to prepare it in the microwave.  In a microwave safe cereal bowl, I measure 3/4 Cup Quaker Old Fashioned Oats and stir in 1/4 tsp ground cinnamon.  I then add 1/2 cups water and 1/8 tsp Vanilla stirring all until it’s well combined.  I cook the oatmeal on high power for two minutes then give the mixture a stir to test the consistency.  My microwave is 10 years old, so I play it safe to avoid the dreaded boil over.  I add 2 more cycles of 30 seconds on high, stirring in between, and end up with a creamy, but not dense and pasty bowl of hearty oatmeal.

I wish I could convince my husband that it really is easy to do, and can even be pre-packaged in a zip bag to take to work, so that he would stop buying and eating the Nutrisystem meals that bring so much unnecessary sodium and so many preservatives into his system, but that’s a fight for another day.

Today I am just going to sit here and enjoy my healthy, hearty, and oh so comforting, bowl of steaming hot oatmeal.

Are you on Facebook?  You might be interested in the things I may not devote an entire blog post to: recipes, food facts, nutritional information, photos and other things that make my mouth water. I may not write a blog post every day, but there are daily updates to my This Girl Loves To Eat community at: https://www.facebook.com/ThisGirlLovesHerFood

Bacon Roasted Cauliflower Chowder

dinnerreservationsI haven’t been to the grocery store this week and was at a loss as to what to make for dinner tonight.

The meat & cheese drawer gave me a pound of uncooked bacon fresh from the butcher, a wedge of parmesan cheese and another small chunk from a wedge of aged gouda-parmesan.

In the crisper was a bag of fresh sweet mini peppers, a head of cauliflower that was nearing extinction, half a red onion, some carrots, celery, a Rubbermaid container with some still viable sliced Portobello mushrooms and a few other items that found their way right into the compost bucket.

Not a lot to work with, but I’m a gamer (and thankfully my husband will try anything I make) so I trudged forward hoping for some inspiration.

A wrinkly but still salvageable Poblano chili was on the counter and inspiration for a nice warm soup struck.

Bacon & Roasted Cauliflower Chowder

  • ½ Cup Sliced Portobello Mushrooms
  • 6 Slices Bacon, cut into ½ inch pieces
  • ¼ Poblano Chili finely diced
  • ½ Red Onion diced
  • ¼ Cup diced Orange Sweet Bell Pepper
  • 1 Carrot chopped
  • 2 Ribs Celery chopped
  • 2 Cloves Garlic minced
  • 1 Medium Head Cauliflower
  • 4 Cups Beef Broth (4 Bullion Cubes in 4 Cups Boiling Water)
  • 1 – 5 ounce can Evaporated Milk
  • 2 Bay Leaves
  • Lawry’s Seasoned Pepper to taste (1 added about 2 tsp)
  • Reserved Rind of Parmesan or Parmesan-Gouda Cheese
  • Shredded Parmesan or Parmesan-Gouda Cheese (if desired)

Cut the cauliflower in thirds, trim off the stem, spritz with olive or coconut oil spray and roast 45 minutes at 400 degrees.

sweatvegetablesCook the bacon over medium high heat for 5 minutes. Add the diced Poblano chili and continue to cook until bacon is crisp but not too brown. Remove both from pan and drain on paper towel.

In the same pan add the onion, garlic, carrot, celery, and bell pepper.  Saute’ about 8 minutes over medium high heat.  Add the mushrooms and return the bacon and Poblano chili to the pan. Continue cooking another 10 minutes while bacon fat breaks down some more then switch heat to low.

addcauliflowerRoughly chop 1/3 of the roasted cauliflower into small pieces and add to the pan. Add the bay leaves and seasoned pepper, stir and cook on low about 5 minutes to allow the cauliflower to absorb the flavors of the bacon and other vegetables.

Put the remaining 2/3 of the cooled roasted cauliflower and 2 cups of the cooled broth into the Vitamix or Food Processor/Blender container and process on low until well combined. It will have plenty of texture, but if it’s not thin enough to easily pour, add a bit more of the reserved broth.

Increase heat to medium, then add the can of evaporated milk, a can of water and the contents of the Vitamix container to the pan. Stir well to incorporate. Stir in the remaining broth, the reserved cheese rinds (if you have any) and bring soup just to a boil. Return heat to low and simmer about 20 minutes.

soupRemove the bay leaves before serving.  Serve with toasted French bread chunks/croutons or crusty bread and butter.  Sprinkle chowder with shredded parmesan or parmesan-gouda cheese and chopped parsley if desired.

Are you on Facebook?  You might be interested in the things I may not devote an entire blog post to: recipes, food facts, nutritional information, photos and other things that make my mouth water. I may not write a blog post every day, but there are daily updates to my This Girl Loves To Eat community at: https://www.facebook.com/ThisGirlLovesHerFood

Leftovers Last Stand

As much as I love Thanksgiving and all of the comfort foods and carbs that bring on the need for a long nap and the fat pants, after about 3 days I get tired of the leftovers.

So far we’ve re-worked our Thanksgiving Leftovers into:

  • Day After Turkey Sandwiches filled with stuffing, cranberries, potatoes and gravy on decadent white bread
  • Turkey and Creamed Spinach Omelettes
  • Turkey Soup with leftover crudité vegetables, some chopped potato and whatever stock and store bought broth remains
  • White Bean Turkey Chili

greenmeatloafThe last of the Bacon Creamed Spinach, Creamed Corn, Green Bean Casserole and Gingersnap Sweet Potatoes will be serving as very colorful side dishes for tonight’s creation:

Green Meatloaf

In my KitchenAid Stand Mixer, with the dough hook attached, mix all ingredients until well incorporated.

Guy-Fieri-Salsa-Verdeorganicgrbeefhuntspanko


I don’t make a packed loaf, instead scooping and mounding the combined ingredients into a large loaf pan, smoothing the top into a loaf shape and then taking a rubber spatula and creating a little trough of space around the edges for the minimal amount of fat that will collect from the very lean beef.  I squirt about another 1/4 Cup of the Hunt’s Ketchup on top of the loaf and then slide it, uncovered, into a preheated 350 degree oven.

Cook for about an hour and twenty minutes.  I put a meat thermometer into the center of the loaf to make sure that I have passed the medium point and am nearing medium well.  The loaf continues to cook a bit when it comes out.

Let the loaf set for about 5 minutes to retain the juices inside when slicing.  The meatloaf is juicy, surprisingly light (not dense), flavorful and goes well with just about any side dishes you may have left.

Are you on Facebook?  You might be interested in the things I may not devote an entire blog post to:  recipes, food facts, nutritional information, photos and other things that make my mouth water. If so, visit my This Girl Loves To Eat community at:  https://www.facebook.com/ThisGirlLovesHerFood

Just Like My Mom Used to Make

macaroniandcheesI’ve been feeling very under the weather for nearly a week and haven’t felt much like eating, let alone cooking.

As we all can probably agree, aside from ice cream, hot tea, and warm chocolate chip cookies (made by someone else of course – I’m sick!), nothing makes a person feel better faster than comfort food like Mom used to make.  Now if my Mom were only here to make it for me…

Some of my favorite comfort foods are:

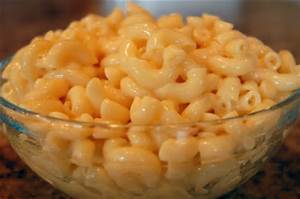
  • Macaroni and Cheese – My Mom wasn’t particularly talented in the kitchen, but she could make a mean box of Kraft Macaroni and Cheese.  Once they came out with the “Kraft Deluxe” with the (then) tiny cans of premade cheese sauce in them, she didn’t even have to add the milk and butter.  Her idea of perfection!  I shared her love of the Kraft Deluxe until about 5 years ago when the sauce (now in a foil pouch) got a little thinner and tasted less “cheesy.”  When I don’t take the time to make my own homemade macaroni and cheese from scratch, I have gone back to stocking the cupboard with the old school, original Kraft Macaroni and Cheese in the blue box with the powdered cheese.
  • Tuna Sandwich on White Bread – My Grandpa Bob set the standard for tuna preparation in our family.  He would buy tuna in oil (likely a lot of the reason he had quadruple bypass surgery in his 50’s), drain it and mix it together with meticulously chopped onions, a ton of mayonnaise (which has never been my favorite, in fact I rarely use it), and he’d pile it on plain white bread (something most people, myself included, rarely eat anymore), slice it in half, and make as many as would fit in his tan and red plaid “picnic” bag with a plastic sandwich box and thermos of “adult” refreshments.  If he was making sandwiches for us kids to eat on the beach at Lake Gregory in Crestline he would leave the onions out and there would be a thermos of lemonade for us to drink.
  • Grilled Cheese on Sourdough and Tomato Soup:  Down and dirty made with 2 pieces of heavily buttered (none of that icky margarine spread for this girl!) thick cut sourdough bread and at least 3 pieces of Kraft Singles American Cheese (no other brand makes it into my shopping cart).  Fried until brown and crispy and served along side a bowl of Campbell’s Tomato Soup made with milk (never water) and with a pat of butter floating on top.  Add a bowl of buttered popcorn to this and I’m pretty darn good.
  • Mashed Potatoes – Reminder, my Mom didn’t cook much from scratch, so it should be no big surprise that I grew up on Hungry Jack potatoes from the box if we were eating mashed potatoes at home.  My grandma, however, made the creamy, buttery mashed russet potatoes I dream about when I am too sick to keep much down and just want to feel better.  Nothing beats a few peeled, boiled potatoes mashed (with chunks – I love the chunks)  with a ton of butter and milk.  I prefer to make them like my Grandma Skip did, but I use half & half or even whipping cream if I have it on hand.

While these are my quick-fix, “Go-To” comfort foods, if my Mom was still here she’d tell me to make some of my favorite of all: Her, “Guaranteed to make me feel better, tuna noodle casserole.”

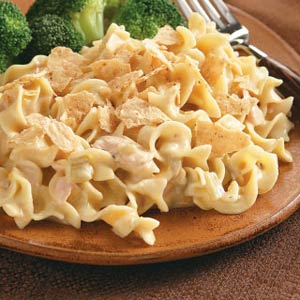
When I mention how much I love tuna noodle casserole to most people, their faces screw up and usually I get a negative reaction. Their Moms’ versions of tuna noodle casserole must have had some icky ingredients like cornflakes, ritz crackers, bread crumbs and even peas.  They may think it’s gross, but my Mom’s stripped down, no-frills version is the best I’ve ever eaten.

tunanoodlecasseroleMy Mom’s, Guaranteed to Make Me Feel Better, Tuna Noodle Casserole

Boil, noodles according to package instructions, and drain in a colander.  I prefer American Beauty noodles because they seem to stand up to the sauce without going limp if any remains to re-heat the next day.  Also, because their tuna is guaranteed Dolphin safe, wild caught, gluten free and readily available, I prefer Chicken of the Sea Chunk Light Tuna.

Open and drain the tuna in a colander.  Empty the Cream of Celery soup into a large saucepan.  Fill the empty soup can first with milk then with mayonnaise, adding both to the pan with the soup.  Add the drained tuna, salt and pepper to taste, and stir over low heat until hot but not boiling.

Empty the noodles into a large mixing bowl or the same pan you cooked them in and pour the hot sauce over the noodles, making sure to use a rubber spatula to get all of the sauce out of the pan.  Use the same spatula to combine the noodles and sauce until well mixed.  You can serve it immediately, but I find that if you let it cool slightly the sauce thickens up.

My husband thinks I am gross, but, if there is any casserole left in the refrigerator the next day, I have been known to eat it cold.  It’s like a tuna sandwich on noodles if you think about it, which qualifies twice on my list of comfort foods. 🙂

If you are on Facebook and are interested in the things I may not devote an entire blog post to, recipes, food facts, nutritional information, photos and other things that make my mouth water, I have a page on Facebook you can visit too:  https://www.facebook.com/ThisGirlLovesHerFood