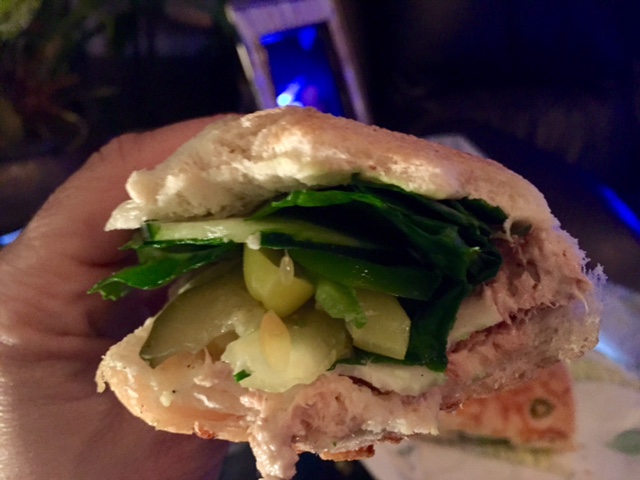
Meatless Monday

IMG_4404[1]I love to shop at Trader Joe’s!

Their produce is always fresh, they have great weekly specials and have a really unique, well priced wine and liquor department without having to fight with a giant grocery store atmosphere.

While browsing the aisles today I was inspired to create something quick and healthy for dinner tonight and didn’t want to ruin the workout I had just suffered through by making something that would make me feel bloated and bad about myself.

There were so many bright orange pumpkins displayed around the store that I thought something based on the same fall flavor would be great.  A few more minutes in the produce department and I came up with an idea that didn’t seem very hard at all.

 No Fuss Spinach Butternut Squash Lasagna

  • 1 – 12 oz package Trader Joe’s Cut Butternut Squash (In the fresh produce department)
  • 3/4 – 12 oz package Trader Joe’s Fresh Leaf Spinach
  • 9 – Sheets Trader Joe’s No Boil Lasagna Noodles
  • 1 – 16 oz container Trader Joe’s Part Skim Ricotta Cheese
  • 1 – 16 oz pkg Trader Joe’s Mozzarella Cheese
  • 1/4 – Wedge Trader Joe’s Parmesan Gouda Cheese
  • 1/4 Cup Skim Milk
  • 2 Cloves Garlic finely chopped
  • Fresh Basil (About 6 large leaves)
  • Nutmeg, Oregano, Salt, Pepper and Paprika to taste

Cook the butternut squash, in it’s package with a corner cut off, in the microwave for 6 minutes.

Shred the mozzarella cheese and grate 1/4 to 1/3 of the wedge of the gouda-parmesan wedge into two separate bowls and set aside.

In Food Processor (I used my Vitamix) combine the squash, milk, garlic, nutmeg, salt and 1/2 the container of ricotta cheese.  Process until just smooth.  Do not over process.  If too thick add a little more milk.  Taste and adjust the spices then set aside.

In a medium mixing bowl combine the spinach, the other half container of ricotta cheese, 1/2 of the mozzarella cheese, the chopped garlic, and some salt and pepper.  Stir until the spinach is well coated.

In a lasagna pan (or 9 x 12 Pyrex pan) drizzle some olive oil then layer as follows:

  1.  1/3 of the squash mixture, a single layer of the unboiled lasagna noodles (I used 2 whole and 1 split to fill the layer), then a layer of the spinach mixture;
  2. 1/3 of the squash mixture, a single layer of the no boil lasagna noodles, then a layer of the spinach mixture;
  3. Final 1/3 of the squash mixture, a single layer of the no boil lasagna noodles, then the rest of the spinach mixture;
  4. Top the lasagna with the rest of the mozzarella cheese, the grated parmesan-gouda cheese, and then sprinkle with oregano, paprika and the chopped fresh basil.

Bake in a 375 degree oven for 45 minutes, or until the top is just browned.  Remove from the oven and let stand 5-10 minutes so the cheese sets.  Cut into 8 pieces and serve with a green salad for a healthy meal.  My husband also added some Frank’s Red Hot to spice his up.  It was a great change of pace and there was enough left over for a couple of lunches this week!

If you are on Facebook and are interested in the things I may not devote an entire blog post to, recipes, food facts, nutritional information, photos and other things that make my mouth water, I have a page on Facebook you can visit too:  https://www.facebook.com/ThisGirlLovesHerFood

Tomorrow’s post:  Slow Cooked Red Bean Chicken Chipotle Chili

Bananas Foster Bread

ripebananasI was looking at 4 very sad – very ripe bananas while cleaning up my counter this morning and knew this was likely the last day they’d be good for anything more than freezing for smoothies.  I still feel crummy and wasn’t really in the mood to bake, but I went online in search of something easy, outside the ordinary banana bread, to do with them.

Like I knew they would, Food Network came to my rescue:

Damaris Phillps’s Bananas Foster Bread

  • 4 Medium ripe bananas mashed
  • 2 Eggs
  • 1 Cup sugar
  • 1/2 Cup coconut oil, melted
  • 3 TBLS plain yogurt
  • 1 tsp rum extract (I used a tsp of Captain Morgan Spiced Rum)
  • 1 tsp Vanilla
  • 2 Cups All-purpose flour
  • 1 tsp baking powder
  • 1/4 tsp salt
  • 1/4 Cup (1/2 stick) unsalted butter
  • 1/2 Cup dark brown sugar
  • 1/4 Cup spiced rum (Captain Morgan is my favorite)
  • 1 tsp orange zest

Preheat the oven to 350 degrees F. Spray a 9-by-4-inch loaf pan with cooking spray.

Combine the bananas, eggs, sugar, coconut oil, yogurt, and rum and vanilla extracts in a bowl.

In another, larger bowl, whisk together the flour, baking powder and salt.

Make a well in the center of the dry ingredients. Pour the wet ingredients into the dry ingredients and stir until the flour is incorporated and batter is smooth. Pour the batter into the prepared loaf pan and bake until golden brown and a skewer inserted into the center of the loaf comes out clean, about 1 hour. Remove from the oven and set aside while you make the glaze.

Melt the butter in a saucepan over medium heat. Add the brown sugar and 1/2 cup water and stir. Cook until the sugar dissolves, and then continue cooking another 3 to 5 minutes over low heat until the mixture bubbles around the edges. Turn off the heat and carefully (in case it flames) stir in the rum and the orange zest.

Slowly pour half of the glaze over the banana bread, allowing it to seep into all the surfaces. Wait until the glaze has been absorbed, about 30 minutes, and then turn the loaf out of the pan.

Slice and serve with vanilla ice cream, if using, and the remaining glaze.

bananasfosterbreadThis was easy to put together and made the house smell amazing while it was baking!

If you are on Facebook and are interested in the things I may not devote an entire blog post to, recipes, food facts, nutritional information, photos and other things that make my mouth water, I have a page on Facebook you can visit too:  https://www.facebook.com/ThisGirlLovesHerFood

Just Like My Mom Used to Make

macaroniandcheesI’ve been feeling very under the weather for nearly a week and haven’t felt much like eating, let alone cooking.

As we all can probably agree, aside from ice cream, hot tea, and warm chocolate chip cookies (made by someone else of course – I’m sick!), nothing makes a person feel better faster than comfort food like Mom used to make.  Now if my Mom were only here to make it for me…

Some of my favorite comfort foods are:

  • Macaroni and Cheese – My Mom wasn’t particularly talented in the kitchen, but she could make a mean box of Kraft Macaroni and Cheese.  Once they came out with the “Kraft Deluxe” with the (then) tiny cans of premade cheese sauce in them, she didn’t even have to add the milk and butter.  Her idea of perfection!  I shared her love of the Kraft Deluxe until about 5 years ago when the sauce (now in a foil pouch) got a little thinner and tasted less “cheesy.”  When I don’t take the time to make my own homemade macaroni and cheese from scratch, I have gone back to stocking the cupboard with the old school, original Kraft Macaroni and Cheese in the blue box with the powdered cheese.
  • Tuna Sandwich on White Bread – My Grandpa Bob set the standard for tuna preparation in our family.  He would buy tuna in oil (likely a lot of the reason he had quadruple bypass surgery in his 50’s), drain it and mix it together with meticulously chopped onions, a ton of mayonnaise (which has never been my favorite, in fact I rarely use it), and he’d pile it on plain white bread (something most people, myself included, rarely eat anymore), slice it in half, and make as many as would fit in his tan and red plaid “picnic” bag with a plastic sandwich box and thermos of “adult” refreshments.  If he was making sandwiches for us kids to eat on the beach at Lake Gregory in Crestline he would leave the onions out and there would be a thermos of lemonade for us to drink.
  • Grilled Cheese on Sourdough and Tomato Soup:  Down and dirty made with 2 pieces of heavily buttered (none of that icky margarine spread for this girl!) thick cut sourdough bread and at least 3 pieces of Kraft Singles American Cheese (no other brand makes it into my shopping cart).  Fried until brown and crispy and served along side a bowl of Campbell’s Tomato Soup made with milk (never water) and with a pat of butter floating on top.  Add a bowl of buttered popcorn to this and I’m pretty darn good.
  • Mashed Potatoes – Reminder, my Mom didn’t cook much from scratch, so it should be no big surprise that I grew up on Hungry Jack potatoes from the box if we were eating mashed potatoes at home.  My grandma, however, made the creamy, buttery mashed russet potatoes I dream about when I am too sick to keep much down and just want to feel better.  Nothing beats a few peeled, boiled potatoes mashed (with chunks – I love the chunks)  with a ton of butter and milk.  I prefer to make them like my Grandma Skip did, but I use half & half or even whipping cream if I have it on hand.

While these are my quick-fix, “Go-To” comfort foods, if my Mom was still here she’d tell me to make some of my favorite of all: Her, “Guaranteed to make me feel better, tuna noodle casserole.”

When I mention how much I love tuna noodle casserole to most people, their faces screw up and usually I get a negative reaction. Their Moms’ versions of tuna noodle casserole must have had some icky ingredients like cornflakes, ritz crackers, bread crumbs and even peas.  They may think it’s gross, but my Mom’s stripped down, no-frills version is the best I’ve ever eaten.

tunanoodlecasseroleMy Mom’s, Guaranteed to Make Me Feel Better, Tuna Noodle Casserole

Boil, noodles according to package instructions, and drain in a colander.  I prefer American Beauty noodles because they seem to stand up to the sauce without going limp if any remains to re-heat the next day.  Also, because their tuna is guaranteed Dolphin safe, wild caught, gluten free and readily available, I prefer Chicken of the Sea Chunk Light Tuna.

Open and drain the tuna in a colander.  Empty the Cream of Celery soup into a large saucepan.  Fill the empty soup can first with milk then with mayonnaise, adding both to the pan with the soup.  Add the drained tuna, salt and pepper to taste, and stir over low heat until hot but not boiling.

Empty the noodles into a large mixing bowl or the same pan you cooked them in and pour the hot sauce over the noodles, making sure to use a rubber spatula to get all of the sauce out of the pan.  Use the same spatula to combine the noodles and sauce until well mixed.  You can serve it immediately, but I find that if you let it cool slightly the sauce thickens up.

My husband thinks I am gross, but, if there is any casserole left in the refrigerator the next day, I have been known to eat it cold.  It’s like a tuna sandwich on noodles if you think about it, which qualifies twice on my list of comfort foods. 🙂

If you are on Facebook and are interested in the things I may not devote an entire blog post to, recipes, food facts, nutritional information, photos and other things that make my mouth water, I have a page on Facebook you can visit too:  https://www.facebook.com/ThisGirlLovesHerFood

Slow Cooker Taco Tuesday Carnitas

carnitasUsing pork as your base is an easy way to treat your family to “Taco Tuesday” without the mess and long prep time if you marinate your pickled vegetables and make your chipotle cream sauce the night before.

Chipotle Cream Sauce   Mix 1/2 cup sour cream, 3 tsp minced chipotle peppers in adobo sauce, and 1 tsp lime juice in a small container.  Mix well and taste. Add more adobo if you like yours spicier, or more sour cream if you need to tone it down. Cover and refrigerate overnight.

pickledcarrotjalapenoPickled Carrots, Onions, & Peppers  Combine in a sealable container:  3/4 Cup apple cider vinegar, 1-1/4 cups water, 1-1/2 TBLS sugar, and 2 tsp kosher salt, mixing until sugar and salt dissolve. Add 1 thinly sliced red onion, 4 sliced jalapenos (seeds in), and 4 peeled/chopped carrots, seal container and make sure all vegetables are covered in marinade.  Put in refrigerator and serve with tacos after pork has cooked.

Slow Cooker Taco Tuesday Carnitas

  • 1 – 4-5 lb pork shoulder trimmed of all fat & cut into 3-4″ chunks
  • 1 TBLS oil
  • 1 Bottle of beer
  • 1 Large white onion, diced
  • 5 Cloves garlic, minced
  • 1 Canned chipotle in adobo chopped + 1 tsp sauce
  • 2 1/2 tsp cumin
  • 1 tsp chili powder
  • 1-1/2 tsp kosher salt
  • 1 tsp black pepper
  1. In a cast iron skillet over high heat, heat the oil. Add in the pork and sear until browned, about 2-3 minutes per side.
  2. Place the pork in the bottom of the crock pot. Add the onion, beer, chipotle, garlic, and seasonings, and stir to combine.
  3. Cover and cook on low for 6-8 hours.  Starting at 6 hours, check your pork. When it easily shreds with a fork, remove from the broth and shred.
  4. Preheat the broiler and line two baking sheets with aluminum foil. Scatter the pork around the baking sheets and ladle about ¼ cup of the broth over each sheet of pork.
  5. Place one sheet under the broiler for about 5 minutes, then toss the pork and ladle another ¼ cup of broth over. Broil once more, until crispy but not overcooked, and then ladle another ¼ cup broth over the pork. Repeat with the second sheet.
  6. When the pork is done, make tacos in toasted corn tortillas with the chipotle cream and pickled onions, carrots and jalapenos. Sprinkle with cotija cheese, cilantro and a squeeze of lime.

blackbeansServe with an ice cold Mexican beer like Corona, Pacifico, Dos Equis, Modelo, or Tecate; cilantro lime rice and black beans for a great meal!

If you are on Facebook and are interested in the things I may not devote an entire blog post to, recipes, food facts, nutritional information, photos and other things that make my mouth water, I have a page on Facebook you can visit too:  https://www.facebook.com/ThisGirlLovesHerFood

Chocolate Red Wine Cake + Cupcake Wine = Yum!

Tonight I’m showing some dessert love.

What’s better than a deep dark chocolate cake?

A deep dark chocolate cake that has red wine in it!  Word of caution: this cake isn’t for kids.  Some of the alcohol remains after baking.

chocredwineloafcakeDeep Dark Chocolate Red Wine Cake

8 TBLS (1 Stick) Room Temp Butter   3/4 Cup Brown Sugar     1/4 Cup Bakers Sugar     2 Eggs (At Room Temp)   2 tsp Vanilla   3/4 Cup Dark ChocolateRouge Wine   1 Cup Flour (Can add up to 1/4 Cup more as needed)   1/2 Cup Cocoa Powder   1/2 tsp Baking Powder     1/4 tsp Cinnamon

In a bowl combine 1 cup of the flour with the dry ingredients; in the bowl of a stand mixer cream together the butter and sugars, add the eggs one at a time (scrape the bowl between additions), gradually add in the wine and vanilla.  Stir in the dry ingredients (if the batter is too wet add a bit of the extra flour), spoon into a loaf pan, greased with solid coconut oil or coconut oil spray, and bake @350 for 60 minutes.

Let cool 5 minutes in pan then remove to wire rack to finish cooling.  Serve with a dollop of freshly whipped cream or a rich scoop of vanilla ice cream and a glass of the decadent wine below.

redvelvet-_x550Cupcake Vineyards Red Velvet

I discovered this wine over the weekend shopping at my local Albertson’s that was having a 30% off wine special.  I get adventurous when I’m not paying full price, and at $6.98 a bottle I was adventurous enough to buy two bottles.

Cupcake Vineyards is not a wine I generally buy, having tasted a few different blends and found them to be too sweet.  Happily, this was not the case at all with this Red Blend of Zinfandel, Petite Syrah and Merlot.  Their description perfectly describes this creamy, smooth finishing wine:  Aromas of chocolate, deep dark blackberries and luscious red fruits that finish with a hint of coconut and creamy mocha that shows unmistakable intensity and length.

I couldn’t agree more!

A glass of Cupcake Red Velvet alongside this decadent chocolate cake would be the perfect way to finish after a great steak dinner!  I guess I’ve figured out Saturday’s menu. 😉

UPDATE:  We loved the Cupcake Vineyards Red Velvet wine so much that I went back yesterday, while the sale is still on at Albertson’s, and bought another 6 bottles to put in the wine closet for a nice “every night” glass choice.

If you are on Facebook and are interested in the things I may not devote an entire blog post to, recipes, food facts, nutritional information, photos and other things that make my mouth water, I have a page on Facebook you can visit too:  https://www.facebook.com/ThisGirlLovesHerFood

Sick and Tired of Skimpy Subway Sandwiches

When the Subway near my house opened I was ecstatic.

Finally there would be a healthier option than I’ve had in a pinch:  Del Taco, Carl’s Jr & Wendy’s.

I’m sorry to say now, I wish it would close.

I went this evening, giving this location its umpteenth chance to impress me but I was disappointed once again.

subwaymenuIn front of the oblivious crew member who finally saw fit to help me (the only customer in the store at 6:15 PM on a Sunday), I snapped a photo on my phone of the item on their menu I intended to order two of: the foot long tuna sandwich. The photo on the menu shows a sandwich overflowing with fresh vegetables and mounds of tuna.

As you an probably guess, my sandwiches came nowhere near resembling the ones shown on the menu board.

The team member helping me asked me for my bread selection first.  Despite the menu showing quite a few options I only saw a few each of the white, wheat and cheddar jalapeno rolls.  I was under the impression that all of their options were available every day.  Strike 1!

Having settled on the cheddar jalapeno rolls, I then ordered the two tuna sandwiches one with Swiss and the other with Provolone cheese.  Over the years I have seen the amount of tuna go from 6 overflowing scoops to 5 and tonight he put 4 full only to level, scoops of tuna and thinly spread it across most of one side of the roll.  Once he put the 4 1/2 slices of cheese (that looked more like 1/3 cuts) on you couldn’t see any evidence of tuna at all.

tuna2I told him that the first sandwich should only have mayonnaise, pickles, olives and pepperoncinis on it.  He haphazardly threw a few of each item on the bread and, again, I blatantly snapped a photo of the sandwich he had made.  This is what my husband’s looked like just before he folded it closed, cut it in half and wrapped it.

Not only had he forgotten the mayonnaise, but he didn’t even distribute the pittance of the ingredients he did add evenly across the sandwich.  Strike 2!

tuna1aThe second sandwich should have come out looking a little less anemic, considering I was putting many more ingredients on mine.  Once again this guy, and this location proved me wrong!  He asked what I wanted on mine and I indicated (as he was filling the sandwich) that I wanted cucumber, spinach, bell pepper, pickles, pepperoncinis and salt & pepper.  He missed the cucumber completely (despite me reminding him twice). He took a very small grab of spinach leaves TORE THEM IN HALF and scattered them on the bread, put 4 skinny slices of bell pepper, counted out 6 pickle slices and then a few pepperoncini SQUISHED the sandwich closed angrily, wrapped it and sliced it in half.  The minimum wage earning sandwich “artist” took no pride in what he was doing and quite frankly seemed like I was bothering him by asking him to make and sell me two sandwiches.  Excuse me for asking you to do your job!  Strike3!

tuna1The sandwich shown on the left comes nowhere near looking like the sandwich shown on the menu board.  As such, I cannot imagine that anything Subway has factored into their calorie and nutrition counts for the sandwich (other than the slightly stale bread) comes close to what the real nutrition value is for a Tuna sandwich made at this Subway.

Suffice it to say tonight was the last time I will waste my money in this local business.

If you are on Facebook and are interested in the things I may not devote an entire blog post to, recipes, food facts, nutritional information, photos and other things that make my mouth water, I have a page on Facebook you can visit too:  https://www.facebook.com/ThisGirlLovesHerFood

Indulge Without Feeling Too Guilty This Weekend

Clean-Eating-CupcakesI try to stick to a mostly clean diet of lean meats, fish, fruit and vegetables during the week, but come the weekend all bets are off.  I am an admitted carb fiend and the weekend gives me just the excuse I need to indulge in as many “bad for me” foods as I can get my hands on.  I justify it by swearing that my weekday workouts will offset the weekend damage, although it never quite works out that way.

For once, I’d like to wake up the morning after a game without seeing a puffy face in the mirror, regretting a night spent drinking like we’re still in college, and trying to force my rings over chubby salt swelled fingers.

With USC playing an away game in Tempe, Arizona this weekend, I won’t be cooking for our usual tailgate crowd of 15-20 pre-game partiers.  It’ll just be two or three of us in front of the TV watching the game Saturday night, so, if I work it right, sneaking a healthier choice or two into the mix may not result in a game time mutiny (and call to have pizza delivered) at my house.  Fingers are crossed I can get away with it.

I’ll give into the boys’ need for “football food” by getting them all-beef hot dogs (Yuck!) to grill and devour with baked beans and whatever chips and dip they insist on eating.  After I’ve satisfied their need for game day stadium food, I’ll clean all of that crap food up and ease them into the experiment by baking up a gluten free cheesy bacon jalapeno bread (aka Cheesy BJ Bread) to snack on while we are watching the game.  If there is any left over, it will be great toasted and served with scrambled eggs Sunday morning.

jalapenoGluten Free Cheddar Bacon Jalapeno Bread

Preheat the oven to 375 degrees and grease a 9″ x 5″ Loaf Pan.

Whisk together 2 Large Eggs, 1/4 Cup Melted & Cooled Unsalted Butter and 1 1/2 Cups Room Temperature Buttermilk and set aside.  In a hot frying pan, cook 6-8 Slices Thick Cut Bacon until Crisp.  Drain and cool then roughly chop the bacon and add to the buttermilk mixture.

In a large bowl combine 3 Cups Gluten Free All Purpose Flour, 2 TBLS Sugar, 1 1/2 TBLS Baking Powder, 1 1/4 tsp Salt, and 1/2 tsp Ground White Pepper.  Add 3 Jalapeno Peppers (seeded and diced) and an 8 oz pkg of Shredded Sharp Cheddar Cheese (2 Cups) to the flour mixture.  Add the buttermilk mixture and stir until well combined.

Pour the batter into the prepared loaf pan.  Bake 45-50 minutes or until a skewer inserted into the middle comes out with just a few dry crumbs.  Cool in pan 5 minutes then remove and cool completely on a wire rack.

I don’t think I’ll get a lot of grief for the bread.  It’ll smell great and they’ll never notice it’s Gluten Free if I have enough cream cheese, sliced jalapenos and maybe even some guacamole for them to slather on it.  Maybe they’ll be so happy eating the spicy, cheesy bread that they’ll start mindlessly nibbling without complaint on the vegetable tray that’ll be sitting beside it.

A girl can hope.

If you are on Facebook and are interested in the things I may not devote an entire blog post to, recipes, food facts, nutritional information, photos and other things that make my mouth water, I have a page on Facebook you can visit too:  https://www.facebook.com/ThisGirlLovesHerFood

Lunch at Brio Tuscan Grille

brio-3-color-logoI love business lunches and today’s was one of the best I’ve had in quite a while!

Because I could make a reservation ahead of time (and earn more points toward free dining) using my OpenTable App, I tried a restaurant that I’ve never been to before, Brio Tuscan Grille in the Irvine Spectrum entertainment, shopping and dining center in Irvine, CA.

The restaurant was a great choice because they are located near the valet, on the outside edge of the center, have a wide variety of  foods to choose from, a daily chef’s choice menu, a gluten free menu, as well as a selection of lighter Italian dishes so we all could enjoy our meals completely.

I started with a glass of Zig Zag Zinfandel to toast the partnership we were celebrating.  The nose was a warm welcoming plum with a touch of vanilla.  The body and flavor were bold but not too overpowering for my lunch selections.

I was a really good girl and stayed away from the bread basket that taunted me with the intoxicating scent of warm sourdough baguettes, breadsticks and cheese crisps.

My first course was the 150 Calorie Chopped Salad.  I only ate half of it, but I loved the lightness of the chopped greens, cucumbers, red onions, tomatoes, Feta cheese and lightly dressed with Italian vinaigrette.  I didn’t want to overeat, having ordered the main course off of the Light Menu that our waiter highly recommended:  Shrimp Mediterranean.

I devoured every last morsel!  Atop a bed of orzo farro pilaf, broccoli, asparagus, spinach, plum tomatoes, and Feta cheese lay 5 perfectly grilled large shrimp that were drizzled with a delicious pesto vinaigrette.  Magnifico!!

At 470 calories with 17 grams of fat, 43 grams of carbs, 7 grams of fiber and a whopping 35 grams of protein, I was satisfied, but not uncomfortably full.

Others I dined with ate from the light menu (Grilled Salmon Fresca) and the gluten free menu (Pasta Brio) and gave very enthusiastic thumbs up reviews to their choices.

A well deserved shout out to the bartender is in order as well.  One of my companions ordered the Raspberry Mojito.  The drink was beautiful and the raspberries that were skewered atop the drink were huge, ripe and delicious (I got to eat the fruit!),

If you have a Brio Tuscan Grille near you, it is definitely worth a visit.   Lunch for 4 with 3 of us having 1 drink plus iced tea all around came to $162.  Not a lunch for those dining on a budget to be sure, and I would expect dinner to be half again as much per person, but certainly worth a splurge when dining for a special occasion or if you are looking to impress someone with great food, great service and a fun atmosphere.  One drawback is that the high ceilings and echo off of the hard surfaces make the restaurant quite loud during it’s busiest hours.

2014_brio_nkh_fb_cover_image_v2Another definite plus for dining at Brio Tuscan Grill is their participation in and support of Share Our Strength’s No Kid Hungry campaign to end childhood hunger in America.  Their Founding Chef Phil Yandolino and the entire Bravo-Brio Restaurant Chain participate in this very important charitable organization.  You can follow #TeamNKH on Twitter @nokidhungry.  For a list of restaurants participating in September #dineout month in support of No Kid Hungry visit http://www.nochildhungry.org.

Not only did I enjoy a great meal, but I contributed to the cause! #TeamNKH

If you are on Facebook and are interested in the things I may not devote an entire blog post to, recipes, food facts, nutritional information, photos and other things that make my mouth water, I have a page on Facebook you can visit too:  https://www.facebook.com/ThisGirlLovesHerFood

I Like My Coleslaw With a Kick!

We are 3 weeks into tailgate season at USC and already we’ve set the bar high with our pre-game feasts:

  • Week 1   For the 8:00 PM game against Arkansas State, we had all day to tailgate, so we did a traditional lobster, clam, mussel & Andouille sausage boil with corn on the cob, red potatoes, and crusty bread.
  • Week 2   It was a middle of the day scorcher in LA when we played Idaho so we took things easy by picking up “Godmother” sandwiches from Bay Cities Deli in Santa Monica.  If you’ve never had one, and you are anywhere near Los Angeles, do yourself a favor and get over there! It’s unbelievably good and the line is always out the door so order ahead.
  • Week 3   When Stanford comes to town that means one thing for our particular tailgate group:  Greg’s Dad’s bloody Mary’s.  They are the BOMB and thus require a suitable food performance to accompany them.  The smoker was hauled out for ribs, Carl’s Fat Boy Pie (A spicy potato concoction) and my Memphis Coleslaw.

Lisa’s Kicked Up Memphis Coleslaw

In a large mixing bowl whisk together the ingredients for the dressing: 

coleslaw

2 Cups Best Foods Mayonnaise, 4 TBLS Creole Mustard (I use Zatarain’s), 4 TBLS Apple Cider Vinegar, 6 TBLS Sugar, 2 tsp Onion Powder, 4 tsp Celery Seed, and Freshly Ground Black Pepper to taste

Once the dressing is combined add:

1 Head Green Cabbage Shredded,  1/2 Head Red Cabbage Shredded, 1- 10 oz bag (About 8 large if shredding yourself) Shredded Carrots, 1/2 Large Jicama Grated

Toss, cover and refrigerate at least 1 hour. It tastes the best when salad sits overnight in the refrigerator.  Makes a good sized bowl and can feed 8-16 depending on serving size.

This girl loves to eat this as is, but if you like more crunch you can also add finely diced celery, green apple or even some radish.  For more kick you can add another TBLS of the Creole Mustard or even creamy (straight if you’re brave) horseradish.

If you are having pulled pork or corned beef this would be great piled high within your sandwich.  I’ve also served it with ribs, steak and alongside hotdogs & hamburgers.

If you are on Facebook and are interested in the things I may not devote an entire blog post to, recipes, food facts, nutritional information, photos and other things that make my mouth water, I have a page on Facebook you can visit too:  https://www.facebook.com/ThisGirlLovesHerFood